Although I was able to shoe-horn a 100mm BBSHD into my Phat Phuk FB 5 2.0 build, owners of the Bikes Direct Lurch bikes are not going to be anywhere near as lucky and will need to order a 120mm kit instead of the 100mm kit even though their BB is only 100mm. This post will talk about all sorts of BBSHD and BBS02 installation issues and how to correct them without (mostly) modifying the frame of your donor bike. There are tons of different BB types so you want to make sure you BB is compatible with the BBSxx before you buy the bike. Matt from Empowered Cycles did a great article outlining most of the common BB types and their compatibility with the BBSxx drive units here. As far as I know, Matt also custom built the only BBSHD custom pressfit BB bearing adapter for the BBSHD which is located here.

Uh oh, somebody got carried away with the red paintbrush. This BD Lurch looks like it’s going to be a problem, but it’s not really. These lopsided excuses for circles are the real problem.
My chainstay is in the way & I don’t have enough threads showing to attach the lockring & mounting plate
Don’t panic. Lots of my builds have the secondary reduction gear that presses up against the chainstay. If you have at least 12mm of threads showing on the non-drive side then you’re golden. If you have less than 12mm of threads showing on the non-drive side then I recommend that you send the drive unit back to where ever you got it from and try to get the next bigger size. The BBSHD comes in 3 standard sizes 68mm, 100mm and 120mm. Try as hard as you can to explain how the problem is really the BBSHD reseller’s issue and they should have KNOWN your bike was not gonna fit that drive unit, and therefore they should eat all the shipping both ways. If you bought it from China that is going to be expensive to swap ship and most unreputable Chinese resellers will probably just have a good laugh at your expense. (see section on angle grinder below)
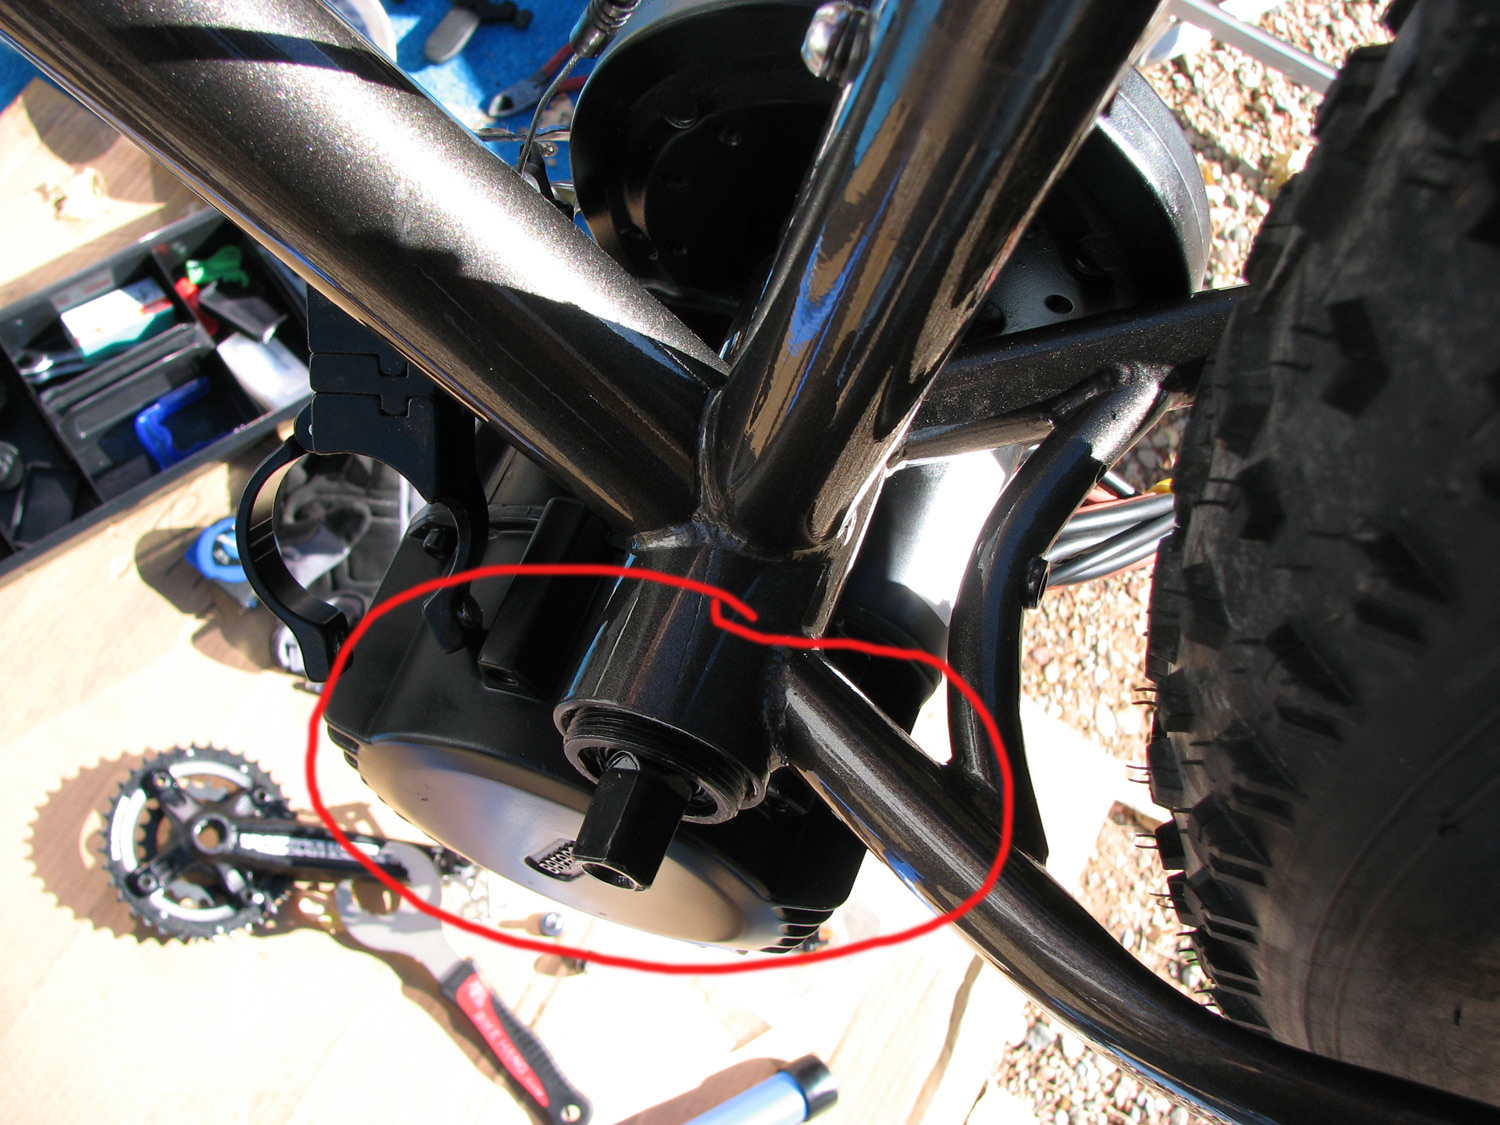
This is what less than 12mm of threads looks like. This happened because A) His bike is too clean B) His work area is too messy C) He went nuts in MS PAINT with the red paintbrush D) He bought a Lurch E) All of the above
My non-drive side pedal is hitting the chainstay on the non-drive side no matter what I do
This happens about 15% of the time. The easiest fix is to install an offset crankarm on the non-drive side. They run about $25 and you can get them from Lectric Cycles right here or Doug at Cali-ebike. Next.

A slightly offset crank arm on the non-drive side will clear most troublesome chainstays, don’t use one unless you must. Why? Because it costs $25 and it’s not any better than the crap Bafang sends you for free, that’s why.
My bottom bracket is a weird size (not 68,73,100 or 120)
No matter what your BB size is you can probably get it to work if you’re willing to put in a little bit of effort. In general, whatever your BB size is to get the next BIGGER drive unit. Example : If you have a 90mm BB get a 100mm BBSHD, if you have a 110mm BB get a 120mm BBSHD.
If the difference is less than 5mm and you know for a fact that the chainstay will not interfere with the secondary reduction gear then you can instead pick the smaller size drive unit. Example : If you have a 73mm BB you can get the 68mm size, if you have a 105mm BB you can get a 100mm size.

You can see that the BBSHD hits the chainstay on the FB 5 2.0 as well, but not as bad as the Lurch. I was able to make it work with a couple of washers on the mounting bolts. Easy Cheezy. Had to space the chainring out thou.
If the drive unit is bigger than the bottom bracket then you will need large 34.75mm ID spacers set against the bottom bracket of the bike. If the drive unit is smaller than the bottom bracket on your bike then you will need spacers on the two bolts that hold the triangle mounting bracket against the bike. Whoever you bought the BBSHD should be able to help you get these spacers if you need them unless you bought from Alibaba or anyone in China other than Paul at em3ev.com in which case you’re probably out of luck. You can buy the small washers for the M6 bolts at almost any building supply store, I suggest stainless.

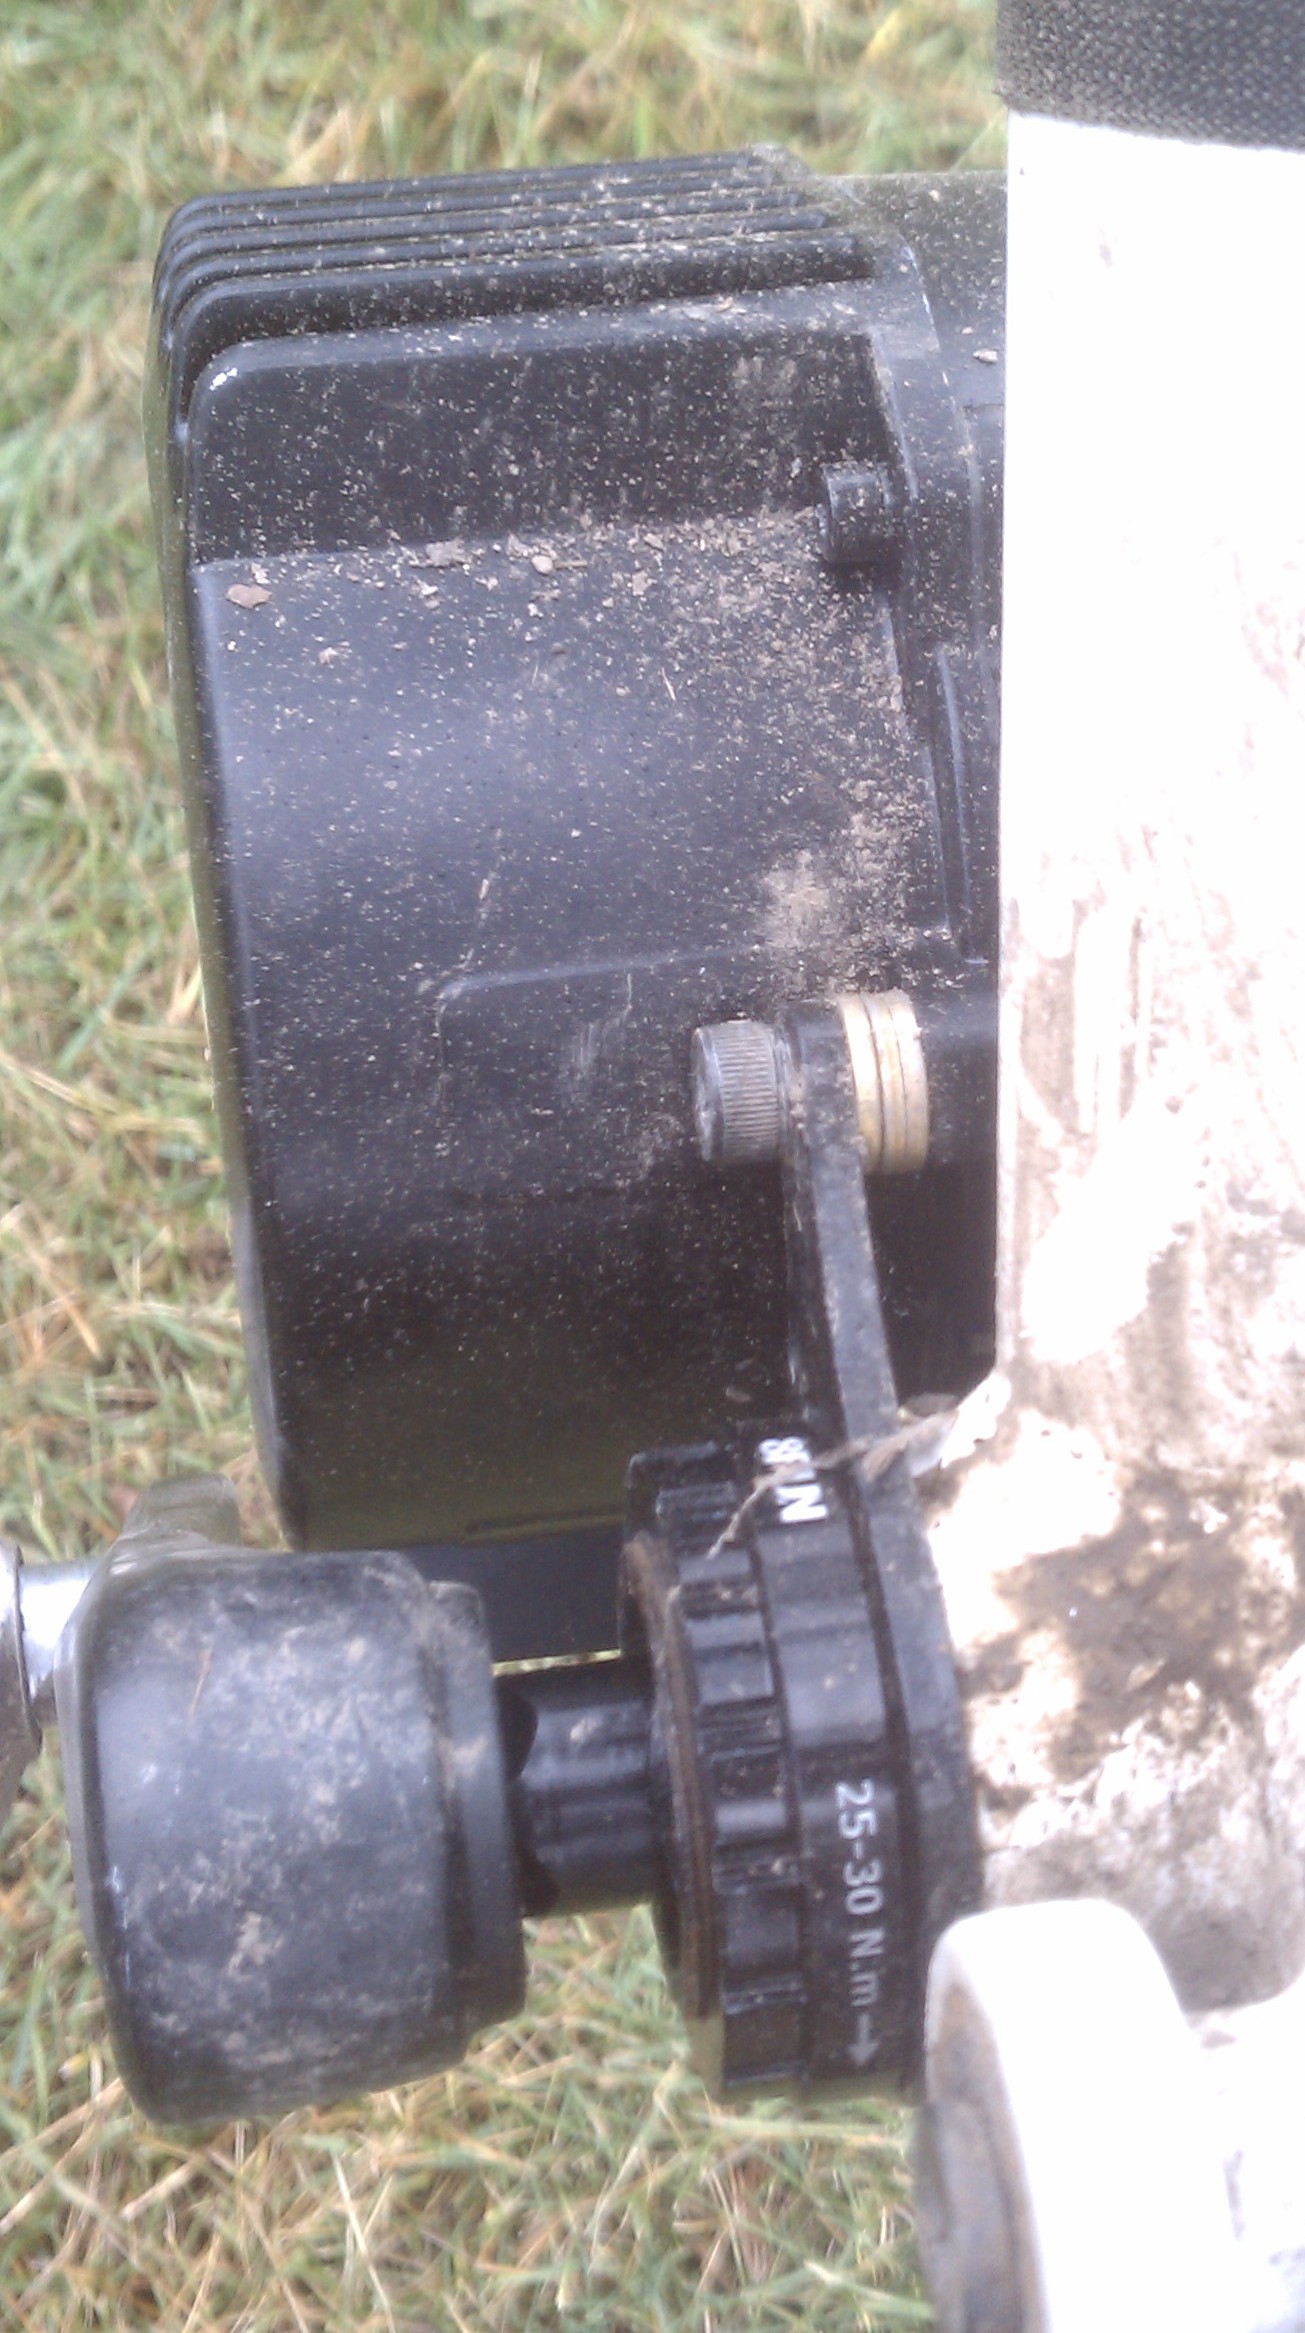
The BBSHD ships with standard M6x15 bolts with lockwashers on them, but you might need something a little longer if your BB is too big or the chainstay intrudes.
The two bolts should go into the drive casing at LEAST 5 mm. If you don’t have 5mm of bite then go buy some replacement M6x20 or M6x25 stainless steel bolts from McMaster Carr or your local hardware store. The BBSHD ships with M6x15mm bolts which are pretty small and have a thick lock washer on them leaving only about 14mm of bite. If your replacement M6 bolts do not have lock washers on them then don’t forget to put a bunch of blue Loctite on the bolts before you tighten them down the final time or your drive unit will loosen up on jumps. I don’t care if you like your drive units like you like your women, just trust me on this one.
The Golden Rule – Your mounting plate must be totally flat against the BB Side
You can never break the golden rule, you can plan all you want and get the spacers that you think you will need, but the only thing that counts is when you actually put the drive unit on your bike and try to get the mounting plate to work. If the mounting plate is flush against the BBSHD main drive shaft but floats above where the 2 bolts attach then you will need to add washers until all three contact points are flush. If your plate is flush against the mounting brackets for the 2 bolts, but it floats above the driveshaft then you will need to add 34.75mm ID spacers against the BB till they line up with the other mounting 2 bolt mounting brackets and the whole plate and the bolts are all flush. Make sure the little bumps on the metal mounting plate are facing TOWARDS the bike or it will sag down like a cow udder on your first jump.
You can see how a 68mm drive unit fits fine on a 73mm bike with the help of 6 washers (3 on each side). I stole those washers off of a kit airplane I built in my living room (true story).
There’s always the angle grinder
Let’s say you have 135mm BB on a fat bike. Are you out of luck? Probably. There is always the angle grinder and you can take a whole lot of material off the BB before you start running into any real problems. If you grind off the non-drive side expect that you will need an offset pedal (see above). I recommend only grinding down the non-drive side and putting a steel hose clamp that y ou don’t care about on the BB before you start to grind as a marker for how much you want to grind off. When you see sparks and you’re grinding an aluminum bike then you know you’ve gone far enough. The hose clamp will make sure the BB is square and flush which can be a little hard to do if you’re just eyeballing it. There is also a BB facing tool which you don’t have, but your bike shop will. This can clean up your BB face, but is too slow to use to take any real meat off.
Do not ever try to modify the chainstay on your bike. This is a bad idea and can lead to nothing good. I know I’m a funny guy, but I’m really not being funny here. *serious face*

If you’re afraid of grinding off your BB then you are too attached. Attachment is the root of all suffering (D. Lama)
Installing a massively offset aftermarket chainring like the Luna Eclipse or the Lekkie ring and it hits the chainstay
If your chainring hits the chainstay then the easiest way to deal with it is to space it out with washers or use a chainring spacer. The washers will have to be ground down with a grinder on one side and then you will need to hold them in place with glue from a cheap craft hot glue gun while you mount the chainring. Put the bolts in and put it on a small square of cardboard on the table face up so you can use the cardboard to lift up the chainring without all the bolts falling out. Put the ground down washers on the chainring with the ground down sides toward the center and put a tiny dab of hot glue on the outside rim of the washers (not enough to get in the way of the chainring). Then carefully lift up the cardboard square and mount the chainring carefully seating all the bolts before you tighten them.
You can only space the Luna Eclipse out about 7mm before the bolt heads start to hit the crank. To deal with this problem you can either grind down the part of the aluminum crank that is hitting the bolts OR you can space the entire drive unit out toward the drive side of the bike a few MM by cutting a short piece of pipe to use as a spacer around the axle shaft of the BBSHD. There are also spacers that are available from Lunacycles for this express purpose. If you space the drive a few mm it will fix the problem of having to massively offset the BBSHD aftermarket chainring.
But I don’t want to deal with all this stuff, I just want it to work
Too bad, if you want the latest and greatest then sometimes you have to spend a little bit of time beating your head against the wall. Lectric Cycles is preselling their e-Rad branded BBSHD 1000W kit here with spacers that are pretty much guaranteed to work with 68,73,92,100,110 & 120mm bottom brackets. I’ve bought and beat on 2 Lectric BBS02 750w eRad branded kits and had not had any real issues with them and Chris is a joy to deal with and sounds like he really likes me actually picks up the phone when I call. I needed some spacers for the chainring adapter on the e-Rad last year and after a couple of weeks and hardly any harassment on my part, they just magically showed up in the mail. Amazing.
Doug from California e-bike also seems to have lots of spacers for the BBS02 which will work well on the BBSHD and he also works very closely with Paul in China from em3ev.com. Doug is also a joy to deal with and once I sent him an email complaining about something that had failed and he never even emailed me back, he just sent the parts I needed in the mail without charging me. I spent a week wondering if he hated me and was ignoring me because I am a terrible person, and then WHAM *parts arrive*. Blew my mind.
Eric from Lunacycle.com & Electricbike.com (Chinese prices from a US vendor) is also working on getting together spacing kits for the BBSHD so if you tell him what you need and send him pictures of your build he can also help you out if you buy your drive unit from him (which I do). Eric is working on 18 different fit kits that is guaranteed to fit pretty much EVERY BB size and chain-stay intrusion from 68mm up to 125mm or you get your money back (that doesn’t mean much because your fit kit will be free with every BBSHD purchase).
Roshan of Biktrix up in Canada, is the countries de-facto Bafang BBSxx expert and an all around awesome guy, Aye? (‘Aye’ is Canadian for ‘said to express assent’). Whatever you need he will wave his magic wand and it will appear out of thin air.
Any of these fine and reputable vendors will not leave you hanging. Do yourself a favor and don’t buy from the cheapest Chinese vendors then lean on other reputable e-bike vendors for custom-made parts.
That is just lame and they will probably just ignore you.
I would.

34.75 mm ID spacer rings from various vendors. The far right one is from Bafang and came with one of my BBSHD’s, the other two are from Doug at Cali-ebike (I think although the center one might be Lectric’s).
Some large spacers are made of steel which I really don’t like and I find that aluminum is lighter and works much better because it is soft. If you can it is best to only install one big ring that is the right size or a little too big and not a bunch of skinny ones stacked on top of each other. The friction between the ring and the mounting plate is the only thing that keeps the drive unit from sagging down like a cow udder, so the fewer rings you have the better off you are. The rings are 34.75mm ID and around 41mm-44mm OD. The measurements are not crucial as long as the ID is 34.75 or greater. Any competent machine shop can quickly and easily make you a spacer out of any steel pipe, although getting it from a reputable e-bike vendor will probably be cheaper and way more convenient.
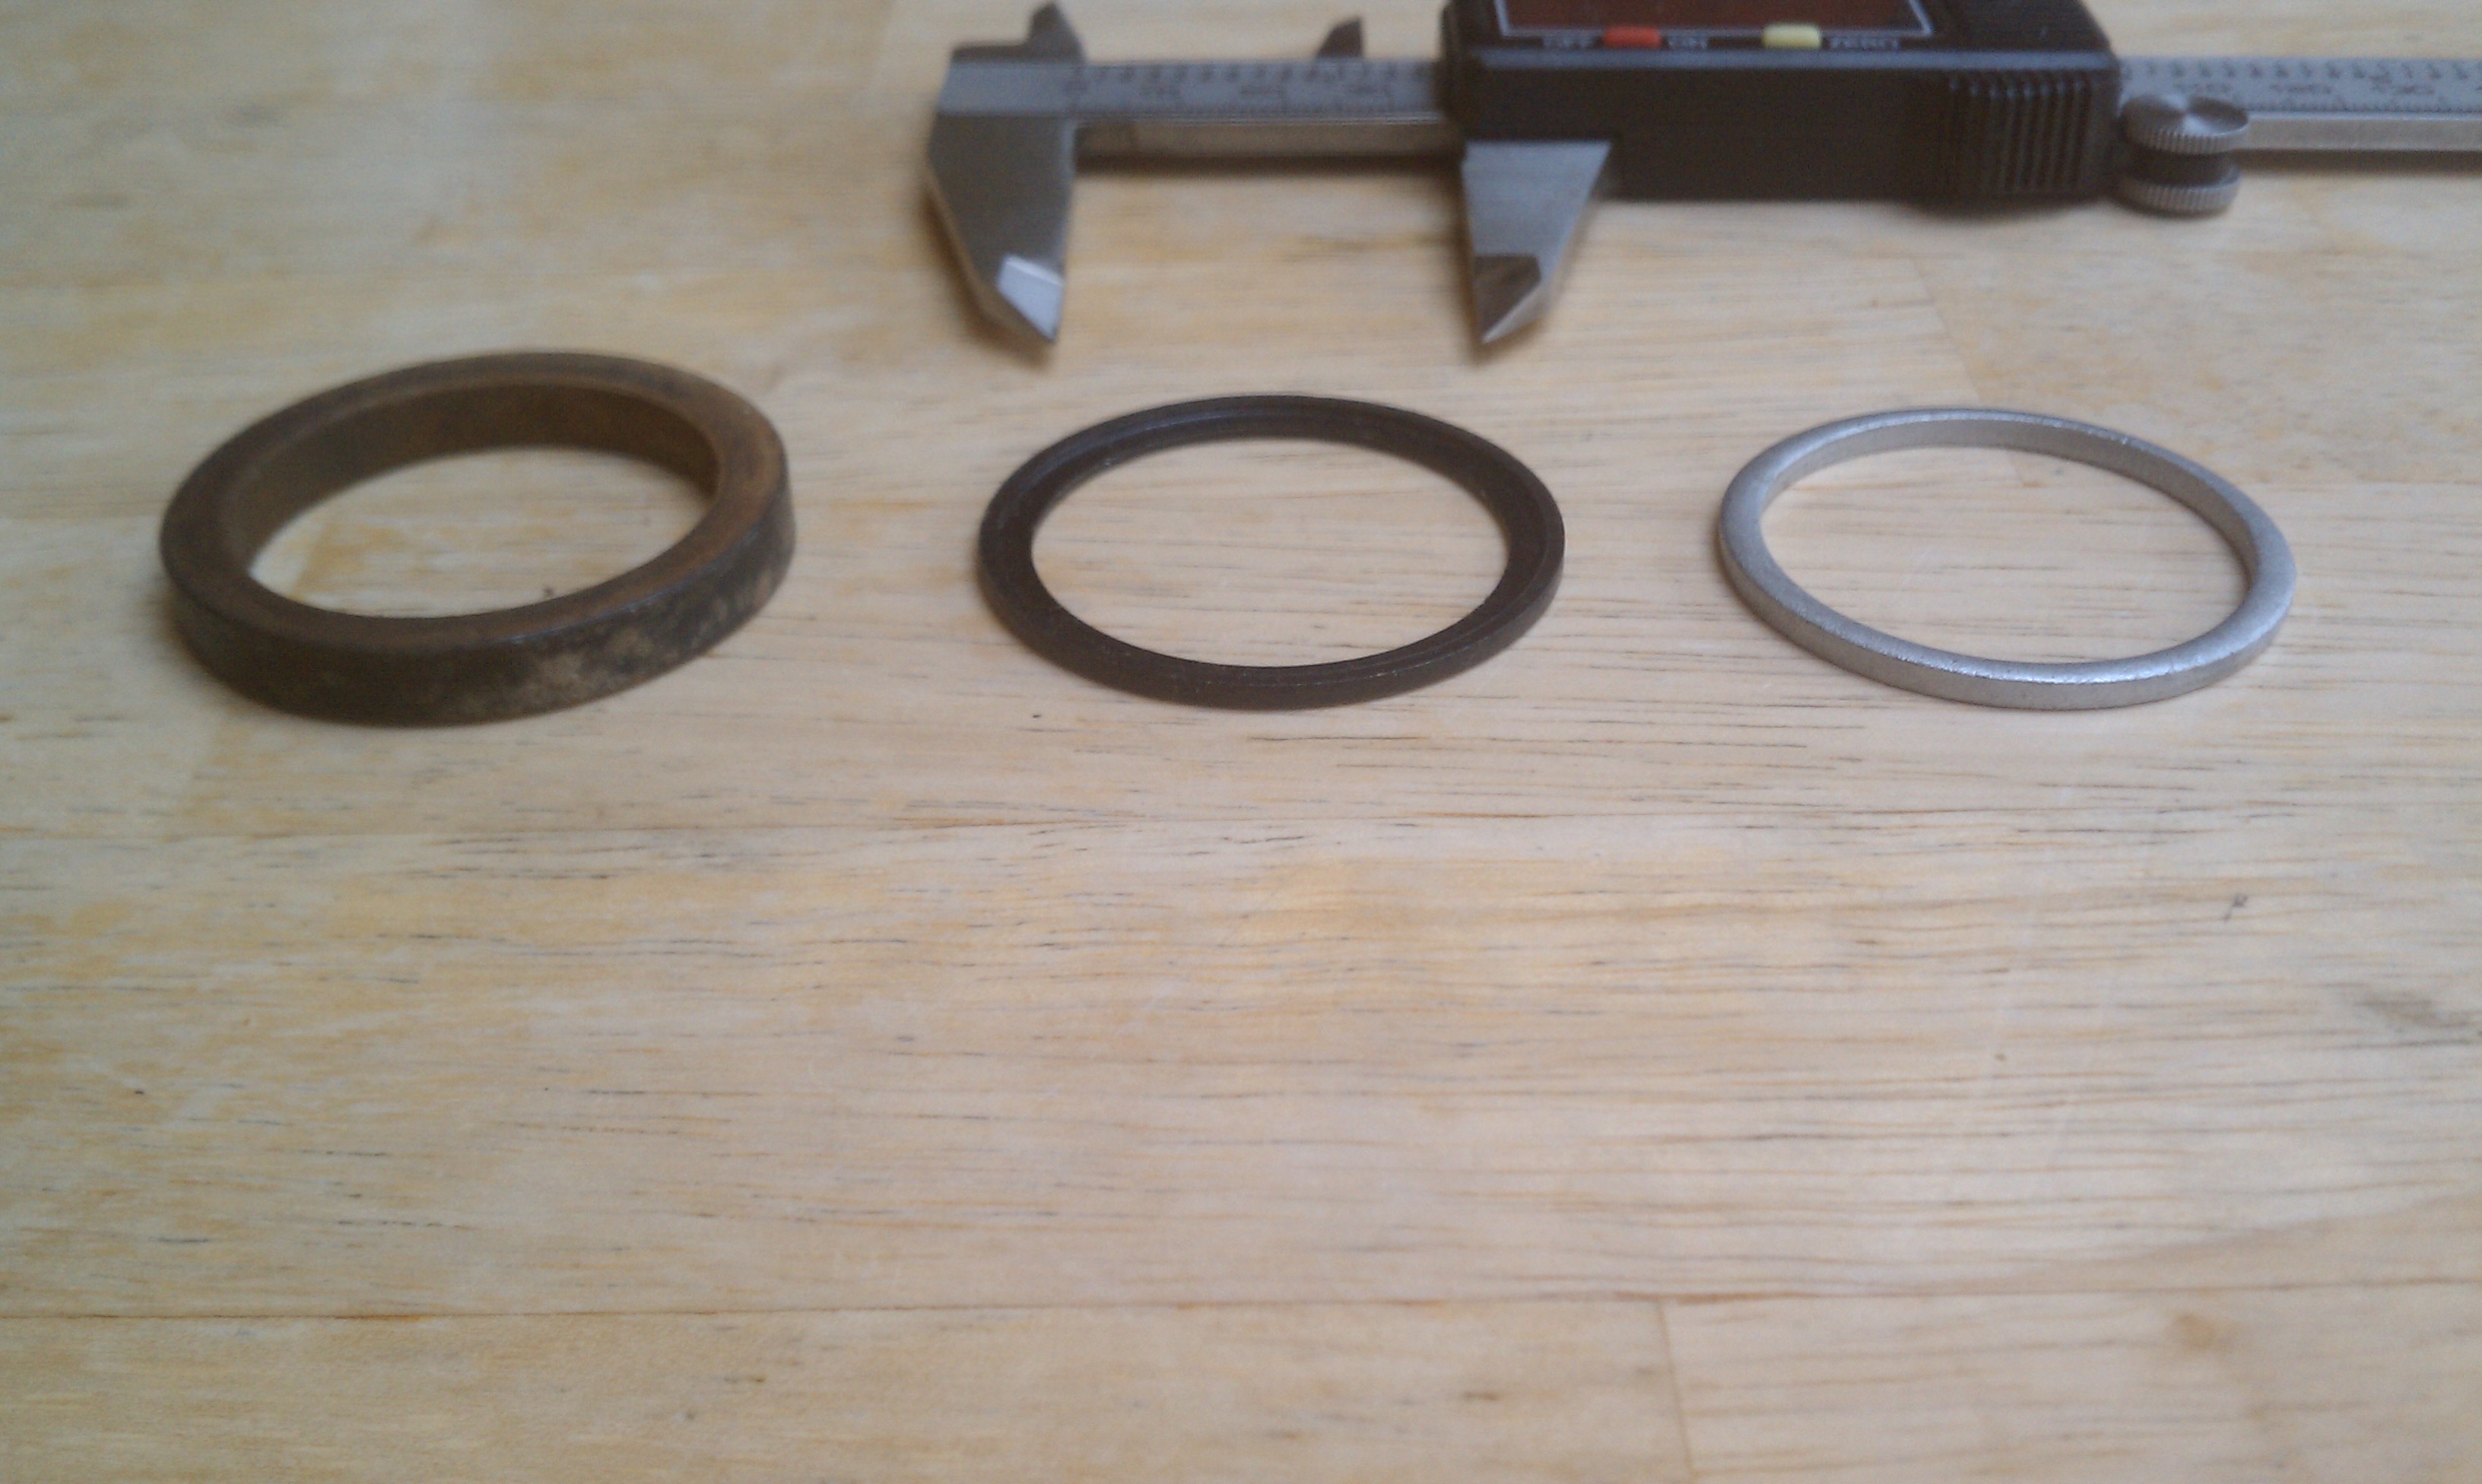
This shows the varying depths of these spacers. 6.5mm (left) 2mm (center) 2.5mm (right). What size will you need? It’s a surprise and I don’t want to spoil it for you.
Can I get the BBSHD to fit on almost any bike on the market? With a little ingenuity and some elbow grease, the answer is a definitive yes. If your BB is too wide for your drive unit by less than 5mm or there is only a minor chainstay intrusion, then you will only have to add a few washers available at almost any hardware store. If you want to just have a BBSHD on a factory pre-built fat bike, well you’re out of luck. There is no BBSHD factory built fat bikes available yet in the US. If you want to buy BBSHD prebuilt conversions from a reputable e-bike dealer then it’s going to cost you a lot extra for work that you can easily accomplish on your own in only a few hours.
Building something yourself will bring you a sense of satisfaction in this life that is hard to replicate in any other way and it will create a connection with your bike that will last a lifetime…
… or at least until it’s stolen.
Ride On.
Watch cowspiracy, it’s really good and it’s not really about pirate cows. No animals were harmed (other than me) during the writing of this article. If you call yourself an environmentalist and you eat meat then you’re in for a rude awakening.
It’s the most important movie to watch of the decade.
Good luck getting any mid-drive Bafang unit to mount on this BB (not gonna happen). You’ll have to opt of a Lightning Rods BB or a GNG kit instead.


As always, nice article Karl!
LikeLike
Now that’s what you call an informative article. Bestest work yet Karl you get a golden star and $10 on PayPal – cheers
LikeLike
Kudos Karl, great, well researched article! I am not surprised to hear you messed around with kit planes…… Longtime A&P here and I thought I recognized the thick AN washers in the pictures.
I can’t wait until Bikesdirect sell a BBSxx ready bike that mounts the drive up INSIDE the triangle. All it would take is to tweak the tubes that meet at the BB when they set up the frame jig to allow room.
LikeLike
Some of the latest trends in mountain bikes are getting very close to allowing this upside down instalment which would make a huge improvement. Just wish I had the Knowse and the $ and the time to find the right one.
LikeLike
Yes, I love planes, kites are my real passion actually. I spent many years flying big kites and have about 4000 hours on the water kiteboarding. I’ve custom bridled a lot of kites, it’s a lot of work, but amazing when you get it right.
LikeLike
Hi Karl, thanks for the fantastic article and thanks you for your fantastic website! It´s absoluly super with interesting informations! I got a Surly Moonlander (with 100mm BB) and I think the BBSHD will not fit because of the same problems wich you describe with the chainstay. I think I can forget my plans to build me real Killerbike in a easy way at home. ;-), What a shit! Greets from Bremerhaven, Germany 🙂
LikeLiked by 1 person
The Surly moonlander I know will fit, I know that Lectra put a BBSHD on a moonlander. You give up awful easy.
Quitters never win, unless you’re quitting smoking, or heroin, or crack cocaine.
LikeLike
I think you´re right, because I never give up crack an cocaine! So I will try to build my Moony as soon as possible 🙂 Maybe than I´ll have the best Trip ever 😉
LikeLike
Hi Karl:
I am reading on the electric bike blog that you were successful in installing the BBSHD on a Surly Moonlander. As that bike is available to me here, I am dying to try this. What hacks did you require to make it fit? Did it involve buying the 120mm kit and then putting a bunch of spacers in? What kind of chain alignment do you have?
LikeLike
Never installed on a moonlander.
I think the 100mm kit will work. Alignment should be good with a eclipse or Lekkie ring.
LikeLike
Karl can you please post the measurement of the distance from the centre of the crank to the edge of the primary reduction gear on the BBSHD . Using a right angle this should enable anyone buying a fat bike to work out if the BBSHD will fit with out the reduction gear casing hitting the chain stay and stopping the unit from pushing all the way into the BB. I looked on the Bafang website and they don’t list this measurement. Chur
LikeLike
No I won’t do this. You missed the point of the entire article. Almost ANY fatbike is going to have this issue. IT REALLY DOESN’T MATTER, unless the chainstay is really intrusive you can make it work, often without having to move to the next bigger size drive unit. Right now the Lurch is the ONLY FATBIKE that needs a larger drive unit than the BB width. The Secondary reduction wheel hits on almost ALL of my other fatbikes and it really doesn’t matter. Add a few washers, maybe a bigger M6 bolt and you’re done. If only everything in life could be this easy.
LikeLike
I take your point that the BBSHD can be made to work with almost any fat bike, but I think the information could still be useful for planning purposes. Especially for people with less common and particularly wide fat bike models. For instance, I have the first generation of this fatty: http://moosebicycle.com/bicycles/fat-bike/the-fat-bike.html
120mm bottom bracket, and the chain (on the bigger chainring) and chainstays are probably wide enough to support >5″ tires. I doubt you’ve tested the BBSHD on that bike, so it would be handy to confirm that I’m not completely screwed and get an idea of the amount of extra hardware I need before I spend >$1000 on a BBSHD and battery pack.
LikeLike
That looks a hell of a lot like a Bikes Direct Boris with a Moose sticker slapped on it, it would not surprise me if it came out of the same factory. The BBSHD 120mm should work, I would do it with a frame pack.
LikeLike
I also wanted this information when planning my conversion…figured I’d pay it forward, but then forgot to take the measurement before I installed the drive unit. So here’s an approx measurement taken from the installed unit. Approx 47mm from the outer edge of your bottom bracket to the end of the drive unit housing. I have a Charge Cooker Maxi with a 100mm BB and it required 5mm of spacers to install…which left 13mm of threads on the left side. As such, the stock Luna chainring adapter and 42t chainring will not work without a chainguide to help the chain stay on because this setup doesn’t provide enough offset (less than 10mm). I have ordered a Lekkie which I’ve read provides about 20mm, so hopefully that does the trick.
LikeLike
Unless you want your bike covered with aluminum glitter(not that there’s anything wrong with that – it might look good with pink hair) two out of three bike shops I called had a bottom bracket facing tool and charged anywhere between 20 and $30 to take off material. Plus you end up with a really flat surface.
LikeLike
Pingback: Finally, A BBSHD Chainring That Doesn’t Suck : Luna Eclipse | Electric-FatBike.com
Hi Karl! Great article and webpage:) Can you tell me where I can find some bottom bracket spacers that will fit the BBSHD? I have ordered the 120 mm BBSHD form my Surly Moonlander whit 100 mm bottom bracket. To avoid the chain stay problem I have to use 15mm spacers on one side and 5mm on the other.
Keep up the god work!
Espen
LikeLike
Talk to Eric at Lunacycle.com . I sent his machinist the specs weeks ago, they should be done by now.
Thanks for the support, except it’s not really god’s work, not the devils either. I was raised a strict Mormon (egads) but now I’m a loyal atheist.
LikeLike
So Espen, did it work on the Moonlander? There’s a used Moonlander for sale locally and considering buying it for BBSHD conversion. From your comment I’d say you bought the 120mm kit, not 100mm?
LikeLike
Pingback: NuVinci N380 & The BBS02 : “We’ve Got The Biggest Balls Of Them All” | Electric-FatBike.com
Pingback: Lekkie BBSHD Bling Ring : 42 Teeth Of POWER ~ 160 Grams ~ 95 Clam$ | Electric-FatBike.com
I am planning on using either the BBS02 750W or BBSHD on my tandem. I will need to have a tandem crank and chainring on the left. Does the left side of the shaft on the models for the wider BBs stick out further past the left side of the motor?
LikeLike
Go with the BBSHD for a divorce maker.
It sticks out pretty far on the left on every unit except the 68mm.
LikeLike
Pingback: 3 Months Of Singletrack Abuse On A BBSHD : This Masochistic Mid-Drive Still Begs For More | Electric-FatBike.com
Thanks for a very helpful article. I needed a 3mm spacer on the drive side to clear a rear suspension hinge joint. I didn’t have a spacer and didn’t want to wait so I slipped the BB lock nut that came off the BB spindle I removed onto the BBSHD spindle and it worked perfectly. Also, I don’t know what grief you saved me by advising to keeping the BBSHD mount bracket flush but I added three washers to each bolt and didn’t have to find out. Thanks again.
LikeLike
Hi, Someone has installed bbshd in fatboy specialized?what kind of size 100 or 120 mm????help me, please!!!!!!!
LikeLike
I assume you mean the Fatboy trail since the Fatboy is just a tire. The Trail comes with a PF30 BB which should work with a PF30 to BSA adapter according to Matt at Empowered cycles. Check out this article for more info. https://www.empoweredcycles.com/blogs/news/101474694-bottom-bracket-standards
LikeLike
Hi Karl,
Great article thanks. I’m about to order a BBSHD 100mm.Can I contact you and ask you check some photos and spot if I am going to have any problems?
BB width = 10mm, BB length = 10mm, Lekki Bling 42T
I’m guessing from your article I should be ordering a 110mm?
Thanks
Somelad
LikeLike
You can always contact me, photos of BB from the top are best.
LikeLike
Hi Karl
I’m thinking about trying a BBSHD install on ‘Framed Wolftrax’ Fatbike. I have top view picture of my BB/Chainstay and would love your opinion if possible.
Thanks so much
Todd
Colorado
LikeLike
Email it to me. Info@electricbike-blog.com
LikeLike
HI Karl
Attached are the pics…thanks so much for your input
Best Todd [image: Inline image 3][image: Inline image 4]
On Thu, Nov 10, 2016 at 8:03 AM, ElectricBike-Blog.com wrote:
> Karl Gesslein commented: “Email it to me. Info@electricbike-blog.com” >
LikeLike
One thing I noticed about the spacer on the drive side is that where the inside of the spacer buts up against the BBSHD (as opposed to the bottom bracket), it’s not a nice clean 90 degree surface on the BBSHD. There is a slight a “slope”/deformation to that facet. This keeps the spacer from laying flat against the surface of the BBSHD, and instead rides on the corner of the spacer instead of the flat. I was getting a “creak” in my install, and pulled it apart and noticed a burr on the inside edge of the spacer.
The fix for me was to add a chamfer on the inside of one face of the spacer for some “relief” with a dremmel to make it lay FLAT flat which quieted the creaky problem for me.
I notice in the image of the three spacers above, that the middle one has a recessed area that may address this if that face is flat against the BBSHD. The spacers with my Luna kit had not recessed area or chamfer.
LikeLike
Hello, I have a Cannondale Bad Boy 1 Lefty, 2012 version. The specs say the BB is a Tange Cartridge. Is that enough info to know if I need anything special to add a BBS02? Thanks for your help.
LikeLike
Read Matt from empowered cycles article on bb specs for the bbsxx
LikeLike
Pingback: No One Gives A Rat’s Ass About Your ‘Street Legal’ Ebike : Build Something Awesome | ElectricBike-Blog.com
This photos are bottom bracket (68 mm) of my bicycle.I think non compatible BBSHD,BBS01 or BBS02.
But may be compatible Cyclone Mid Drive 3000 watt Planetary KIT end Mini Cyclone Kit
This video talking abaut my problem.
please help me.I want to conversation my bicycle to ebike. What is your suggestion to me?
Best regards
LikeLike
Send photos of your BB to my email account, info@electricbike-blog.com please
LikeLike
i would like to install a bbs02 midrive in my scwinn with a one piece crank. is this possible?
LikeLike
If you had a threaded BB then probably yes. Take it off and send a picture and I’ll tell you if it will work.
LikeLike
Hi Karl,
Thanks for your helpful posts. I noticed that someone has asked you before if it’s possible to install BBSHD on a Framed Wolftrax Fatbike, it was on November 2016.
I am wondering what the answer is because I am thinking to get the same bike. Please let me know if you don’t mind. Thank you very much!
LikeLike
Never tried it. Check out this post for BB compatibility.
https://www.empoweredcycles.com/blogs/news/101474694-bottom-bracket-standards-and-bafang-mid-drive-motors
LikeLike
Good artcicle.
I am thinkink about installing a BBSHD kit in my Giant Glory 00 2010 with 83mm BB.
Do you think it is possible to install a BBSHD 100mm 1000W kit with spacers to fit in 83mm BB?
Regards,
LikeLike
It almost certainly will fit.
LikeLike
Top notch article – like the rest!
Have you ever tried grinding the case of the bbshd instead? (Where it contacts the chainstay) Am thinking of attempting this, but concerned about the thickness of the case.
LikeLike
Yes you can do that about 5 mm without issues. Use a Dremel.
LikeLike
Pingback: My Achy Breaky Ebike : How Improper Mounting Of A BBSxx Can Cause Premature Alloy Frame Failure | ElectricBike-Blog.com
What a brilliant resource this site is! Just upgraded my bike frame and ran into the chain stay problem.
Loads of useful tips, thanks!
LikeLike
Pingback: Kennisbank - BUDGET BIKES BRABANT