With modern 18650 cells almost without fail, every problem with your battery which is NOT caused by improper mounting and physical damage to the battery is going to be the BMS. The BMS handles the charging and discharging of your pack making sure that there are no problems with any of the cell groupings. When a cell stops working and the voltages are too high or too low it will shut down power on the entire pack. For whatever reason BMS’s can become flakey and every problem I’ve had with my packs could be traced back to a problem with the BMS. A ‘leaky’ BMS will slowly drain down one or more of the cells in the grouping causing the entire pack to be out of sync. If it drains the power on a cell grouping down too low then the pack will not work and you’ll have to remove the dead cells as shown in this article. The problem is if you replace the cell groupings without replacing the BMS the problem will just occur again. This article will go into troubleshooting faulty BMS’s and how to replace them in about the amount of time it takes you to swap out a flat tire. Did you know Americans spend more time doing their taxes every year than having sex? I think we have our priorities way out of whack as a nation.
Here’s to more sex and easier taxes. Which presidential candidate is going to promise me that?

The BMS is the heart and soul of your ebike battery, when they fail it can cause a variety of problems that can be difficult to troubleshoot.
Safety
When working with a lithium battery you must always wear gloves and eye protection. Although a 52v pack will not shock you when your hands are dry as you work with the pack your hands will get sweaty and the pack will shock you. Also, when using a soldering gun around a lithium cell there is always the risk of the battery exploding. Any kind of cheap clear safety glasses will do, if you are nerdy and wear prescription glasses then that is probably good enough. Whenever you are working with a lithium pack and using a soldering gun there is always a risk of explosion. Also, be very careful about how you deal with the wires off the battery. Don’t leave them floating around to short out on things. Even bare ground wires can be dangerous if they accidentally touch the nickel strips on the side of the battery. Cut and solder one, then when you are done move on to the next one.
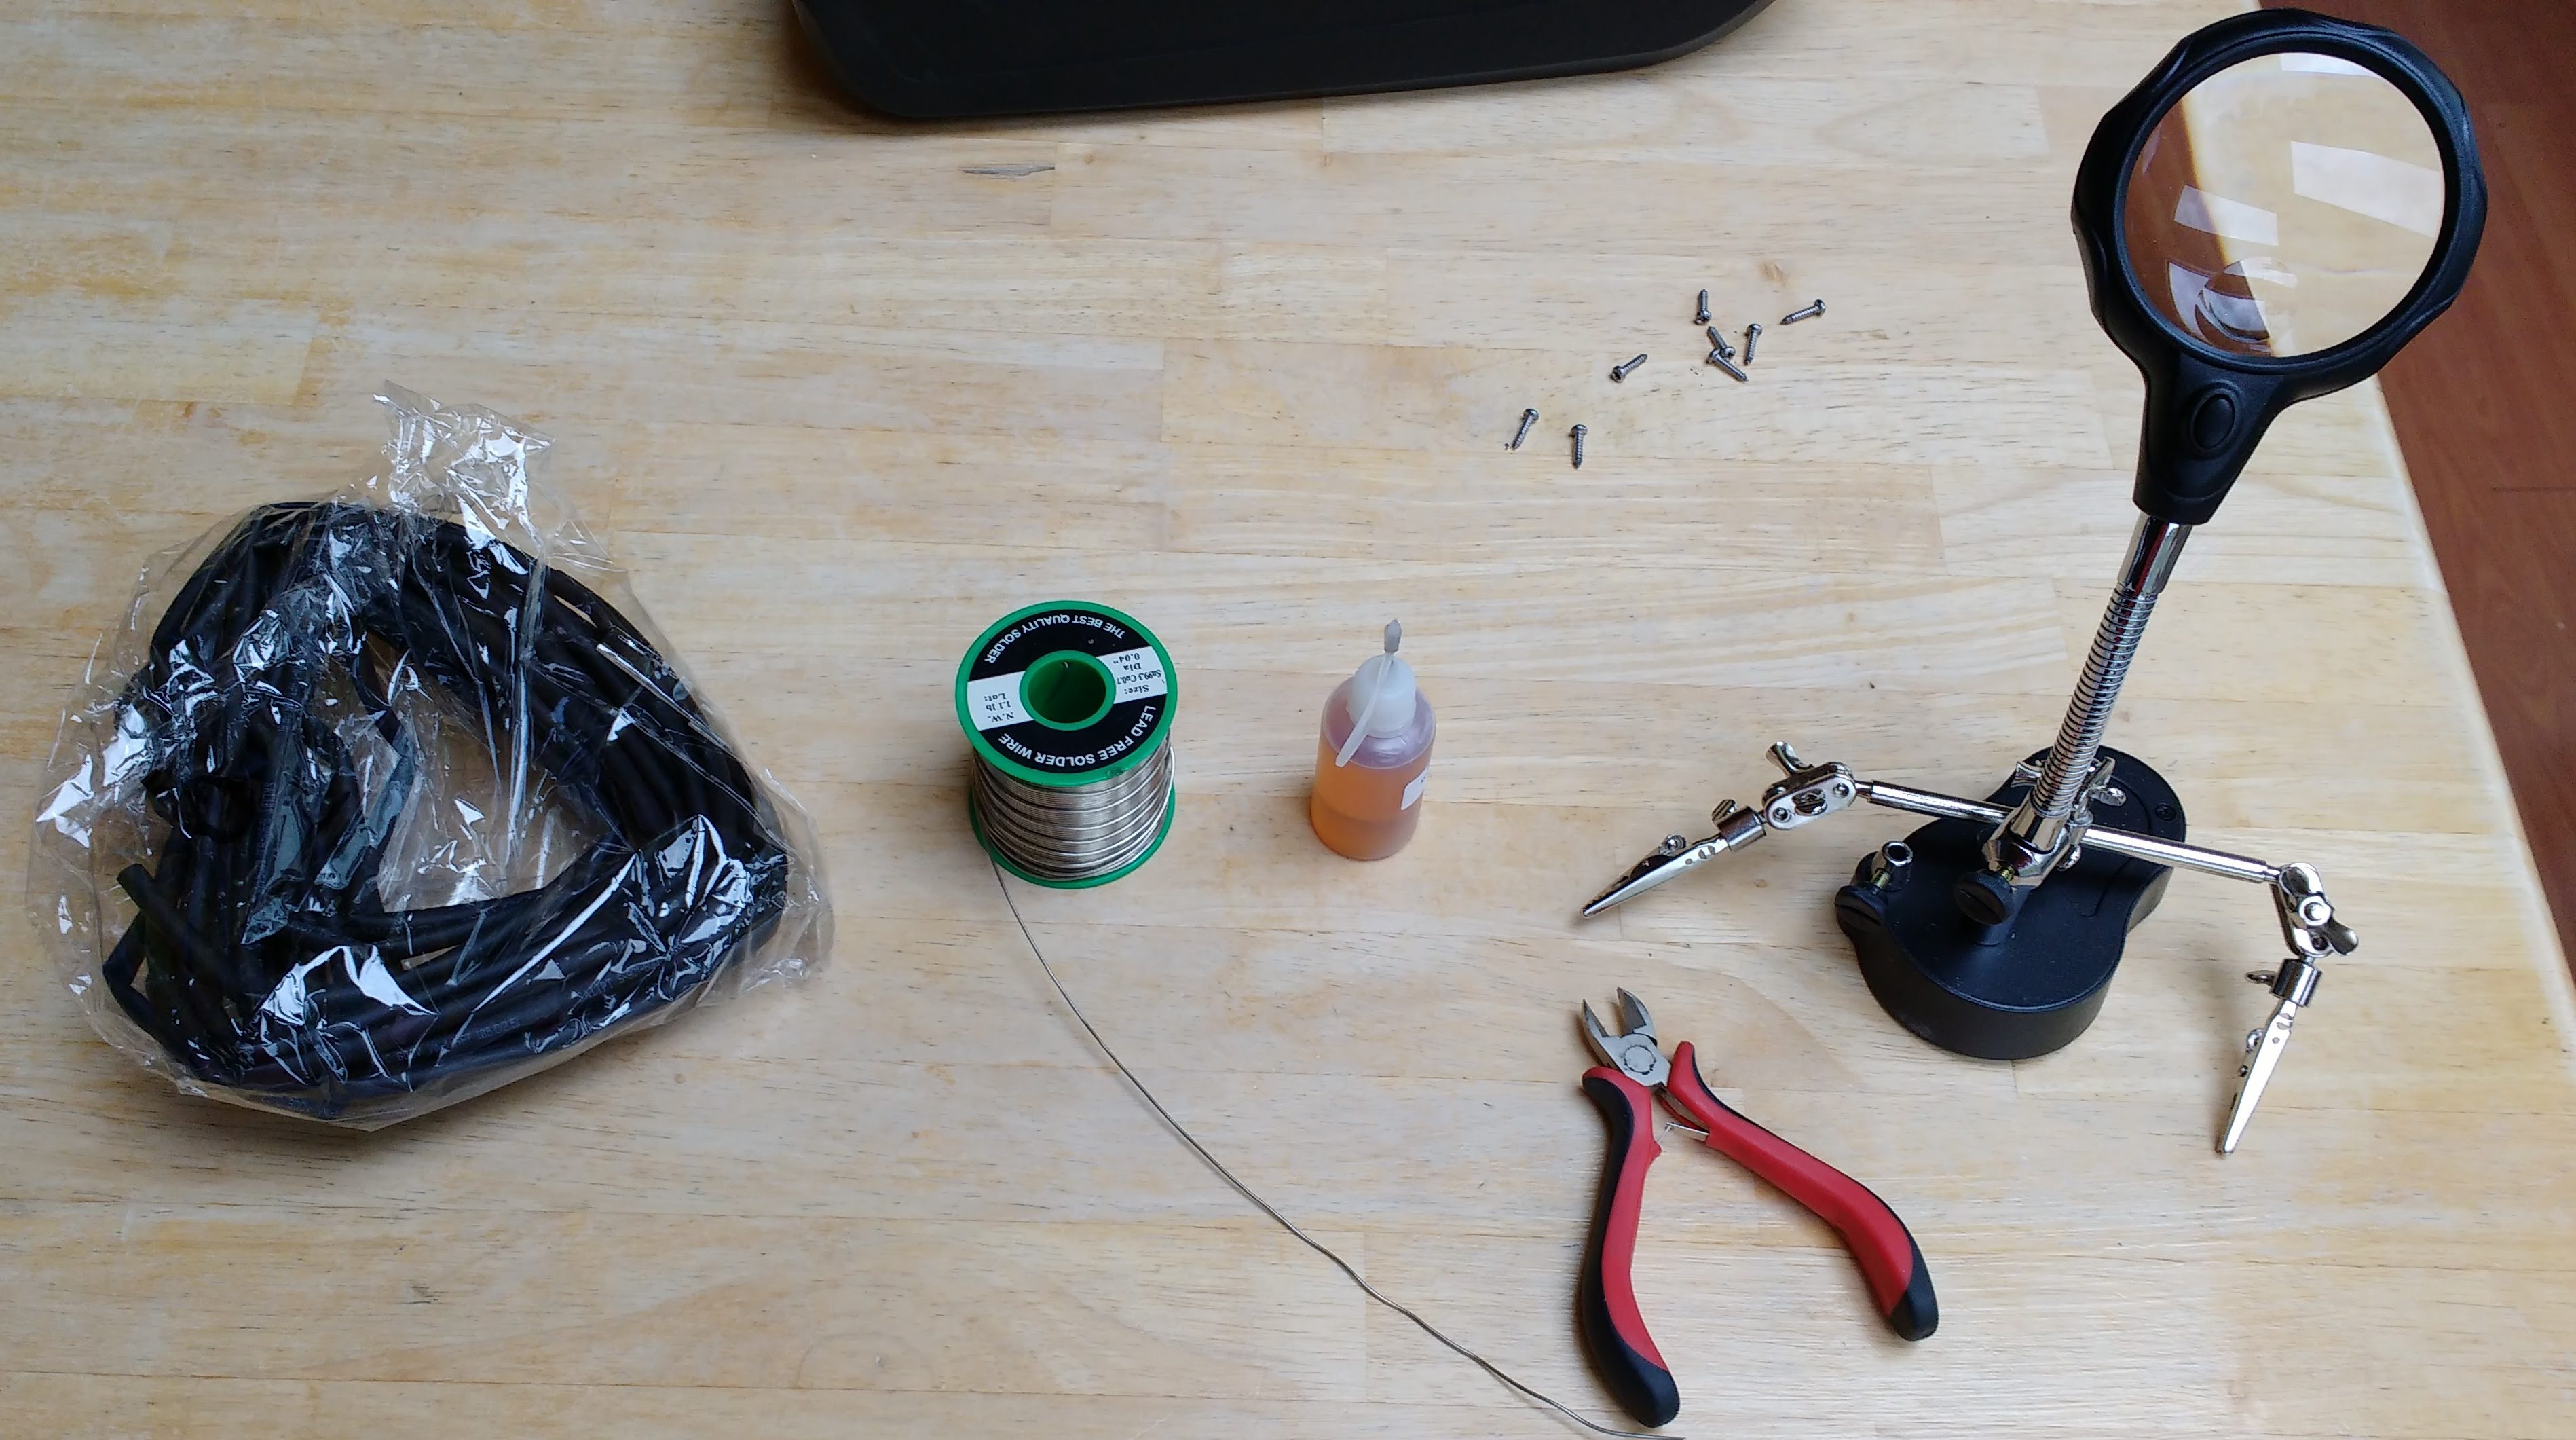
Heat shrink tubing, lead-free solder, flux, wire cutters and helping hands are all must-haves for a DIY builder.
Troubleshooting
One of the hardest parts of figuring out if a pack has a problem is troubleshooting. I recommend performing the following steps before you swap out the BMS.
- Contact your pack reseller and make sure that they are OK with you taking apart the pack and troubleshooting it. Some of them will want the pack sent back to them for repair if it’s within the warranty period. Others will tell you to fix it yourself, most of the Chinese battery manufacturers will just ignore your pleas for help. Warranty? What warranty?
- Charge the pack to 100% with your charger.
- Throw a cheap watt meter on it to read the power and run the ebike till the pack shuts off. Compare how many Ah of power you got out of the pack vs what you should have gotten.
- Take the top of the case off the pack and measure each of the cell groupings (there will probably be 13 or 14 of them). The voltages for each cell grouping should all be about the same. Write them all down. The cells are all grouped together in groups based on the number of parallel cells in the grouping. Most frame packs are 4P so the first cells you want to test are at one end of the pack, then they zig-zag down the pack swapping orientation for every cell grouping.
- Carefully inspect the battery for any physically damaged 18650 cells.
- Charge the pack with the case off to 100% and then measure all the cell groupings again. They should all be even. Touch the outside of all the cells to see if any of them have gotten hot while charging.
- Tell your findings to whoever you bought the pack from, this will help you decide if the BMS is bad. Even if cell groupings are not behaving properly chances are it is the BMS that is causing cells to get out of whack.
- Grovel to your pack seller to send you a replacement BMS. You will need to send them a picture of your existing BMS. With any luck they will have one in stock they can send you. You don’t need the exact SAME BMS but you do need one that will fit the header block with all the cell monitors and will also be a BMS for the right size pack (13S or 14S). Most pack sellers don’t warranty their packs for that long, but will still make a best effort to help you out if you are having problems with a pack.
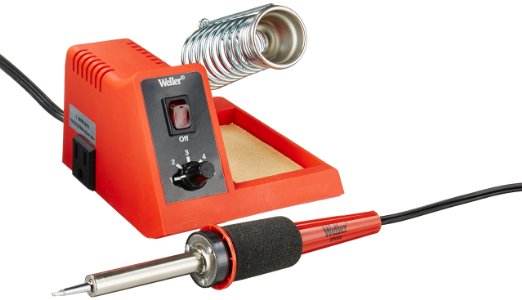
You’ll need to have a soldering gun that gets pretty hot. I use the Weller 40 Watt WLC100 (which generally runs about $40) and run it at power level 5.
There are tons of great videos showing pack troubleshooting and building on Youtube by Damien Rene and Bruno “Nobody goes faster than me on a BBS02” Baccianti. These guys are both totally awesome to watch and you can easily waste an evening browsing their videos which are every bit as entertaining as watching zombies eat your favorite heroes on TV.

Compare the BMS to make sure it is the right size and will fit in the case
Once you get a replacement BMS then you will need to make sure it will fit in the case. Put the two BMSs side by side and make sure it will fit in the case and be clear about where you need to connect the wires to the battery. Most BMSs have 3 soldered wire connectors. B-, P- and C-.
- The P- goes to the Negative lead on the main drive controller (usually an XT90 connector on soft packs).
- The B- goes to the Ground on the battery and may have more than one wire if it is a high power BMS just to carry more current.
- The C- goes to the negative lead on the charging connector (usually an XT60 connector on soft packs).
Your BMS may B+ or P+ which would go to the positive side of the battery cells and the positive side of the main lead on the drive controller respectively. Most of the BMSs I’ve seen do NOT have any positive leads off their circuit boards other than the header block that goes to the individual cell monitors.
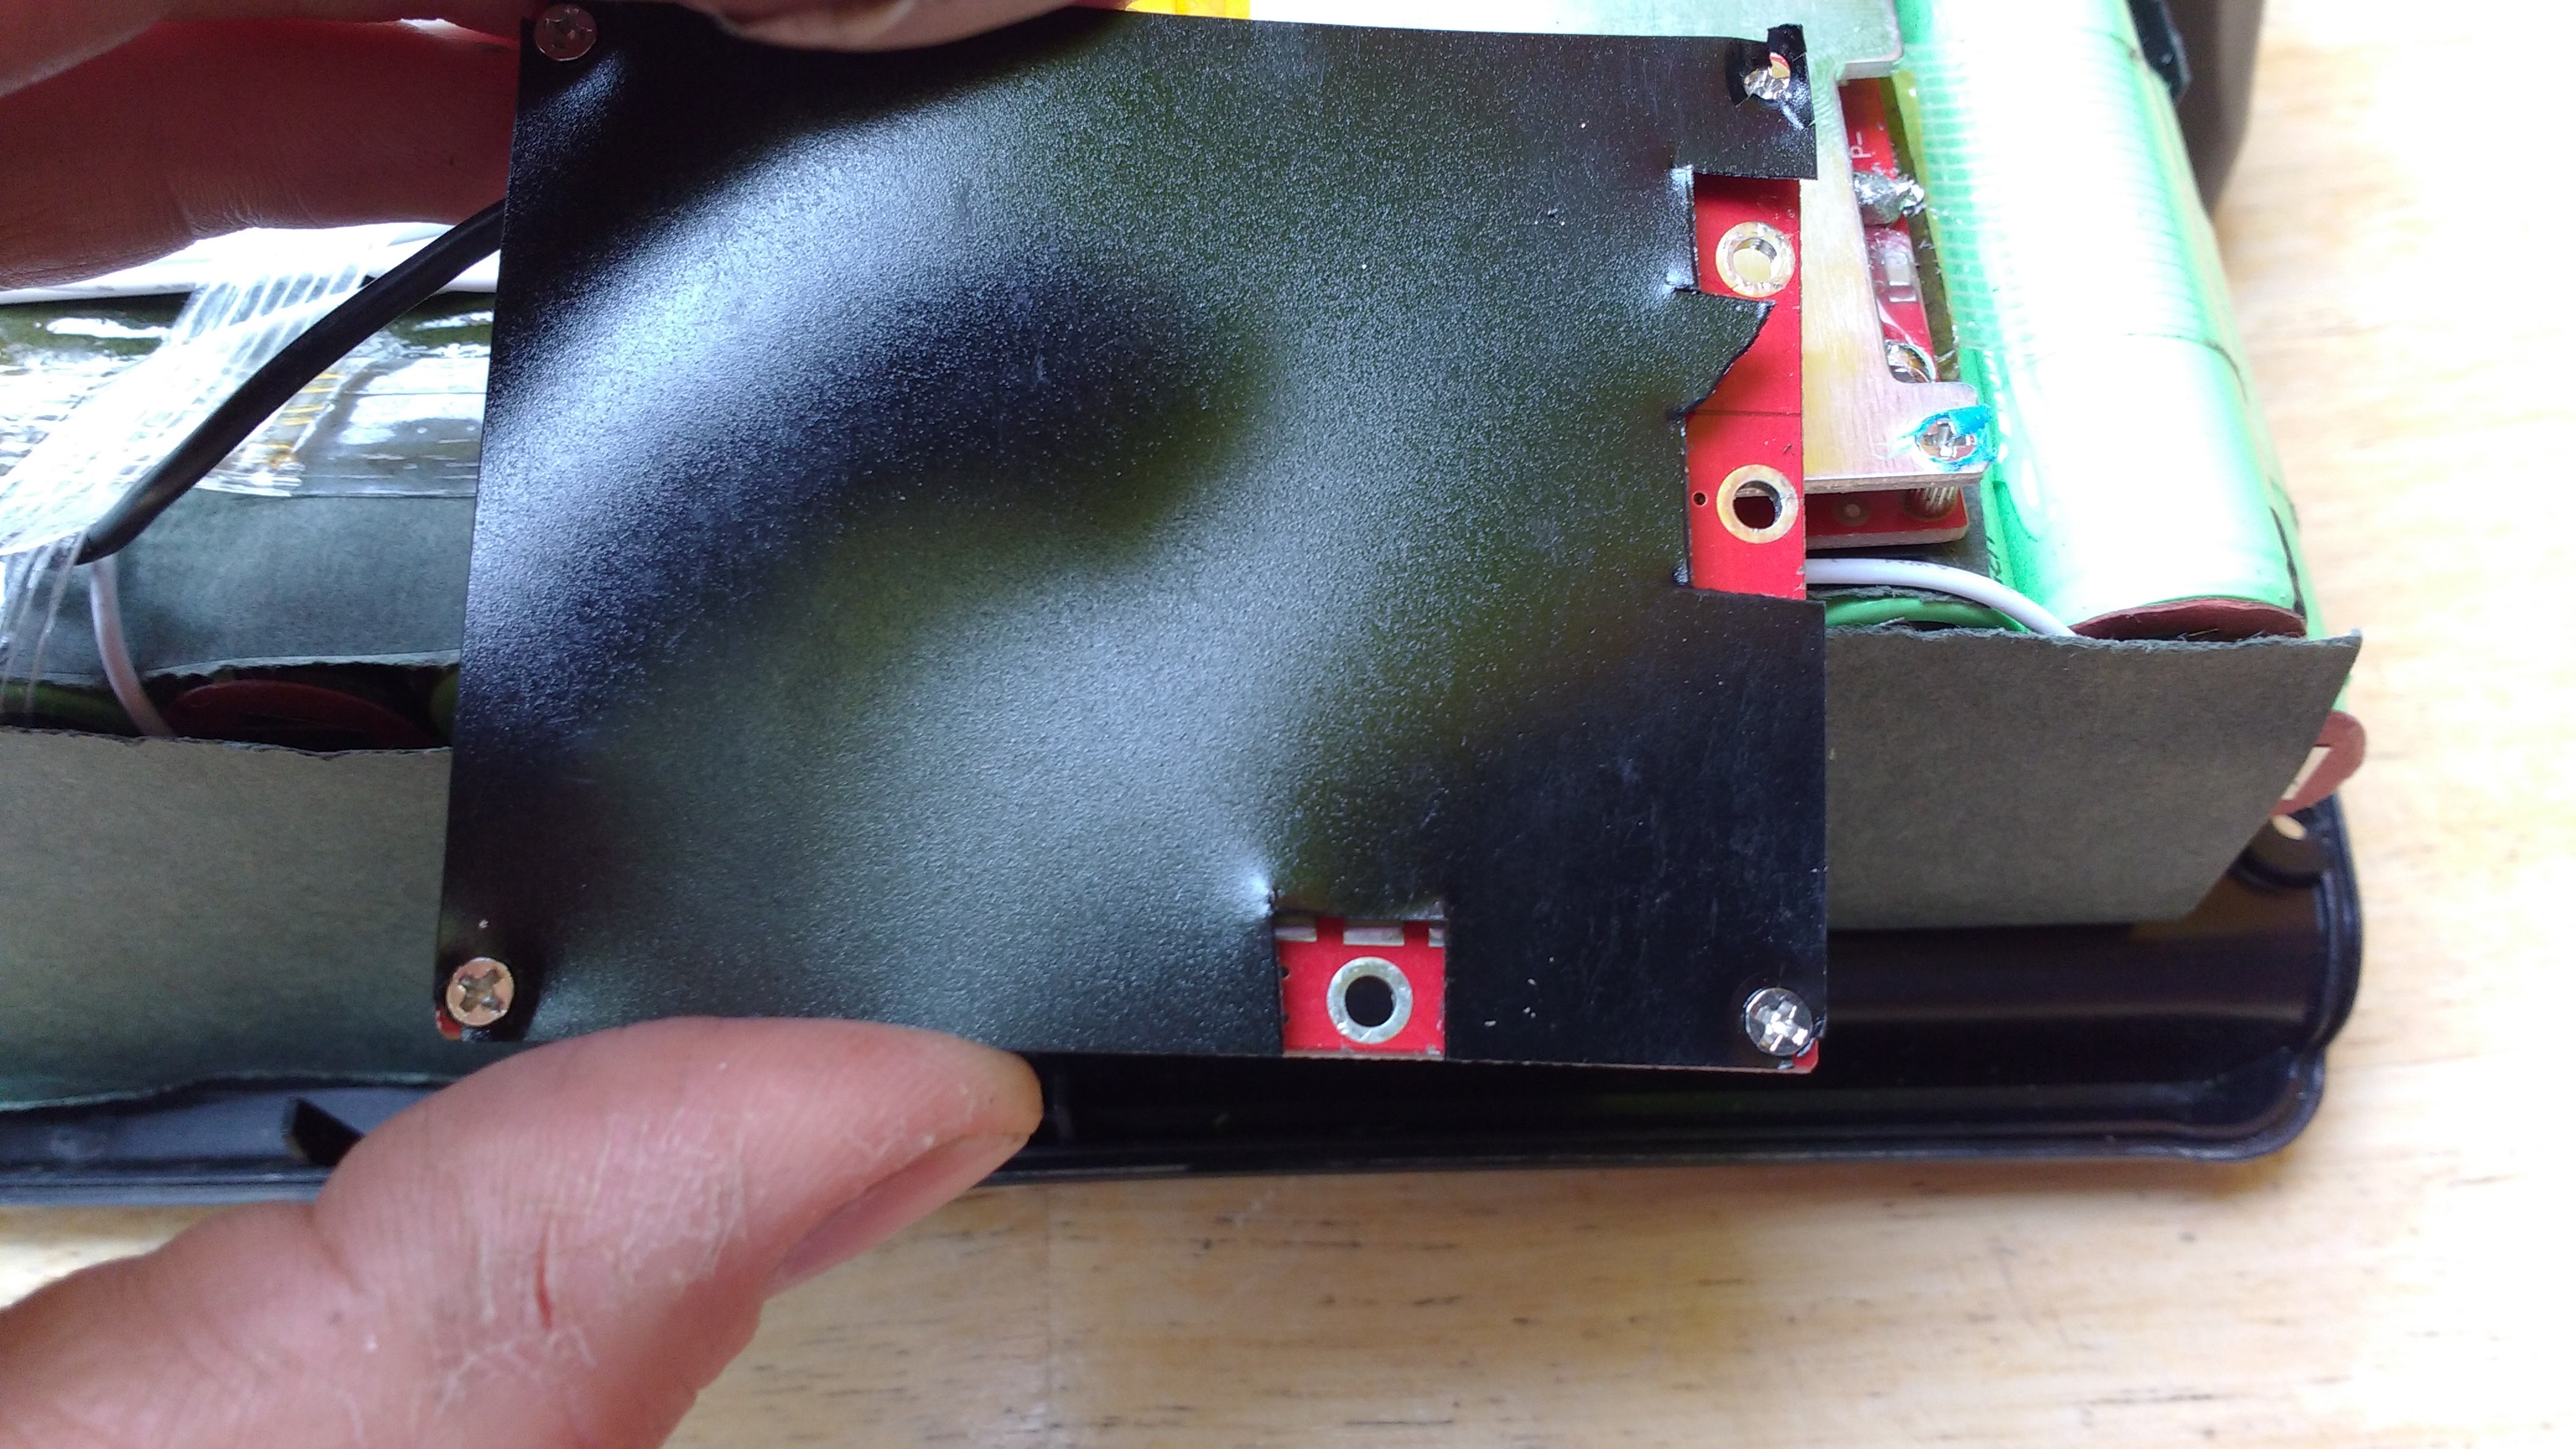
Notice the not-so-square notches cut out of the plastic cover with scissors.
A note on BMS reliability and BMS warranties
I’ve noticed a wide range of quality from different Chinese BMS’s. Some of them are not worth the silicon they are printed on, and others seem to be made very well. The higher power you run your bike at the higher quality your BMS will have to be to survive. Most decent BMS’s run about $40-65 dollars. If you pay less than $40 for a BMS you should expect that it will probably fail at some point. Since they are such a pain to replace I would not recommend cheaping out on your BMS. It should also be noted that most USA BMS sellers will NOT warranty their BMS. If you buy it and burn it out from hooking it up wrong you’re on your own.
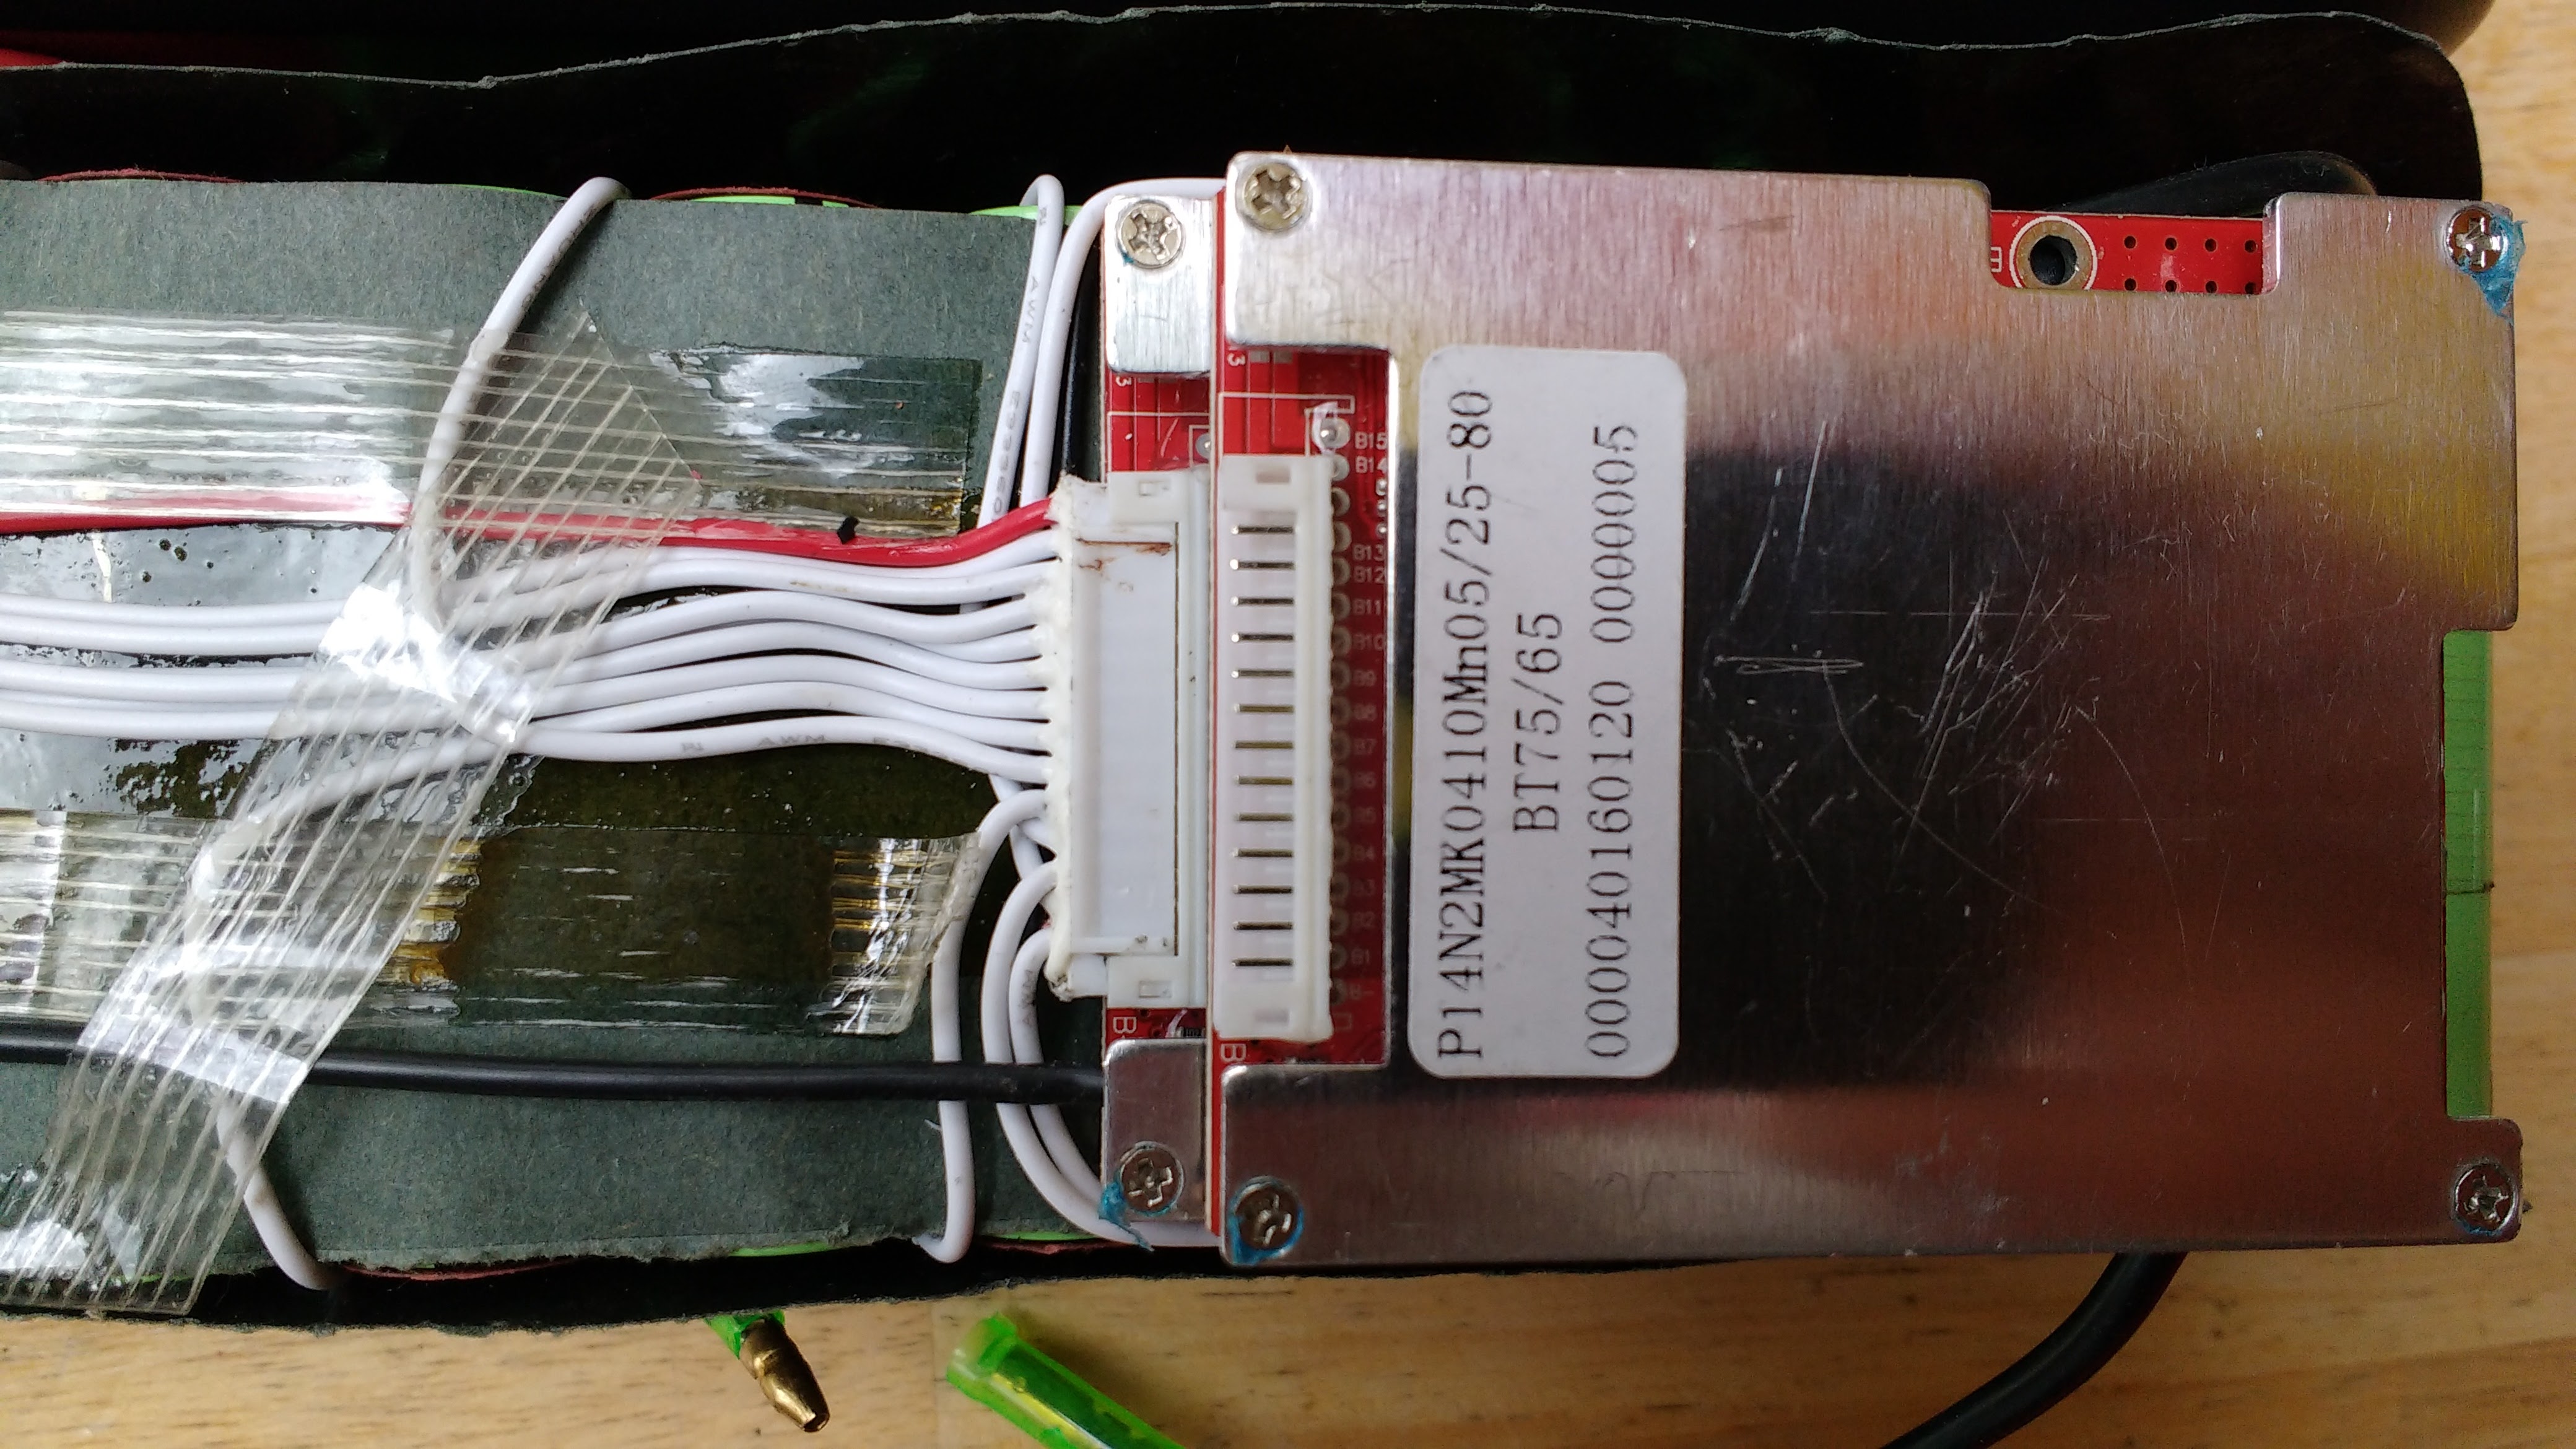
Check the header block to make sure it is the right size. Both the BMS and the header block should have the same number of connectors. Note the dried blood all over the old connector … yep, that’s my blood.
When I swap out a BMS I do it one wire at a time. This is the way I advise you do it so that nothing gets messed up and you do not have wires floating around that can short out on the battery.
- Disconnect the header block from the old BMS and leave it unplugged. Don’t stick anything metal in there to separate the header block, if you can’t do it with your fingernails then use a plastic knife.
- On the new BMS if it has a plastic sheet you may have to cut small squares out of the plastic with scissors so you can solder the wire all the way through without melting the plastic. Do NOT cut it with a mat knife as you could cut into the circuit board and damage the traces.
- Cut the first wire you want to move as close to the BMS as you can.
- Carefully strip off the end of the insulation so you can put it through the hole on the new BMS.
- Push the wire through the correct hole and bend it over to hold it in place. Put a bunch of Flux on the end of the wire. I cannot overstate the importance of flux for making quality solder joints. If you don’t have flux then buy some on ebay. It’s cheap.
- Make sure your soldering gun is hot, hot, hot. I run mine at full power when making beefy joints like this. The flux will smoke and make a mess (like old Willy Clinton you really shouldn’t inhale) but the flux and heat will really draw the solder into the joints and all the way through the pad.
- Once that wire is done you can move on to the other ones one at a time.
- When you are finished you will have to pry off the old BMS, it will probably be siliconed or hot glued to the pack.
- Dab some silicon or hot glue on the pack and then stick the new BMS to it. The BMS should have a metal heat sync case or a plastic covering. Do not apply silicon or hot glue directly to a circuit board. If you can’t glue it down because it has a bare circuit board, then just tape it with some heat-resistant tape.
- Use some heat-resistant tape to tape down the wires to the case so they don’t float around.
Gluing the new BMS in place. Don’t ever glue directly to circuitry unless you’re using silicone without acetic acid.
When you are finished make sure everything is secure by putting the pack back together and then shaking it as hard as you can. If you hear the battery rattle inside the case then you need to figure out where it is hitting and take the battery apart and add padding to it where it is hitting the case. I use small chunks of closed cell foam, but any kind of firm foam like material that is heat-resistant should work. This is really important because if the battery is loose in the case then over time the cells could will almost certainly get damaged.
Heat resistant tape is your friend. You can buy it cheap on eBay and Alibaba. Don’t skimp on the tape, nothing should be able to move around inside the pack.
With a little elbow grease and about 15 minutes of time, you can swap out a BMS from any frame pack with relative ease. Replacing a BMS in a soft pack is a very similar process except you will have to cut away the heat shrink tubing. When you do that make sure that you don’t cut into any of the wires or the cells. Also, be sure that you have replacement heat shrink tubing to re-wrap the battery in when you have swapped out the BMS. You should test the pack with charging and under load before you re-wrap the battery to make sure that all your connections are good.
It can be difficult to find the really tough rubberized large heat shrink tubing. It’s pretty easy to get the thin PVC stuff from Alibaba, just order the tubing with a larger flat diameter than the height + the width of the battery and you should be fine. If you want the heavy-duty rubberized tubing the only place I’ve found to get it is $3-5/foot right here.
The hardest part of swapping out the BMS is resisting the urge to lick the battery connectors to see if it’s really charged. Don’t do it, your tongue will thank you in the end for your restraint.
Ride On.


Thanks Karl, this article is a much-needed help to many new ebikers that was way overdue. BMS = Battery Murder Suspect.
LikeLiked by 2 people
Right on Karl! I’ll likely use this guide to swap out my first BMS soon (charging circuit not working, cells measured good).
LikeLike
Pingback: I Got The Skills : Building A 18650 25Ah GA 50Amp Soft Pack From Scratch | ElectricBike-Blog.com
Hi, is the bms that you replaced in the pictures for 48v or 52v.thanks
LikeLike
52v. Read Micah Toll’s book before undertaking this job.
LikeLike
Strange, i can only count 13 white wires at the bms in the pictures..so that would make 13s -48V battery ..i might be wrong though.Thanks
LikeLike
I lost my charger and i want to order a new one, but i can’t remember the voltage. I opened the battery and the bms is idntical to the one in your photos. That’s why i’m asking. I don’t need to change the bms.
LikeLike
have 48v20ah triangle battery. Bms stopped given power I got new bms .my new bms has 3 leads black blue yellow .my old bms has 6 leads .and is twice the size to the new bms .I don’t no what to do .battery cost £500.00 pounds .ive contacted more than 30 companys in uk .no will fit bms .please help
LikeLike
If its a 13S BMS is should work with any 13S pack. Check out this article on wiring up BMS https://vruzend.com/tech-center/how-to-charge-a-lithium-battery-with-a-bms/
LikeLike
No that doesn’t thanks for you help h
But .my battery has 6 leads my bms has 3. Can you email me ijwian@outlook.com .I’ll send some pics please
LikeLike
Sorry my son replied can you delete that reply my battery has 6 leads attached to battery is there any way I can send pic
LikeLike
Sorry this dident help. As 6 leads
LikeLike
So I have 6 wires to to bms 3 red 3 black .
LikeLike
Very happy to give donation of 50 pounds if you can help
LikeLike
I think 50 GDP is about 75 dollars .
LikeLike
Is there any different with bms if the old bms come with 1 black 10 white and my new bms is 1 black 10 red?
LikeLike