
It is not pretty, but it works. All the good things in life come inside a Lego box. It does look like a homemade bomb.
When the Panasonic GA cells came out I got really excited, so excited in fact that I purchased 100 of them to build into a 7P14S pack in my spare time. Months went by and the batteries just stared at me from under the desk wishing that I would put them to good use. I ended up buying a spot welder off eBay, which ended up self-destructing before the pack was even finished. After a lot of procrastinating, I splurged for an even MORE expensive spot welder, which is the one that I should have bought from the get-go (review here). The entire process of building a very large pack like this from scratch was incredibly educational, frustrating and cathartic at the same time. I have a pretty strict rule that I won’t buy or use ANY product that I don’t completely understand how it works and that I can’t tear down and put back together. Building my own 18650 ebike pack seemed like a logical progression in support of that belief system.
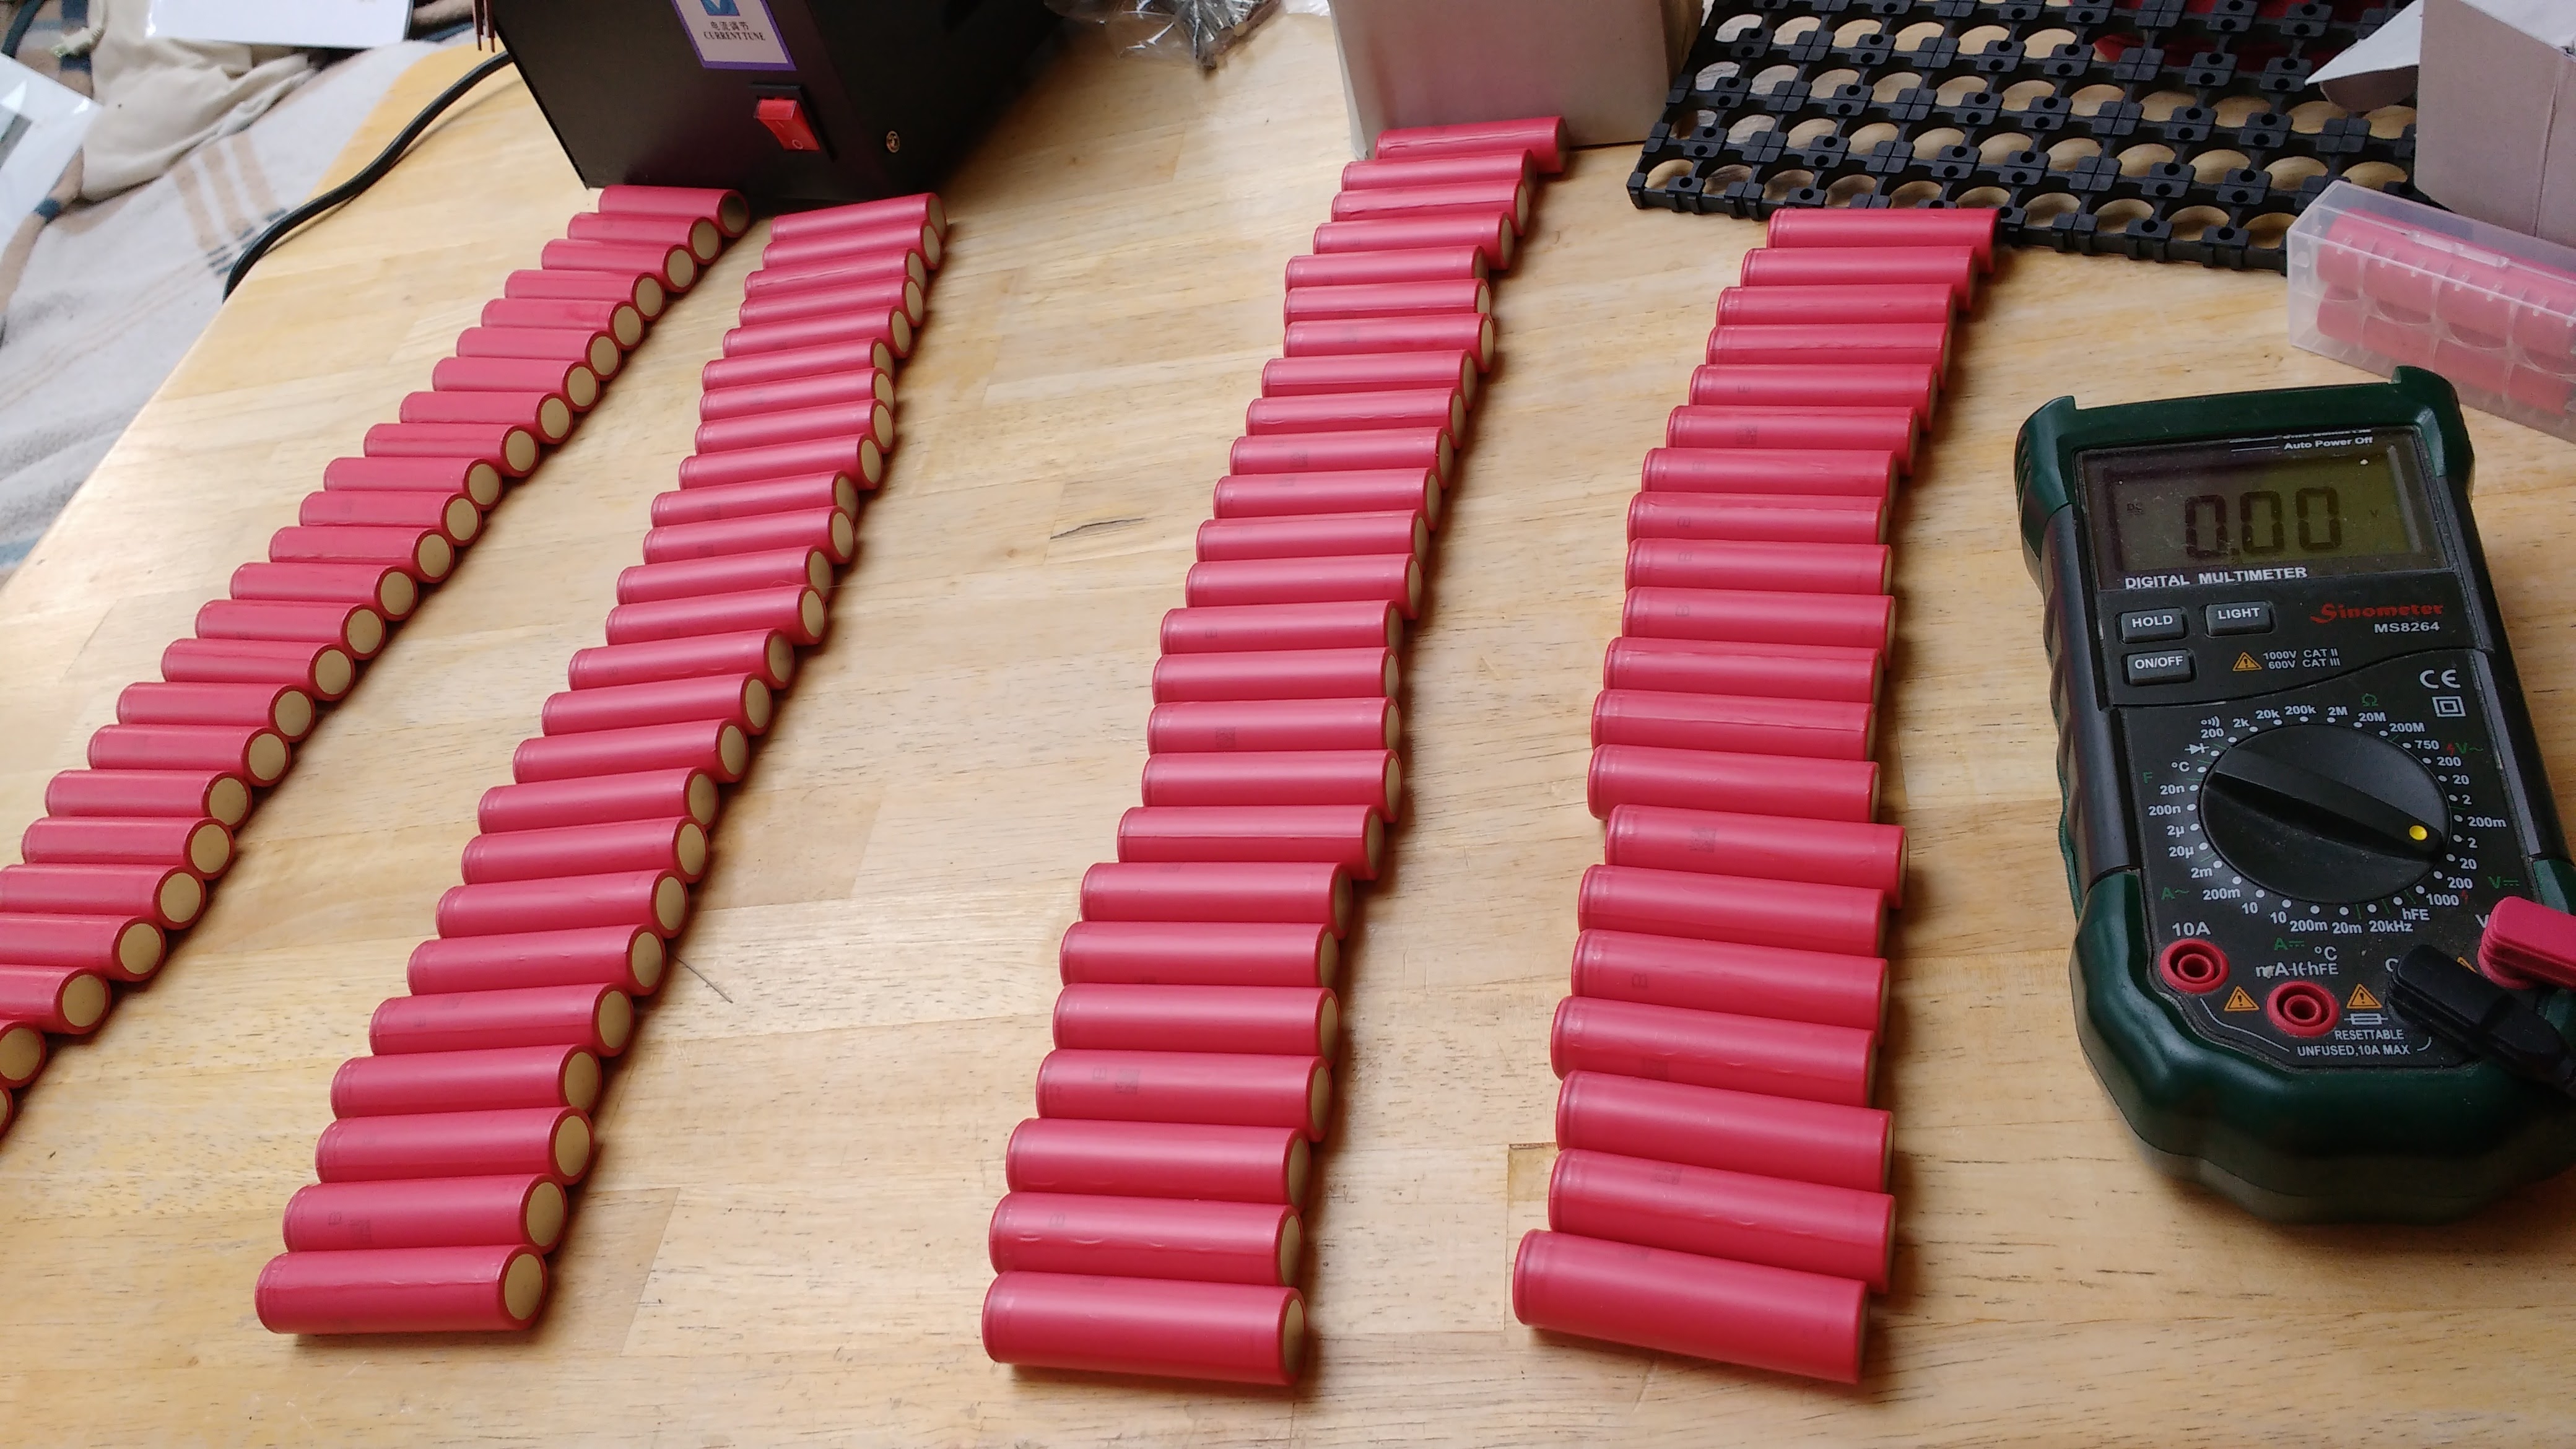
Step 1: Lay out all the cells and test the voltage
For people who are looking to build your own ebike pack there are some great resources on Youtube under Damian Rene’s channel and Bruno ‘More Power’ Buccianti’s channel. Both these channels have tons of videos that show the entire pack building process from start to finish. For people who learn more easily by reading articles, Micah Toll did a great article on pack building right here on his ebikeschool website which is a must read before you build your first pack. I’ve tried very hard in this article to not repeat what Micah said in his article, so please read both. Everyone has their opinions, and I’m not a big fan of hot glued batteries and I would encourage people toward using plastic stencils instead. No matter what you decide to do, the first thing you need to do is buy some batteries.
You can see the batteries laid out in groupings of 7 cells together for a 7P setup
Figure out your Cell configuration
How many batteries you need will depend on the configuration of the battery. This battery was a 14S7P which means I need 98 individual cells ( 14 x 7 = 98 ). The number of batteries in your series will depend on the voltage (13S for 48v & 14S for 52v). The number of batteries in each cell grouping (the number preceding the P) will depend on how many Ah you want your pack to have. If you are building a pack with 25R cells that have 2500mAh (2.5Ah) each and you want a pack that has 10 Ah then you will need to build a 4P pack ( 2.5 x 4 = 10 ). Before you settle on your P number make sure that the batteries can hit your discharge rate. My pack uses a 50Amp nom BMS and I have a 7P pack with GA cells which can put out 8Amps all day long. This means that my pack can safely put out 56 Amps with a 7P configuration so I am good ( 7 x 8 = 56 ). Under no circumstances should you build a pack that the BMS will be able to pull more power from the cell groupings than what they are going to be able to provide. When in doubt about the discharge rate, just use 25R cells which have an output current capacity which blows all other 18650’s out of the water. The 25R can do 20 Amps sustained PER CELL and can do 100 Amp bursts. I am not aware of any other 18650 2500Mah cell that can claim that capability. If there is one, please let me know.

Cut the nickel strips into 4 different piles with different sizes for 2,3,4 & 5 cells in a row
Buy your cells
With 18650 cells counterfeits abound, so be careful about who you are buying from. There are a lot of Alibaba and Aliexpress 18650 battery vendors that are selling counterfeit Chinese cells that are nearly impossible to differentiate from the real deal as the package wrapping and printing is exactly the same. These cells can dramatically underperform and also risk starting fires. If a deal seems too good to be true, it probably is. The safest place to buy 18650 cells is from a reputable US-based vaping or flashlight site that is known to sell genuine cells. If I need just a few cells I tend to buy from waveandvape.com which is owned by Eric of electricbike.com & Lunacycle fame. If you want to buy a lot of cells look for wholesale deals under the Bare cells section of the Lunacycle website. These GA cells came from the Lunacycle website right here and cost about $550 for 100 which as near as I can tell is a screaming deal. You can adjust the quantity by 10 using the drop down box as long as you buy at least 50 to get the best possible deal (ie, 50,60,70,80,90 etc). I can’t say enough good things about the GA cell which can put out 8 amps all day long. My 52v GA shark pack has been my go-to pack for the last 6 months and I’ve had no issues with it. I suspect that this large 25Ah GA pack will also give me many years of usage. Although 2016 brought out a lot of new exciting cells, none are as ideal as the GA cell which gives BOTH high power AND long-range in one cell. No matter what you decide, if you buy the cells 50 at a time they will be cheaper than buying a small quantity. The GA cells from the Lunacycle website are $5.50 each in quantities of 50 or more, whereas the cheapest you can get them for on WakeandVape are $6.50 each for 4 or $8 each if you want less than four. There are batteries that are much cheaper from Alibaba and Aliexpress, but I am extremely wary of Chinese 18650 battery dealers. When you can buy genuine, guaranteed cells from the US for a dollar or two more each, I believe it is worth the extra money for the piece of mind. Think of how much NOT having all your stuff burn up in a house fire is worth to you.
Put on the other side and gently pound the stencils together with the palm of your hand
Pick your BMS … get one that doesn’t suck
BMS is short for ‘Battery Murdering System’. If you have problems with your ebike packs and have not been physically abusing the pack then most often the problem is with the BMS. There are a whole lot of crappy Chinese BMSs on the market right now. The most important parts of your pack are
- A BMS that doesn’t suck
- Genuine 18650 cells
- Real Nickel strips
I really can’t emphasize this enough. If any of these components are sub-standard then so will your pack. If you’re going to waste countless hours of your life building your own ebike pack then DON’T cheap out on the BMS. The only BMSs I recommend are ones bought through Lunacycle. If you go to the BMS section on the Lunacycle website you’ll see that there are none listed there, but I told Eric to order a few thousand and Eric always does exactly what I say so soon they will be there and you can buy them again. If you know of another vendor that sells BMSs that actually work well, by all means, PLEASE tell me. No vendor is going to warranty their BMS for more than 30 days, and for non-reputable vendors in China they will probably not even do that. If you can get someone to vouch for a particular BMS on Endless-Sphere then it is probably decent, but there is a lot of crappy ones out there that will self-destruct if you look at them funny. Every problem with every ebike pack I have ever had has been caused by cheap, crappy, substandard BMSs. Just by looking at them there is no way to tell if a BMS is robust or flakey, the only way to know is if other people have used that BMS for extended periods of time and not had problems with them.
I bent the welding contacts on my crappy ebay welder so that I could go three layers deep
Get real nickel strips
There is a lot of Chinese resellers selling nickel strips as 99.9% nickel when they are really just nickel plated steel. Nickel plated steel will weld better at lower power, but rest assured pure nickel strips are what you want. If you buy the strips, scratch them with a mat knife and soak them overnight in salty water and they look all rusted then you got duped. When in doubt you can buy from ebay which keeps vendors a little more honest as they will get crappy feedback otherwise. You can also ask people on endless-spheredrama.com who to buy from because lots of ebike builders have already gotten burned and want to make sure the same thing doesn’t happen to you. Make sure you get real nickel as steel has a MUCH lower current carrying capacity than nickel does as shown in this chart by master 18650 pack builder Damian Rene. The strips used in this pack were 8mm wide by .18 thick, I wouldn’t recommend anything smaller unless you are building a very low power pack. For my 50Amp pack I doubled up on these strips.
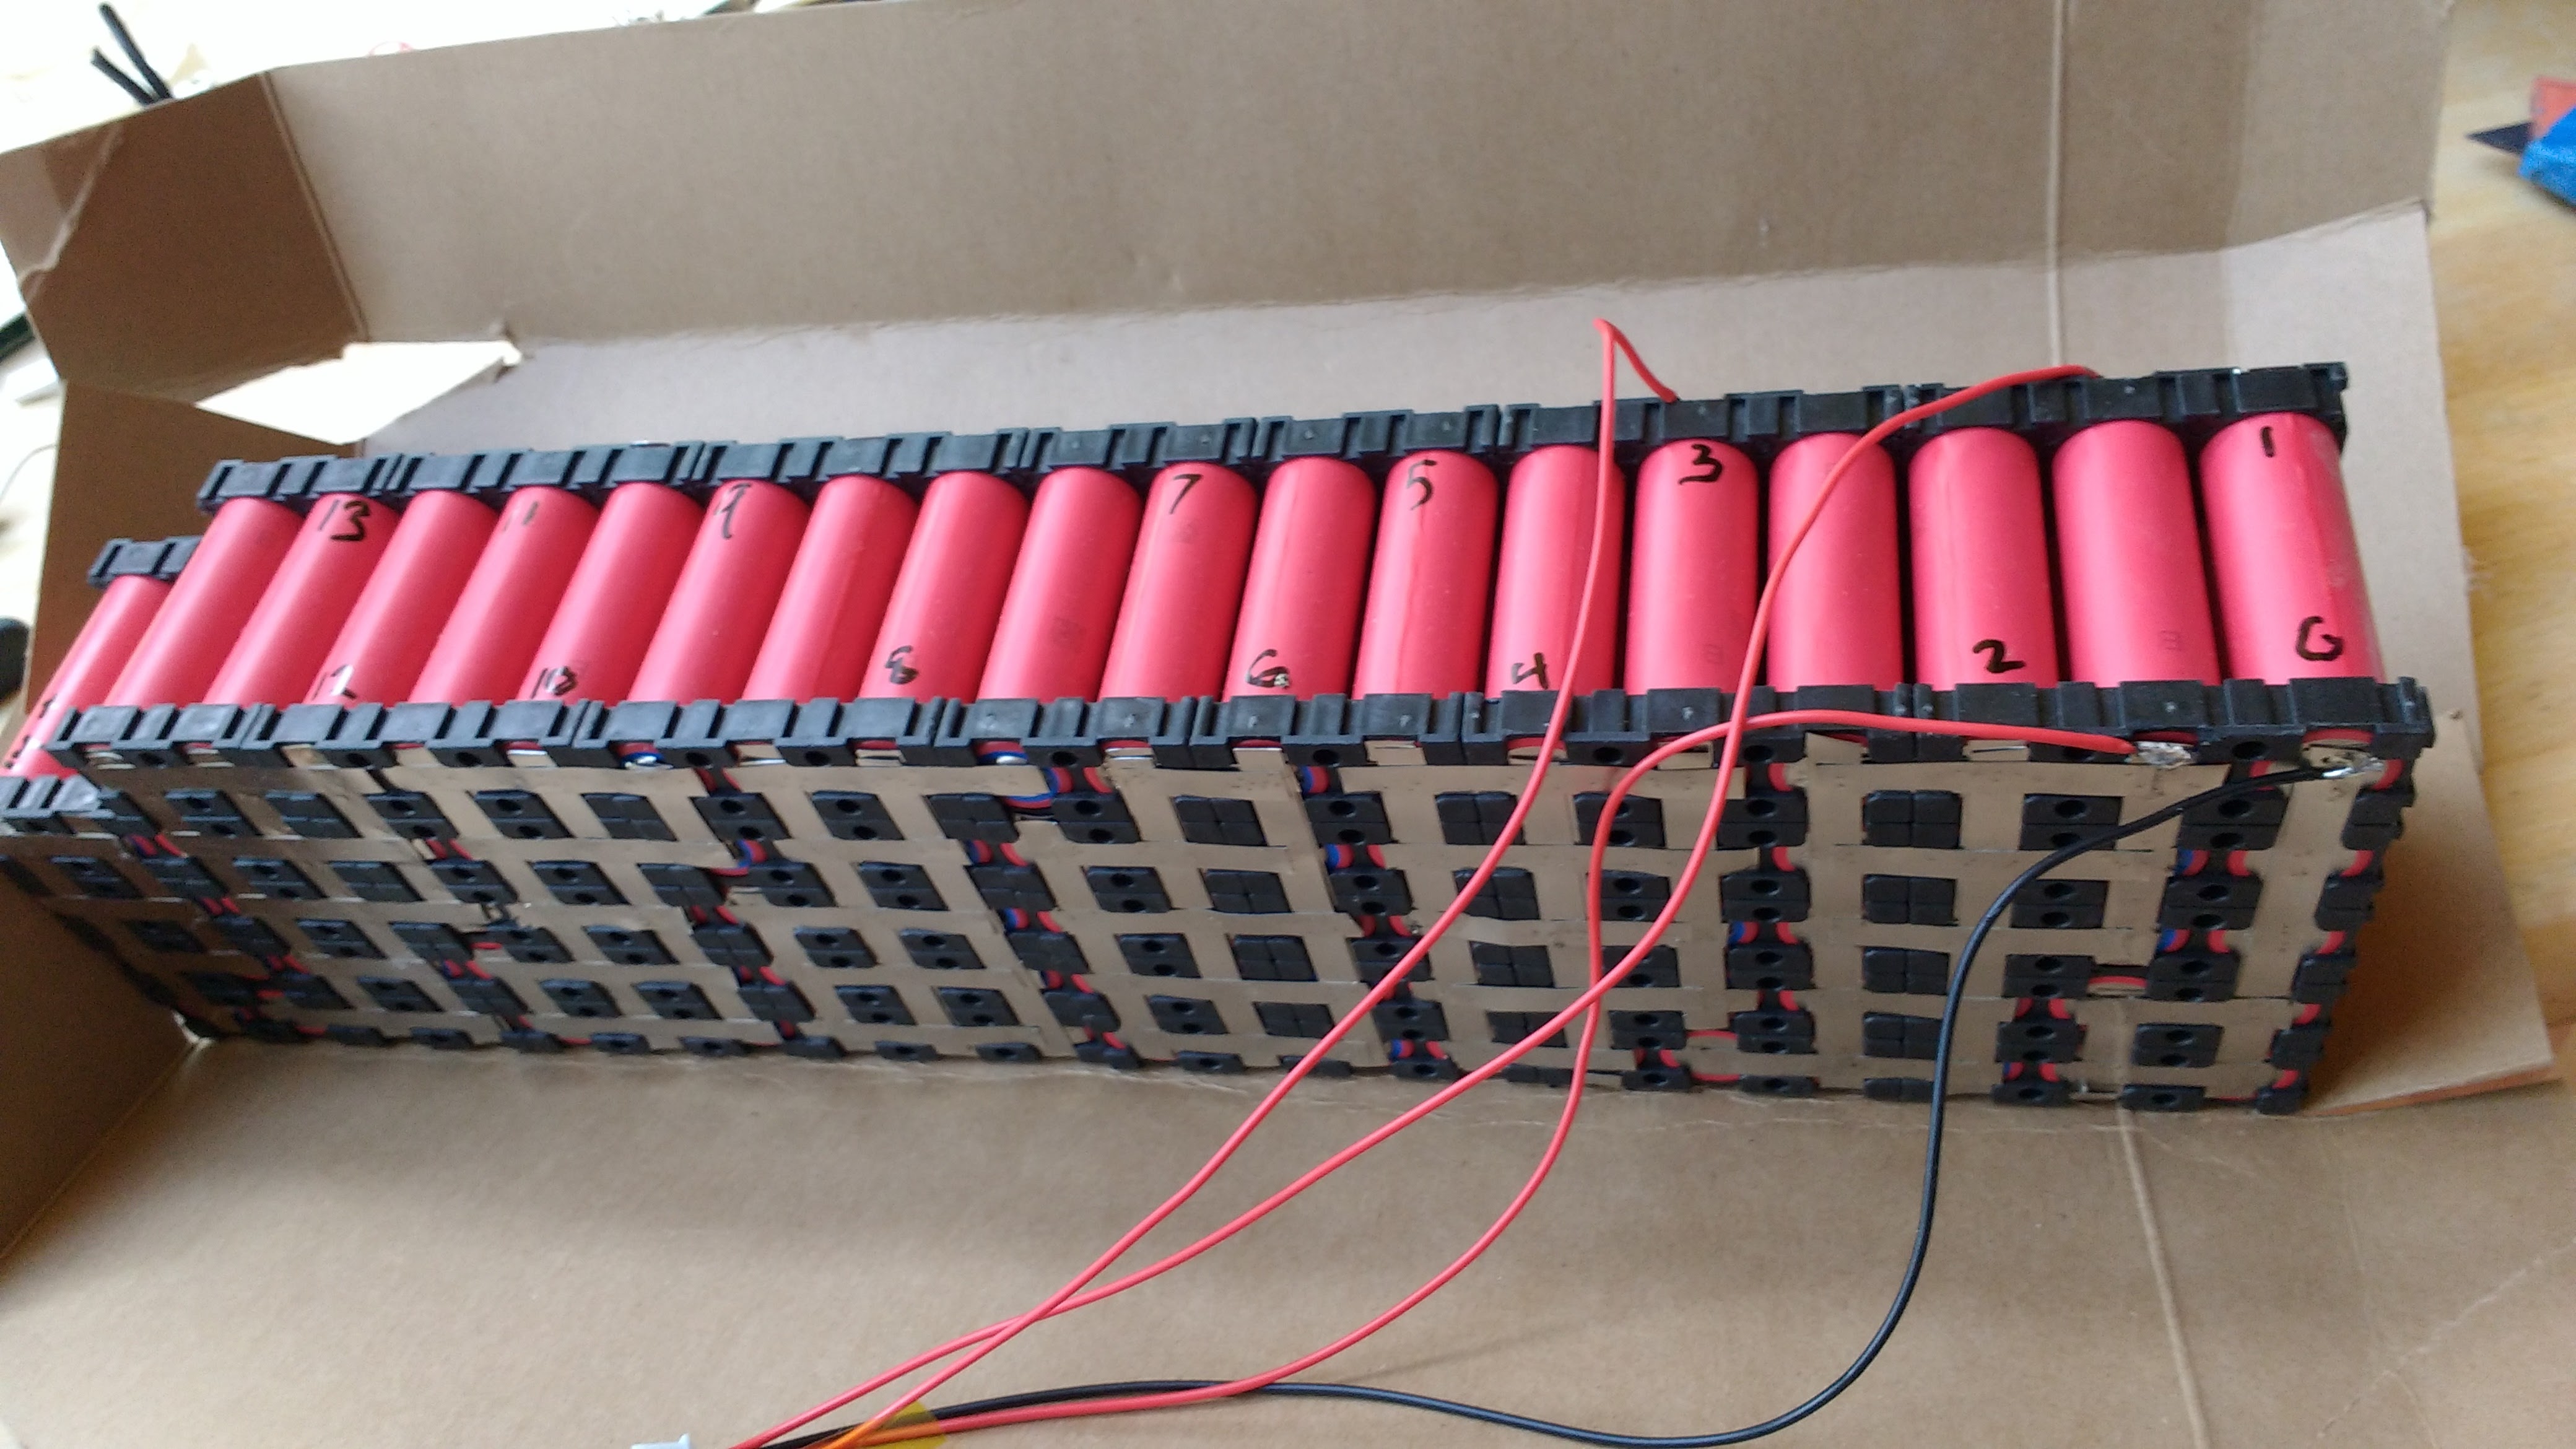
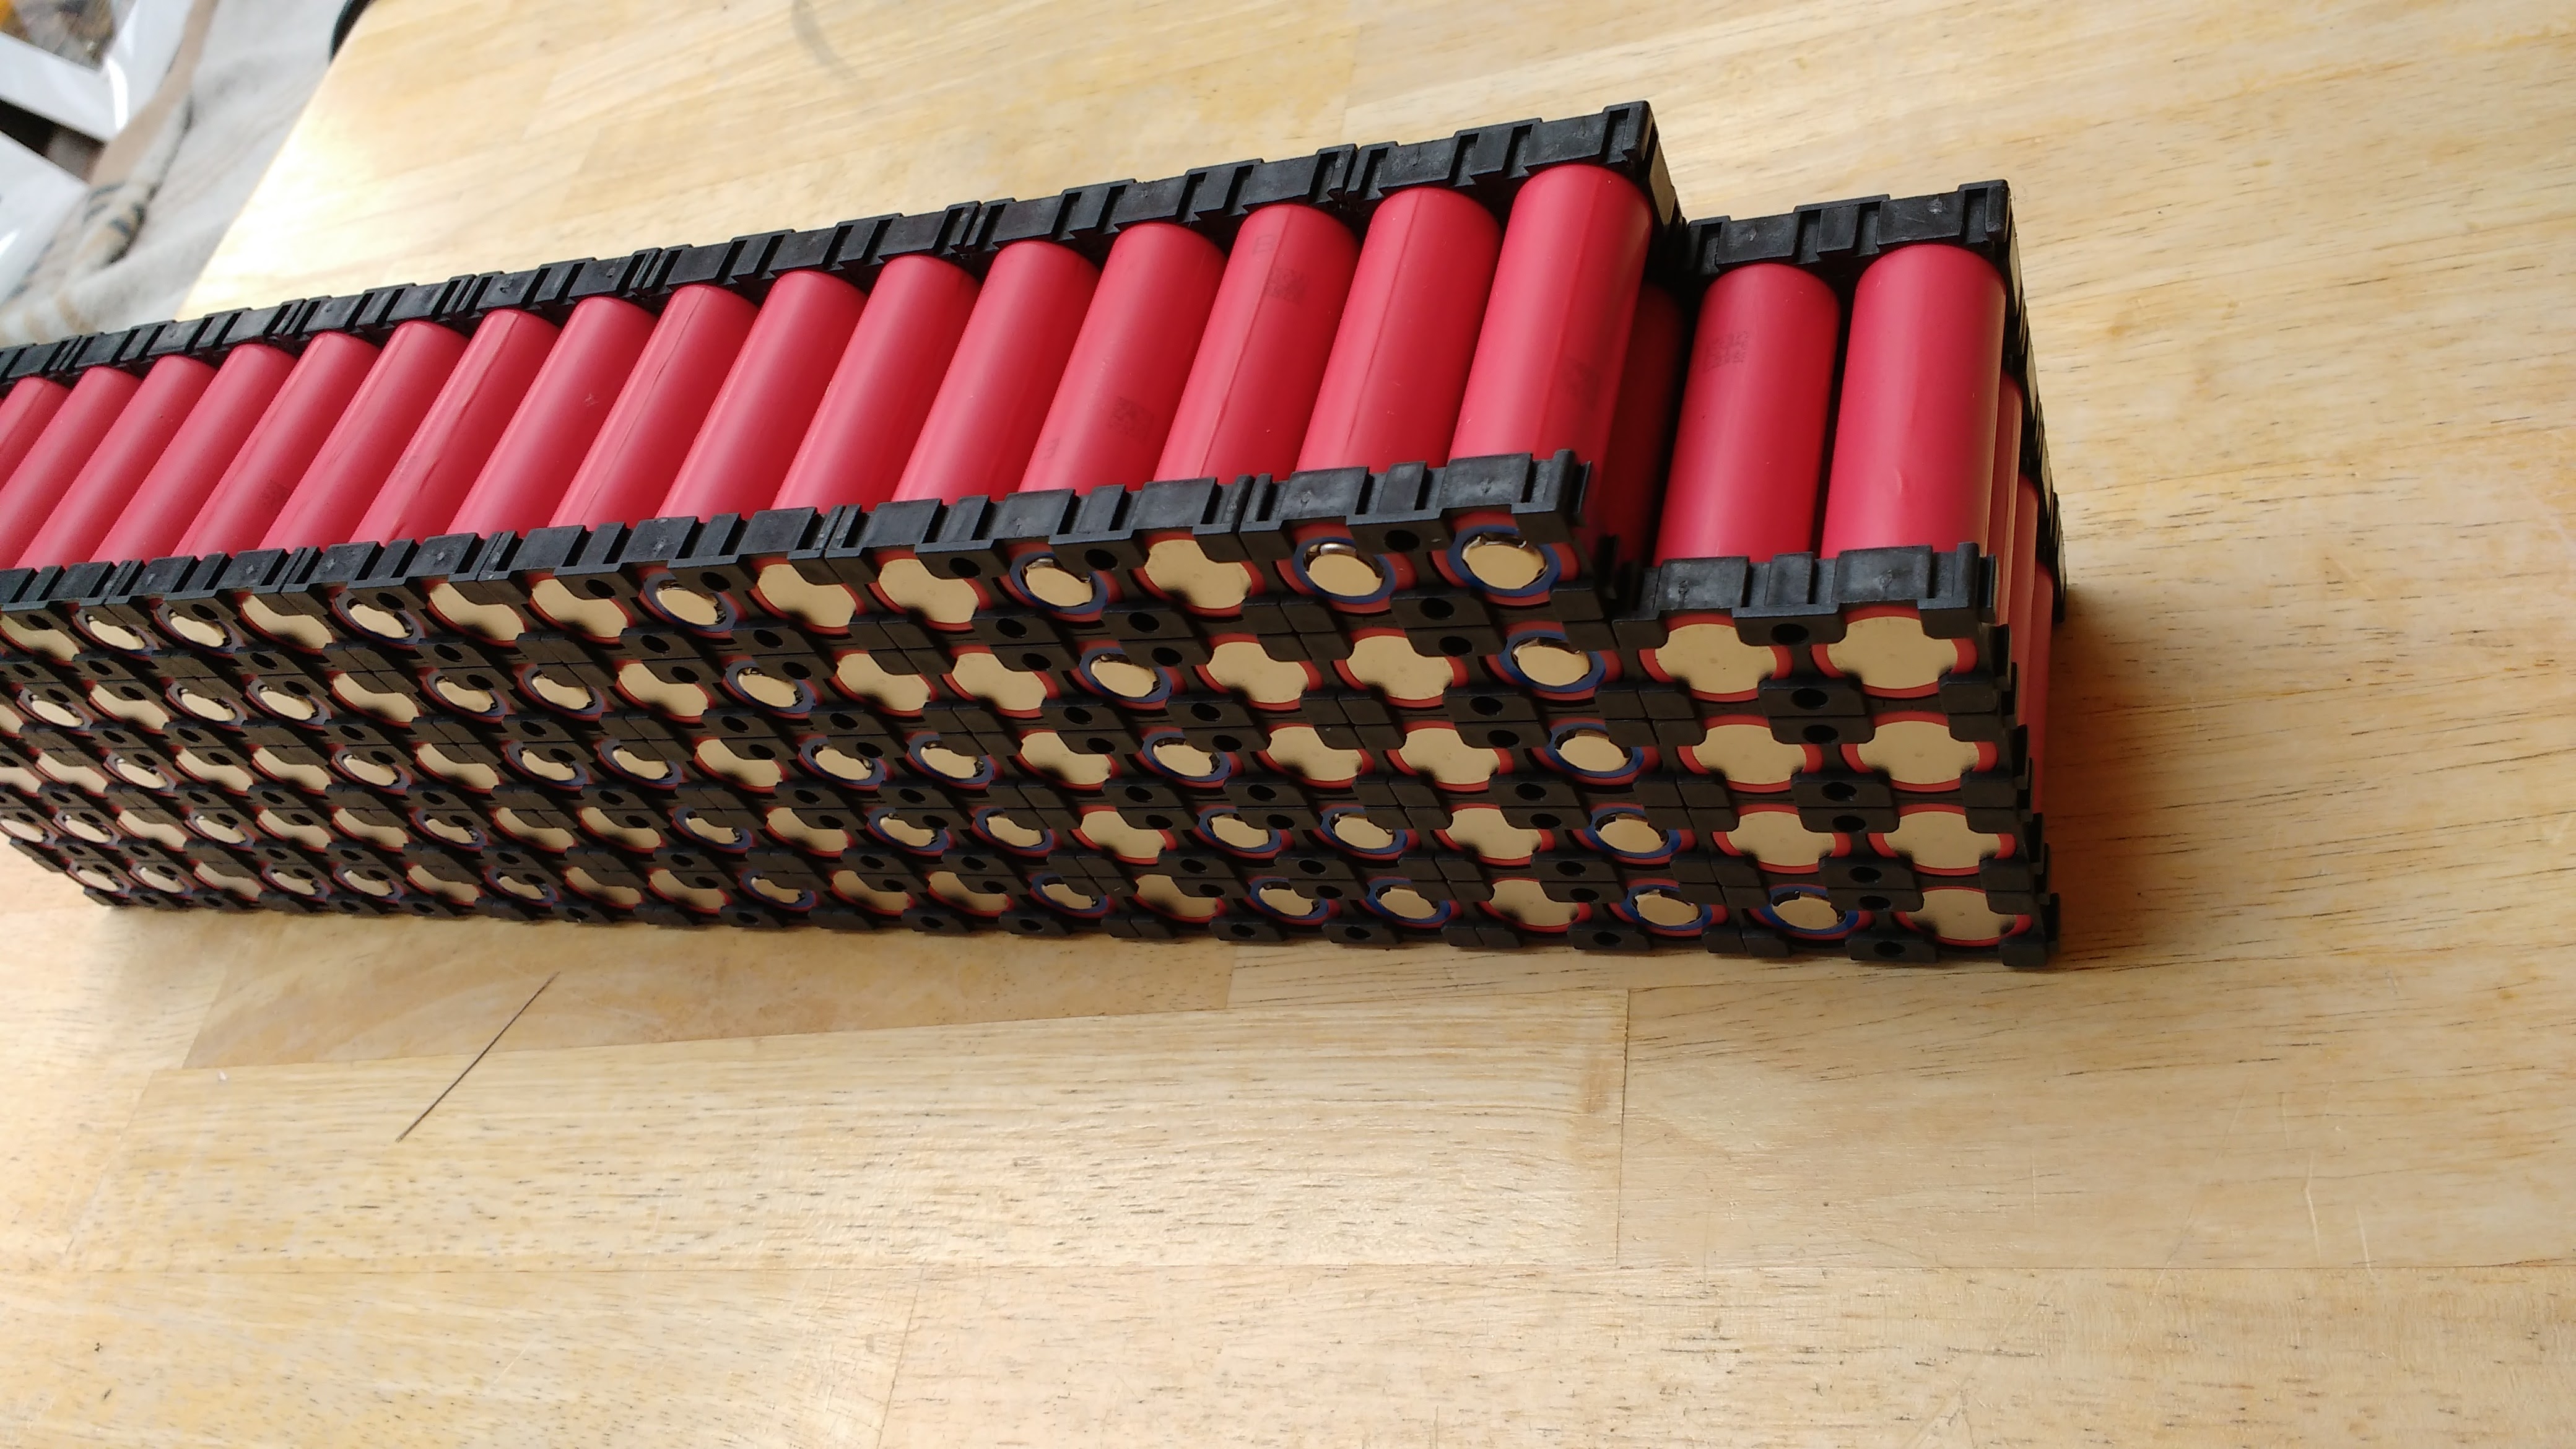
Clearly label the cell groupings so you don’t get confused. Notice 2 groups of 7 welds at the end and everything else is 14 cells. The other side is all groups of 14 cells.
To build your pack you will need to follow these steps
- Put on your safety glasses and Nitrile gloves. This is no joke, when welding these batteries they can blow up in your face and when you’re working with the pack and your hands start to sweat you WILL get shocked. Don’t ask me how I know.
- Lay out the cells and test them all for voltage. They should be within .1v of each other. If ones are too low straight from the factory they might be bad. Set them aside to be tested with an 18650 individual cell tester.
- Put the plastic stencils together in the shape you want. In order to buy plastic stencils from China look at this article. You can also hot glue your pack together but I only recommend you do that if you are very tight on space and need the most power dense pack you can build. Glued packs do not dissipate heat as well as stenciled packs.
- Lay the cells in the stencils in groups of whatever your parallel cell grouping number is. For this 7P pack it means groups of 7. Try to layout the groupings so it is obvious what the groupings are when you build the pack. If you make it too confusing then you might accidently weld something together wrong and short out the cells in the pack. This could be incredibly dangerous, so the best way to lay it out is so that there are no pack groupings that are two apart that are touching. Notice that there is always separation between the groups so that any grouping of an ODD or EVEN number is NEVER next to another grouping of an ODD or EVEN number. If you are building a large triangle pack with a small P number this will be impossible to do so I recommend that you use a white paint pen and draw lines on the plastic stencils between groupings so that you won’t accidently weld a strip between two ODD or EVEN number groupings. I know you think you are too smart to do that, but I assure you it has nothing to do with intelligence, once you start the welding process the higher functions in your brain shut off and your lizard brain takes over and does the grunt spot welding work.
- Cut a pile of nickel strips into different sizes that will span 2,3,4 & 5 cells. You can use a pair of sharp household scissors.
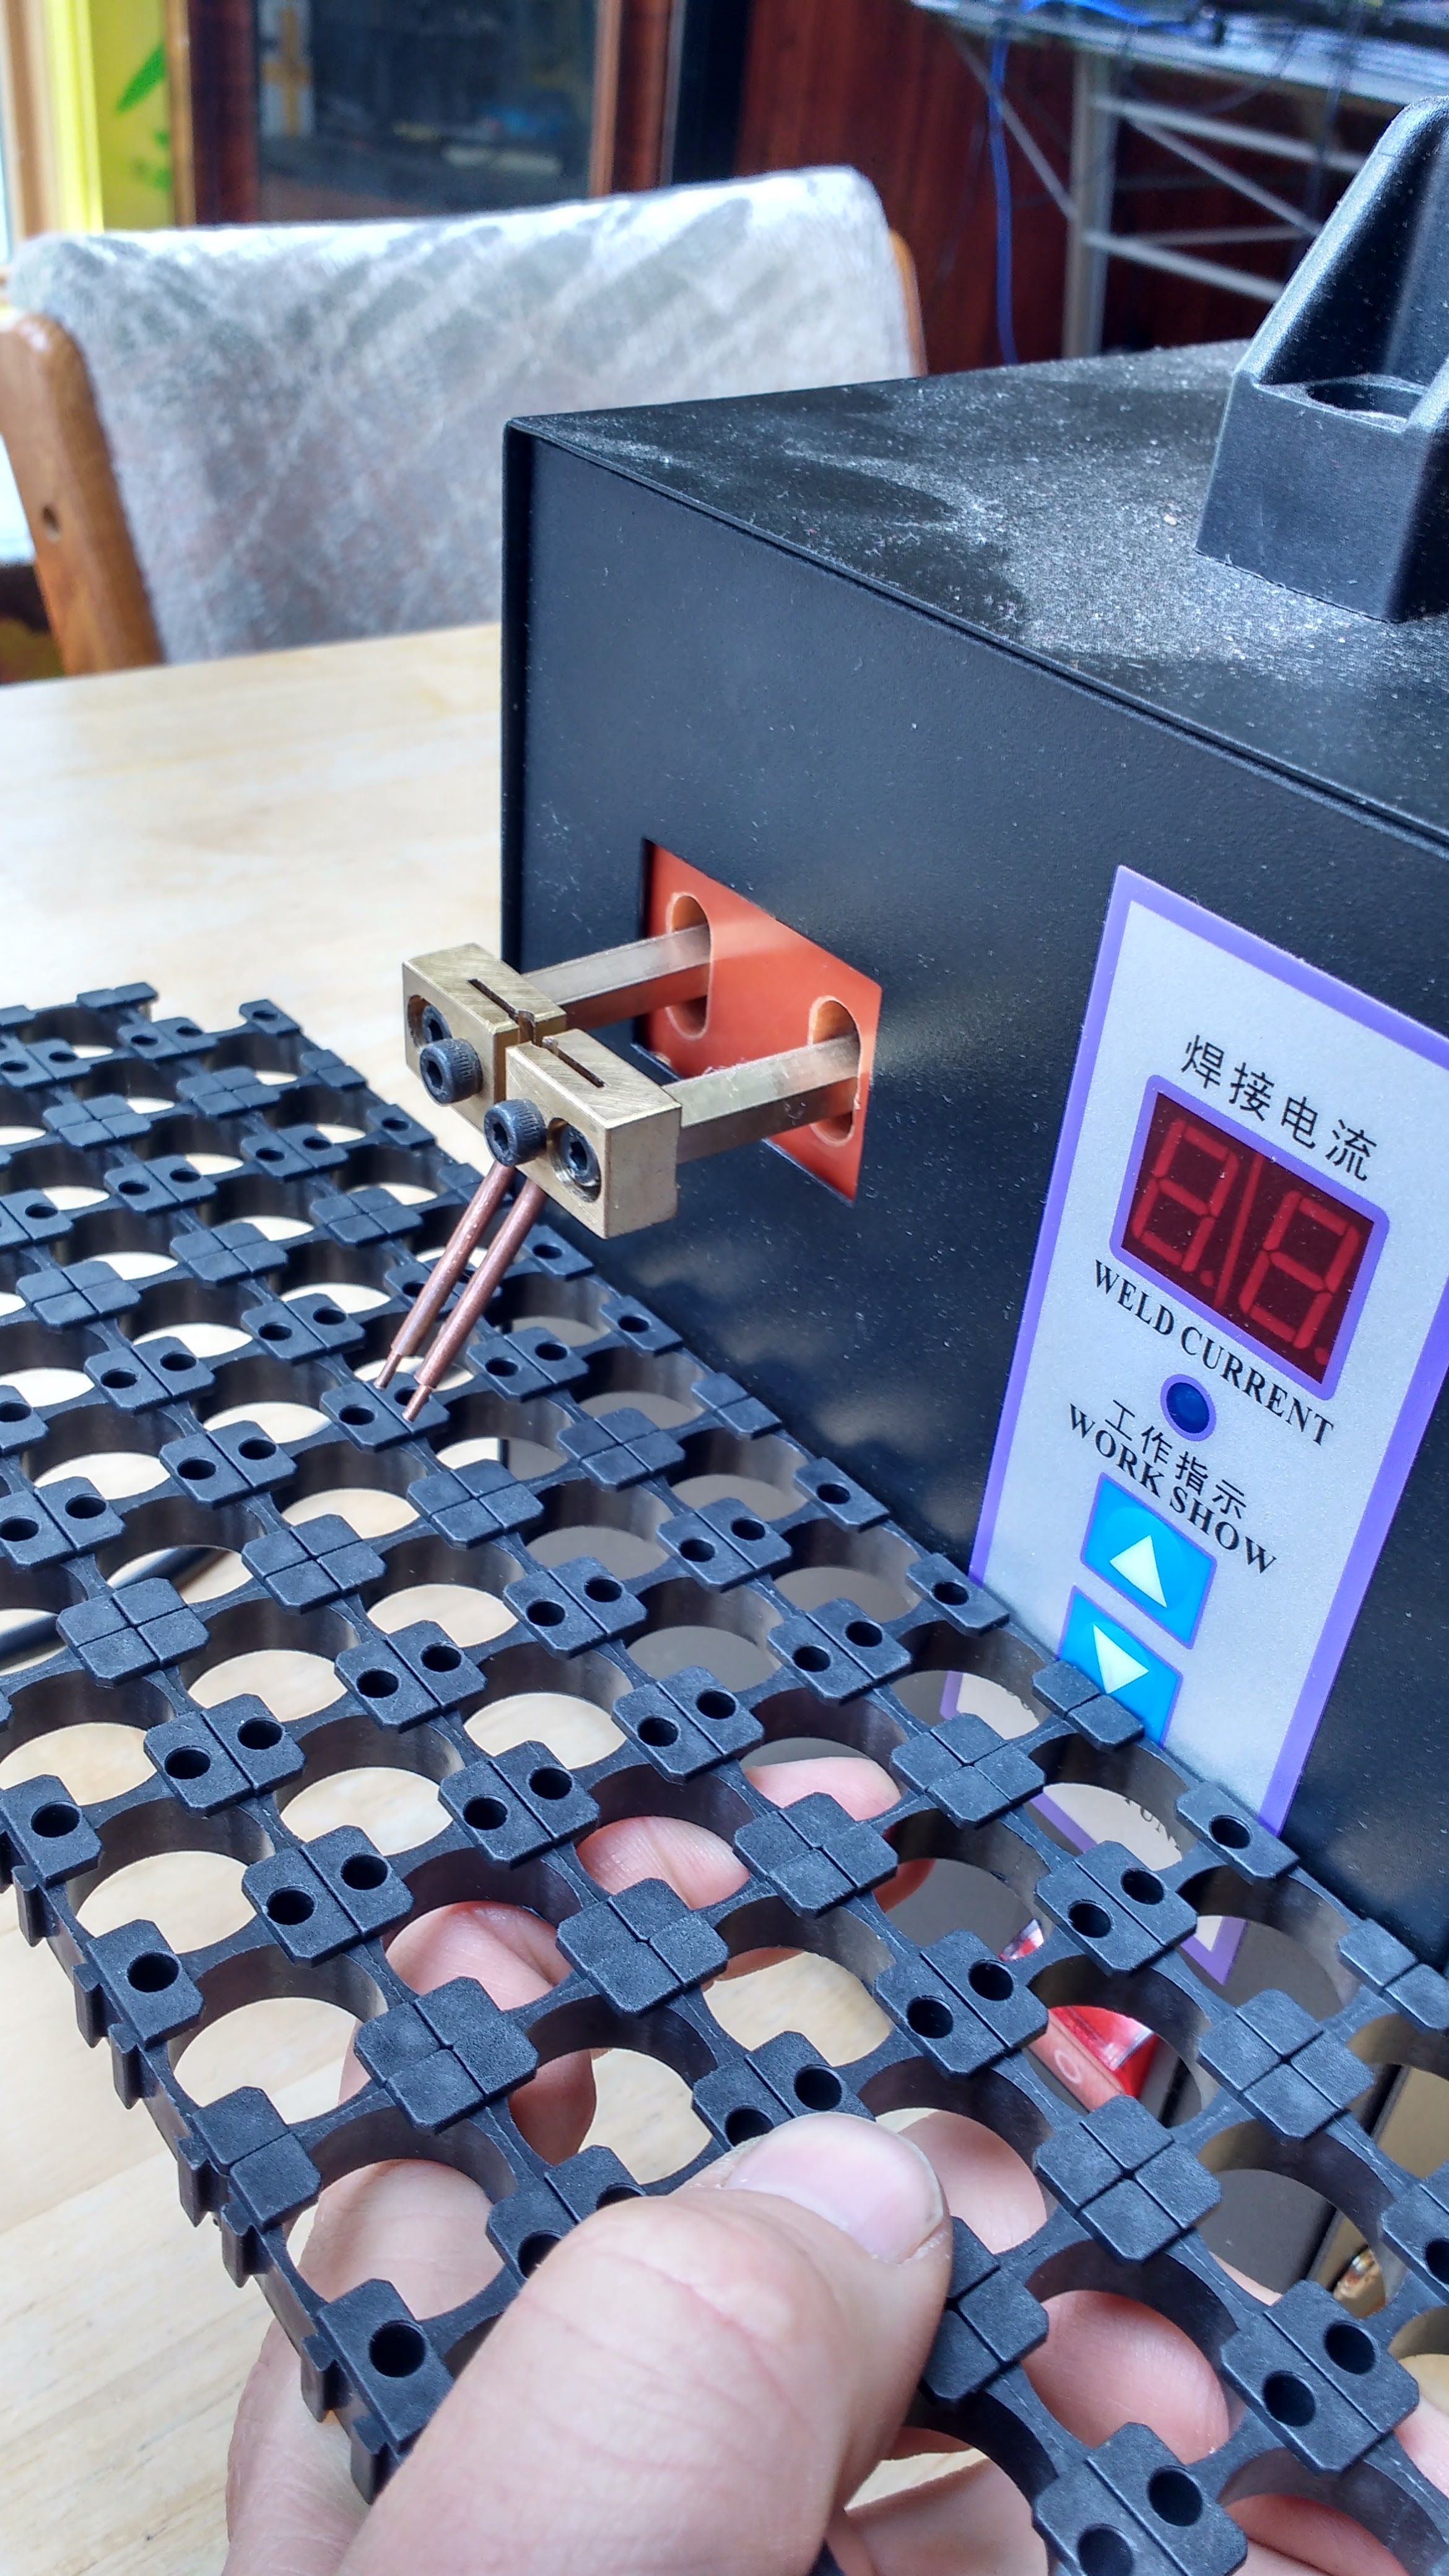
- Start welding the groups together. I highly recommend that you start at one end of the battery (positive or negative it doesn’t matter which) and then work your way to the other end of the battery. The first group of cells you weld together will be the same number as your P number (for this battery it was 7). If you have a low power pack (30Amps or less nom) then you can usually get away with one set of nickel strips, assuming that the strips you got are really nickel and NOT nickel-plated steel. If you are building a 50 Amp pack then you should double up the strips so the pack will carry more current and not be limited by the nickel strips.
- Welding strips is mind numbing work, but you must pay attention. Be careful and thoughtful about where you place the strips down on the pack to make sure you’re not overlapping two even or odd number cell groupings. I spend a lot of time thinking about the pack and how it’s supposed to be laid out and how to keep it from shorting out when I’m building it. Make sure your work area is clean, don’t ever put the pack down on anything metal. Don’t keep any liquids on your workbench. Pretend you are building a bomb that could blow up in your face at any second and you are much less likely to have it blow up in your face. Since this is a 50Amp continuous pack and I only had 8mm x .18 thick strips I doubled them up. For a 30 amp BMS that would not be necessary, one set of strips should be enough. When you first start welding you should try to pull the strip up after your first weld. If the nickel comes off then just keep increasing the spot welder power till it sticks with about 15lbs of pressure pulling the strip 90 degrees directly away from the weld. I did about 3 welds per battery connection, sometimes more.
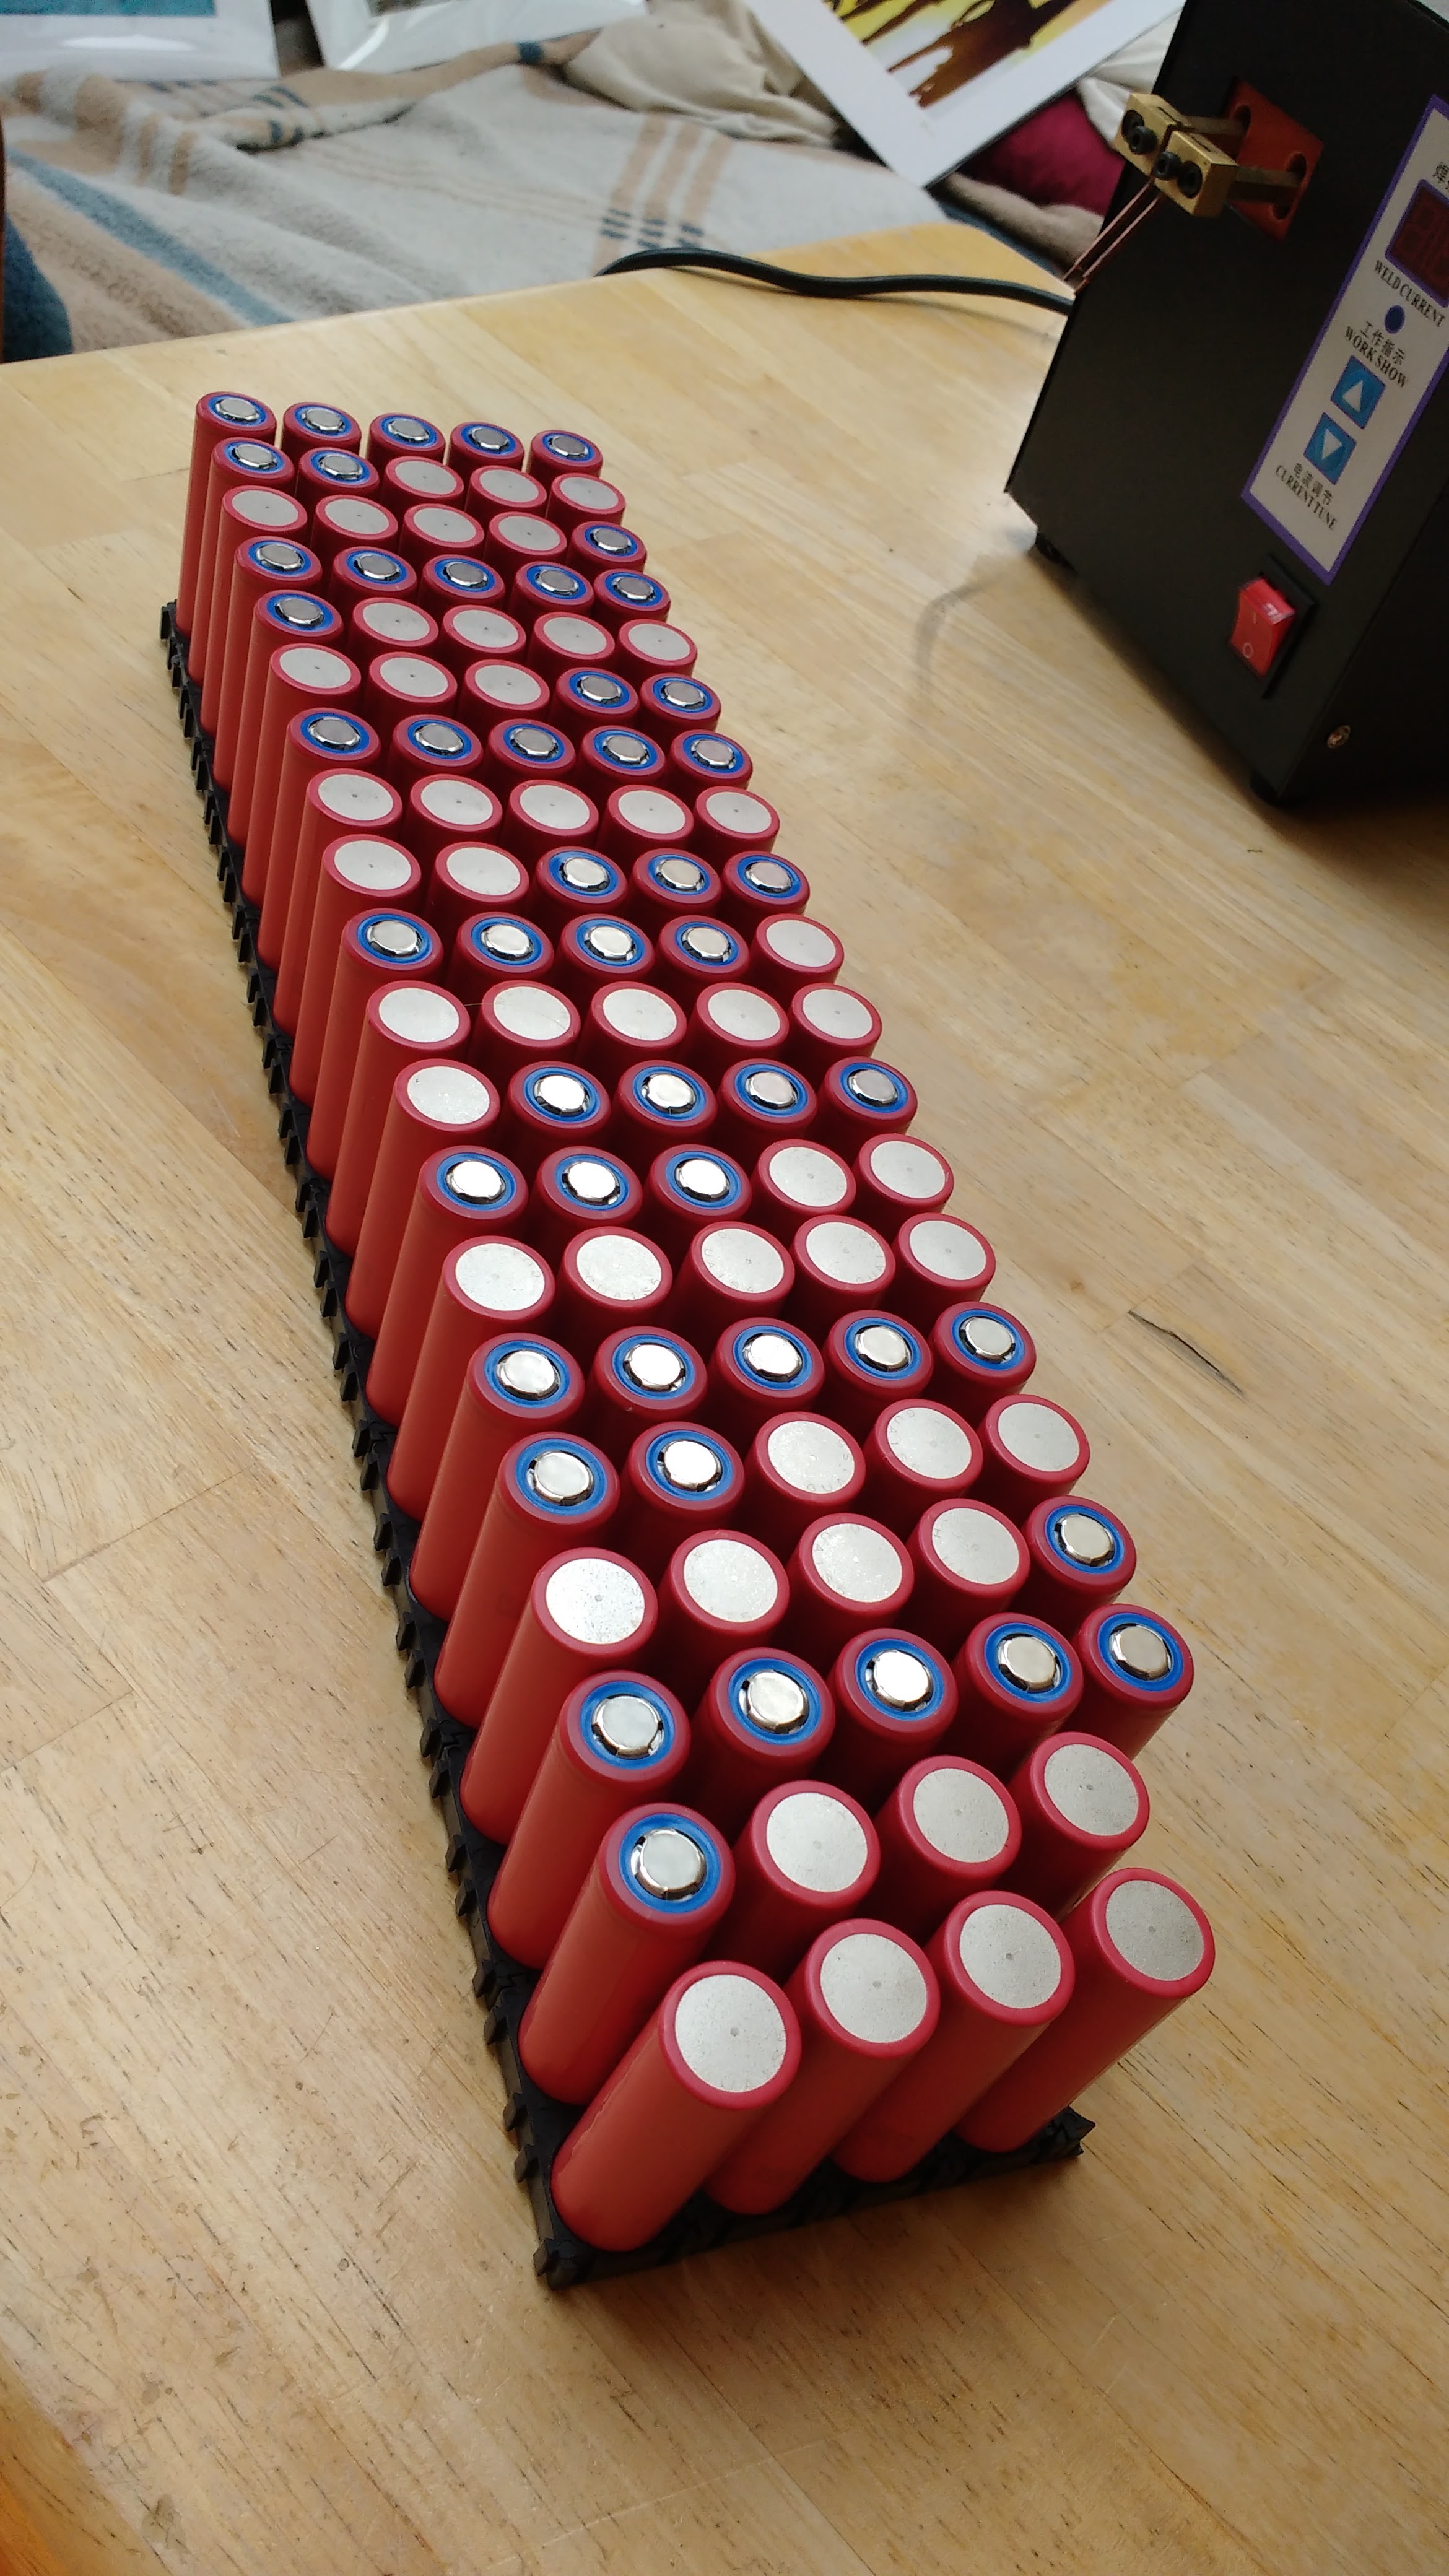
- Once you are done with the first set of welds you will need to flip the pack over and weld together the next 2 cell groupings. If you are making a 7P pack then every set of nickel strips you weld together except for the ends should be groups of 14 cells. The ends should only have 7 cells on them (the positive end of the battery and the negative end). Spot welding the groups together is incredibly boring and takes most of the time building the pack.
- Keep flipping the battery with every group of cells doing the next set of 14 cells (or 2x the P number) until you reach the end. The last cell grouping should be only 7 cells (or whatever your P number is).
- Lay out the BMS making sure not to short the bottom of the BMS against the welded nickel strips. Get an idea of how long the lead wires need to be. I tape the header against the battery in it’s approximate final position.
- This is the tricky part. You will need to weld the individual sensor wires to the cell groupings. There is generally one black wire which should go to ground and then the next red wire next to that goes to cell group 1, the next one goes to cell group 2, etc. I label the cell groupings with a sharpie before I do this so I am absolutely crystal clear as to where my wires need to get soldered. Be extremely careful about not getting the ends of the battery too hot. I highly recommend putting flux on the nickel strips to help the solder stick to the slick surface.
- Solder the other connectors on the BMS to their appropriate places. BMS’s can be tricky and I wrote this short article about swapping out BMSs from frame packs here which you might want to read before you start soldering your BMS. The P- on the BMS goes to the negative lead on the ebike controller (black wire on the XT90 Female plug) The P+ (if there is one) goes to the red lead on the main XT90 female plug, if there is not P+ then that means you need to solder the main power leads of the XT 90 DIRECTLY to the nickel strips. This is by far the hardest solder joint to get right. I suggest that you use lots of flux and flatten and tin the wires BEFORE you try to connect it to the nickel strips. It also helps to weld between cells so the cells don’t get too hot and use lots of flux on the nickel.
- The B- on the BMS goes to the ground of the battery. On this pack, I actually ran two wires to the ground just to make sure there was enough capacity on the wires to not overheat. Like the positive lead, this one can be really hard to get right. Make sure to get the wire ends tinned and flux everywhere (it smells great when you inhale the smoke … NOT).
- The C- goes to the black wire of the charging cable which I usually use as a male XT60 connector. The positive side of the XT60 charging connector should be soldered to the positive side of the battery right next to the main power solder joints. Make sure that your charging and power leads from your pack are long enough to give get about 6 inches away from the ebike pack.
- Wrap the battery in high-quality lightweight cardboard. Old Lego boxes are perfect to use.
- Silicone the BMS to the side of the pack and use heat-resistant tape to tape down all the wires. You can buy cheap heat-resistant tape on ebay, alibaba or aliexpress. More tape is better, in fact you really can’t use too much.
- Create a strain relief for the main charging and discharge cords. I use one large 75lb ziptie with two other zip ties criss-crossed and pulled as tight as you possibly can. If some idiot grabs the battery by the cables and picks it up, it might survive. If you are successful at making an idiot proof ebike battery, then they will probably make a better idiot.
- Heat shrink the entire pack with a large piece of tubing. I’ve used cheap PVC tubing which is basically useless. I can’t seem to find the nice thick rubber tubing anywhere other than the Lunacycle website which is pretty pricey at $3-5 a foot right here. Highway robbery.
- This pack I took some cheap closed cell foam pads that they sell at Lowes and Home Depot for about $15 for 5 2′ x 2′ squares and are designed to be put together as soft flooring for garages as such. You can cut the pads up with scissors and then silicone them to the PVC which makes for a very robust, water-resistant and shock resistant pack. If you don’t want to do that you can just create a blanket for it out of Thermarest pads which also works very well.
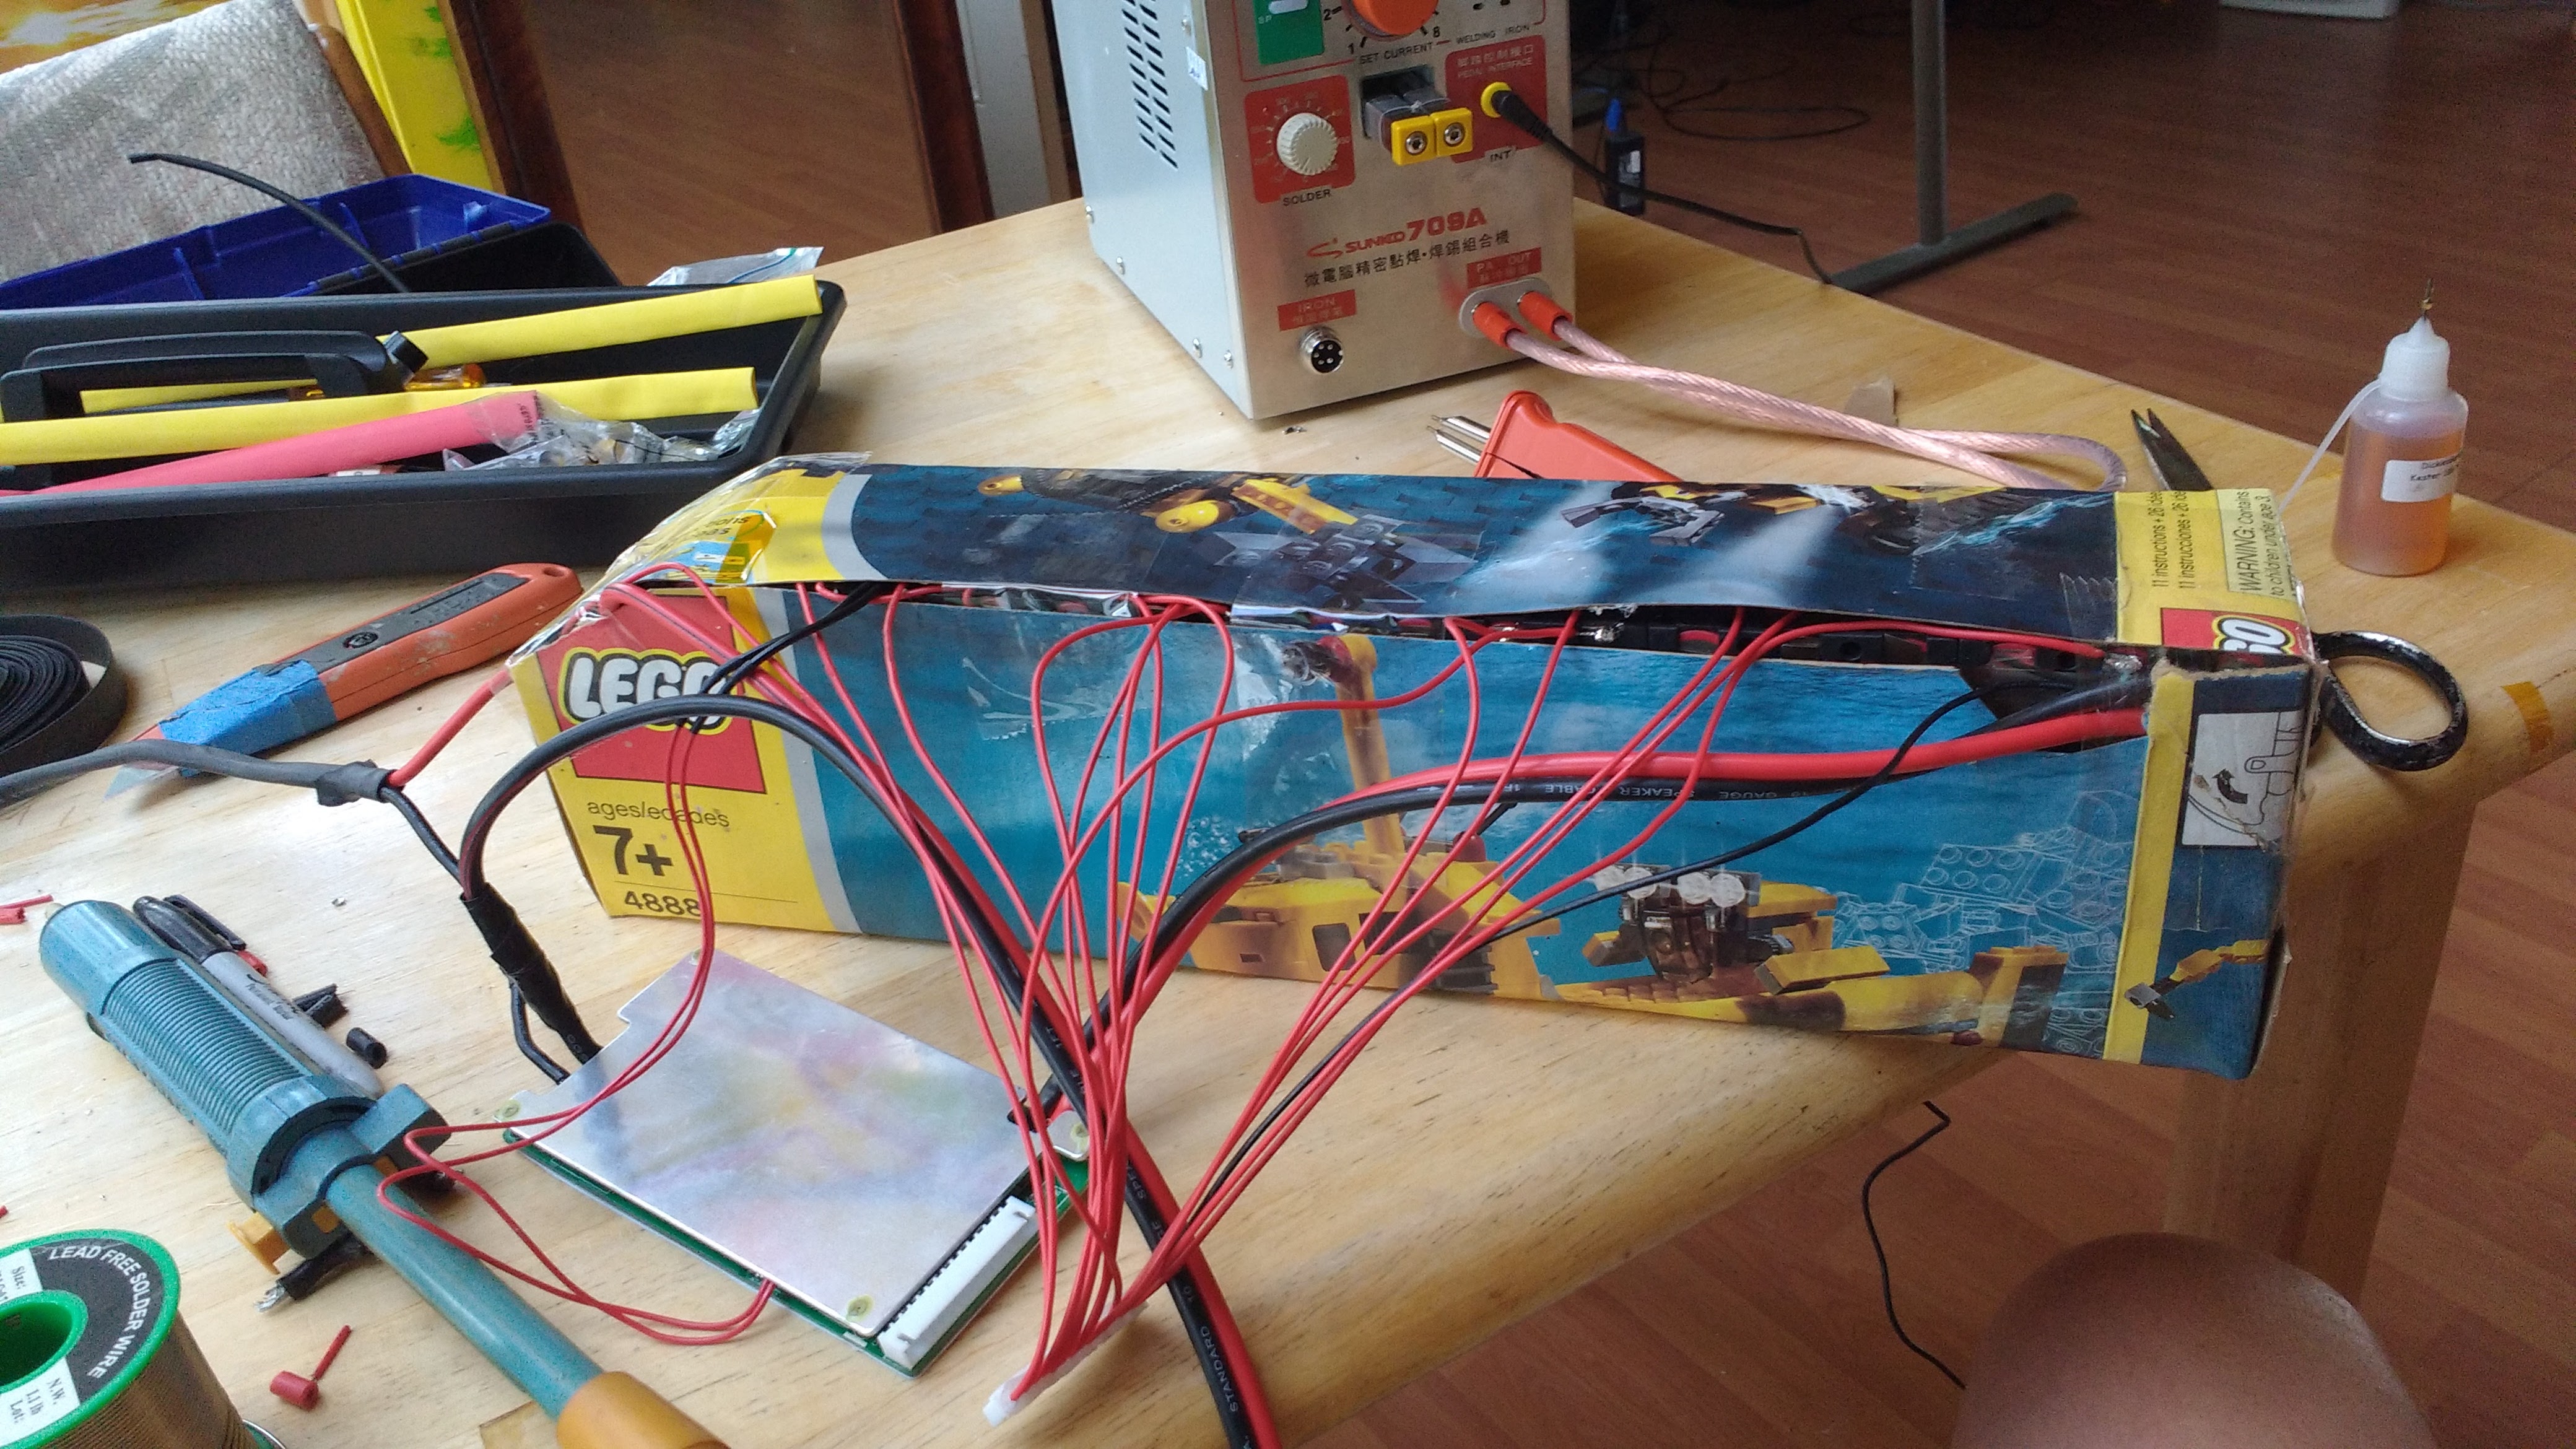
Lay out the pack before you start in with the heat tape. Nice clean work bench kitchen table, right? Not.
Building your own ebike pack is something that every ebike enthusiast should take on at some point in their life. Although it is dangerous the danger can be easily mitigated by a little common sense. I am not a very technical person and although I have soldered quite a bit, I have a hard time reading electronic schematics and troubleshooting broken stuff. With a very modest skill set, I was able to sit down and in about 25 hours of work build a pack that looks like crap but actually works pretty well. Was it worth it in the end? No way. I didn’t do it to save money, I did it to say that I did it and so that I would understand what kind of labor went into every ebike battery I purchased. I have no regrets about the process, but I am skeptical that I would ever do it again knowing what I know now. When you can buy a complete battery with a warranty for just a few hundred dollars more, there is little financial incentive to build a pack from scratch. In the end, I have no regrets and there is no feeling like the satisfaction of beating the hell out of something that you created from scratch to fit into the frame of your full-suspension custom-built 3000W electric fat bike.
Ride On.
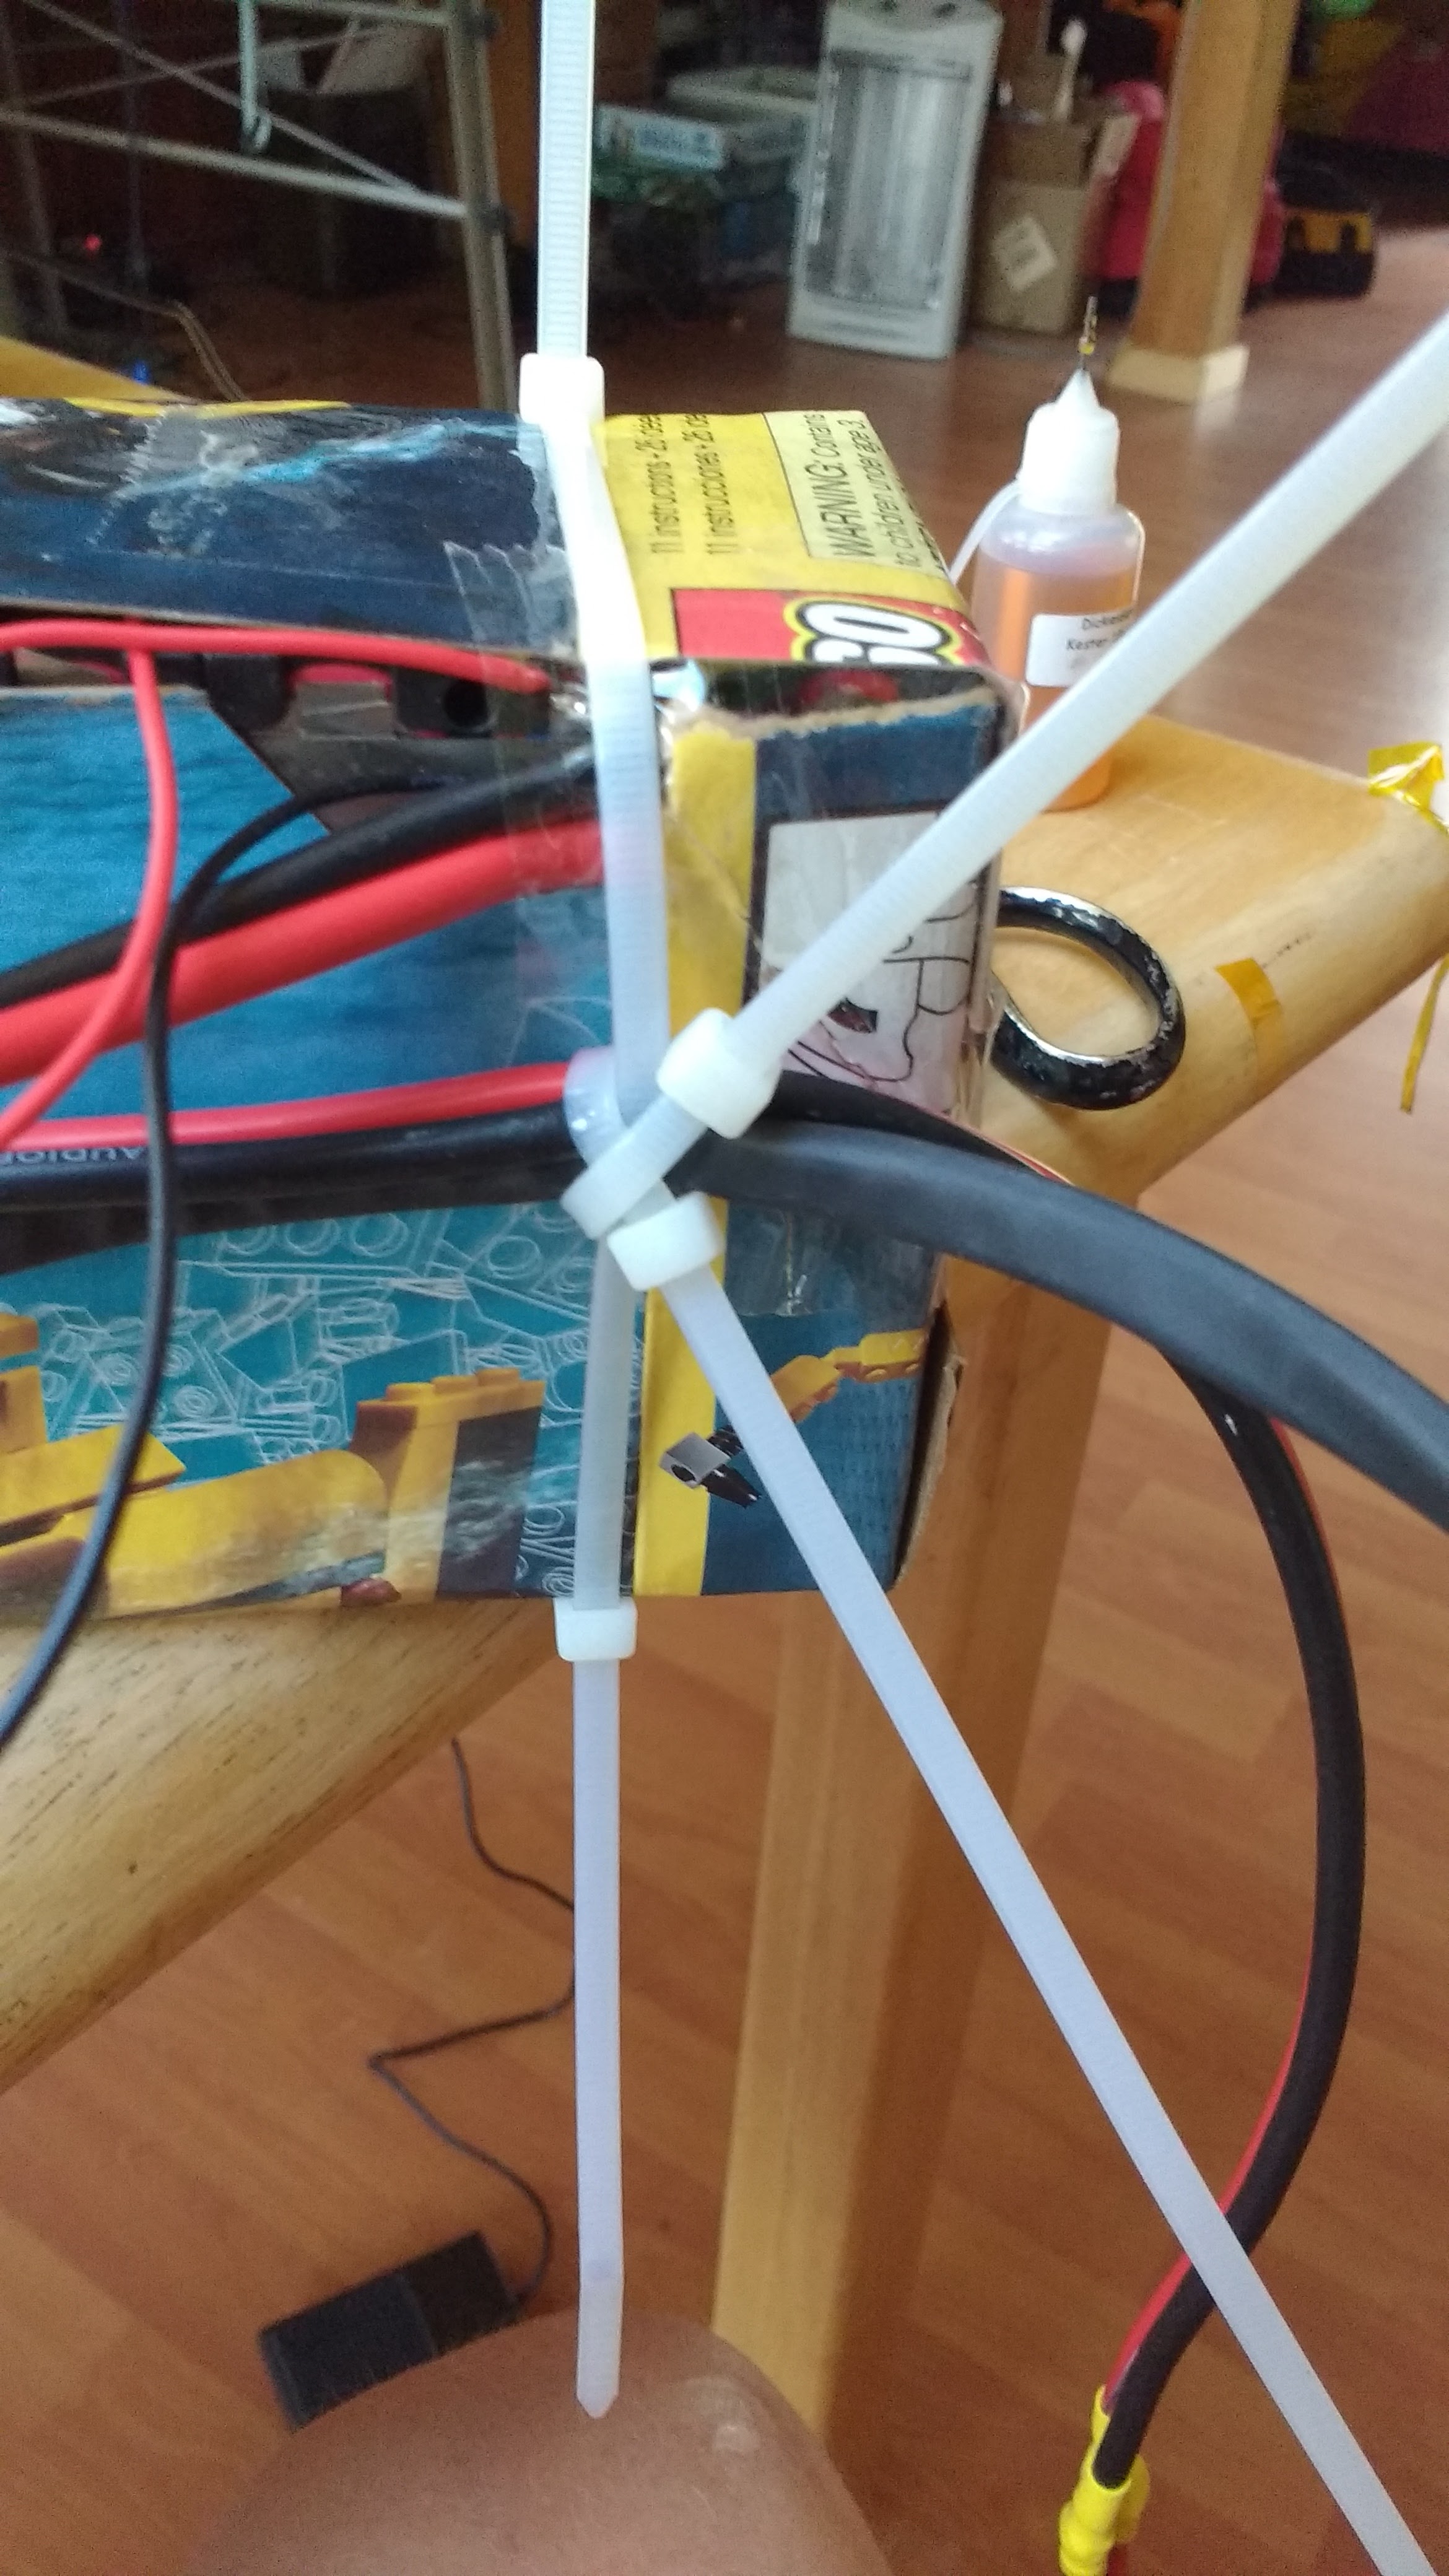
A closeup of the strain relief, don’t skip this step
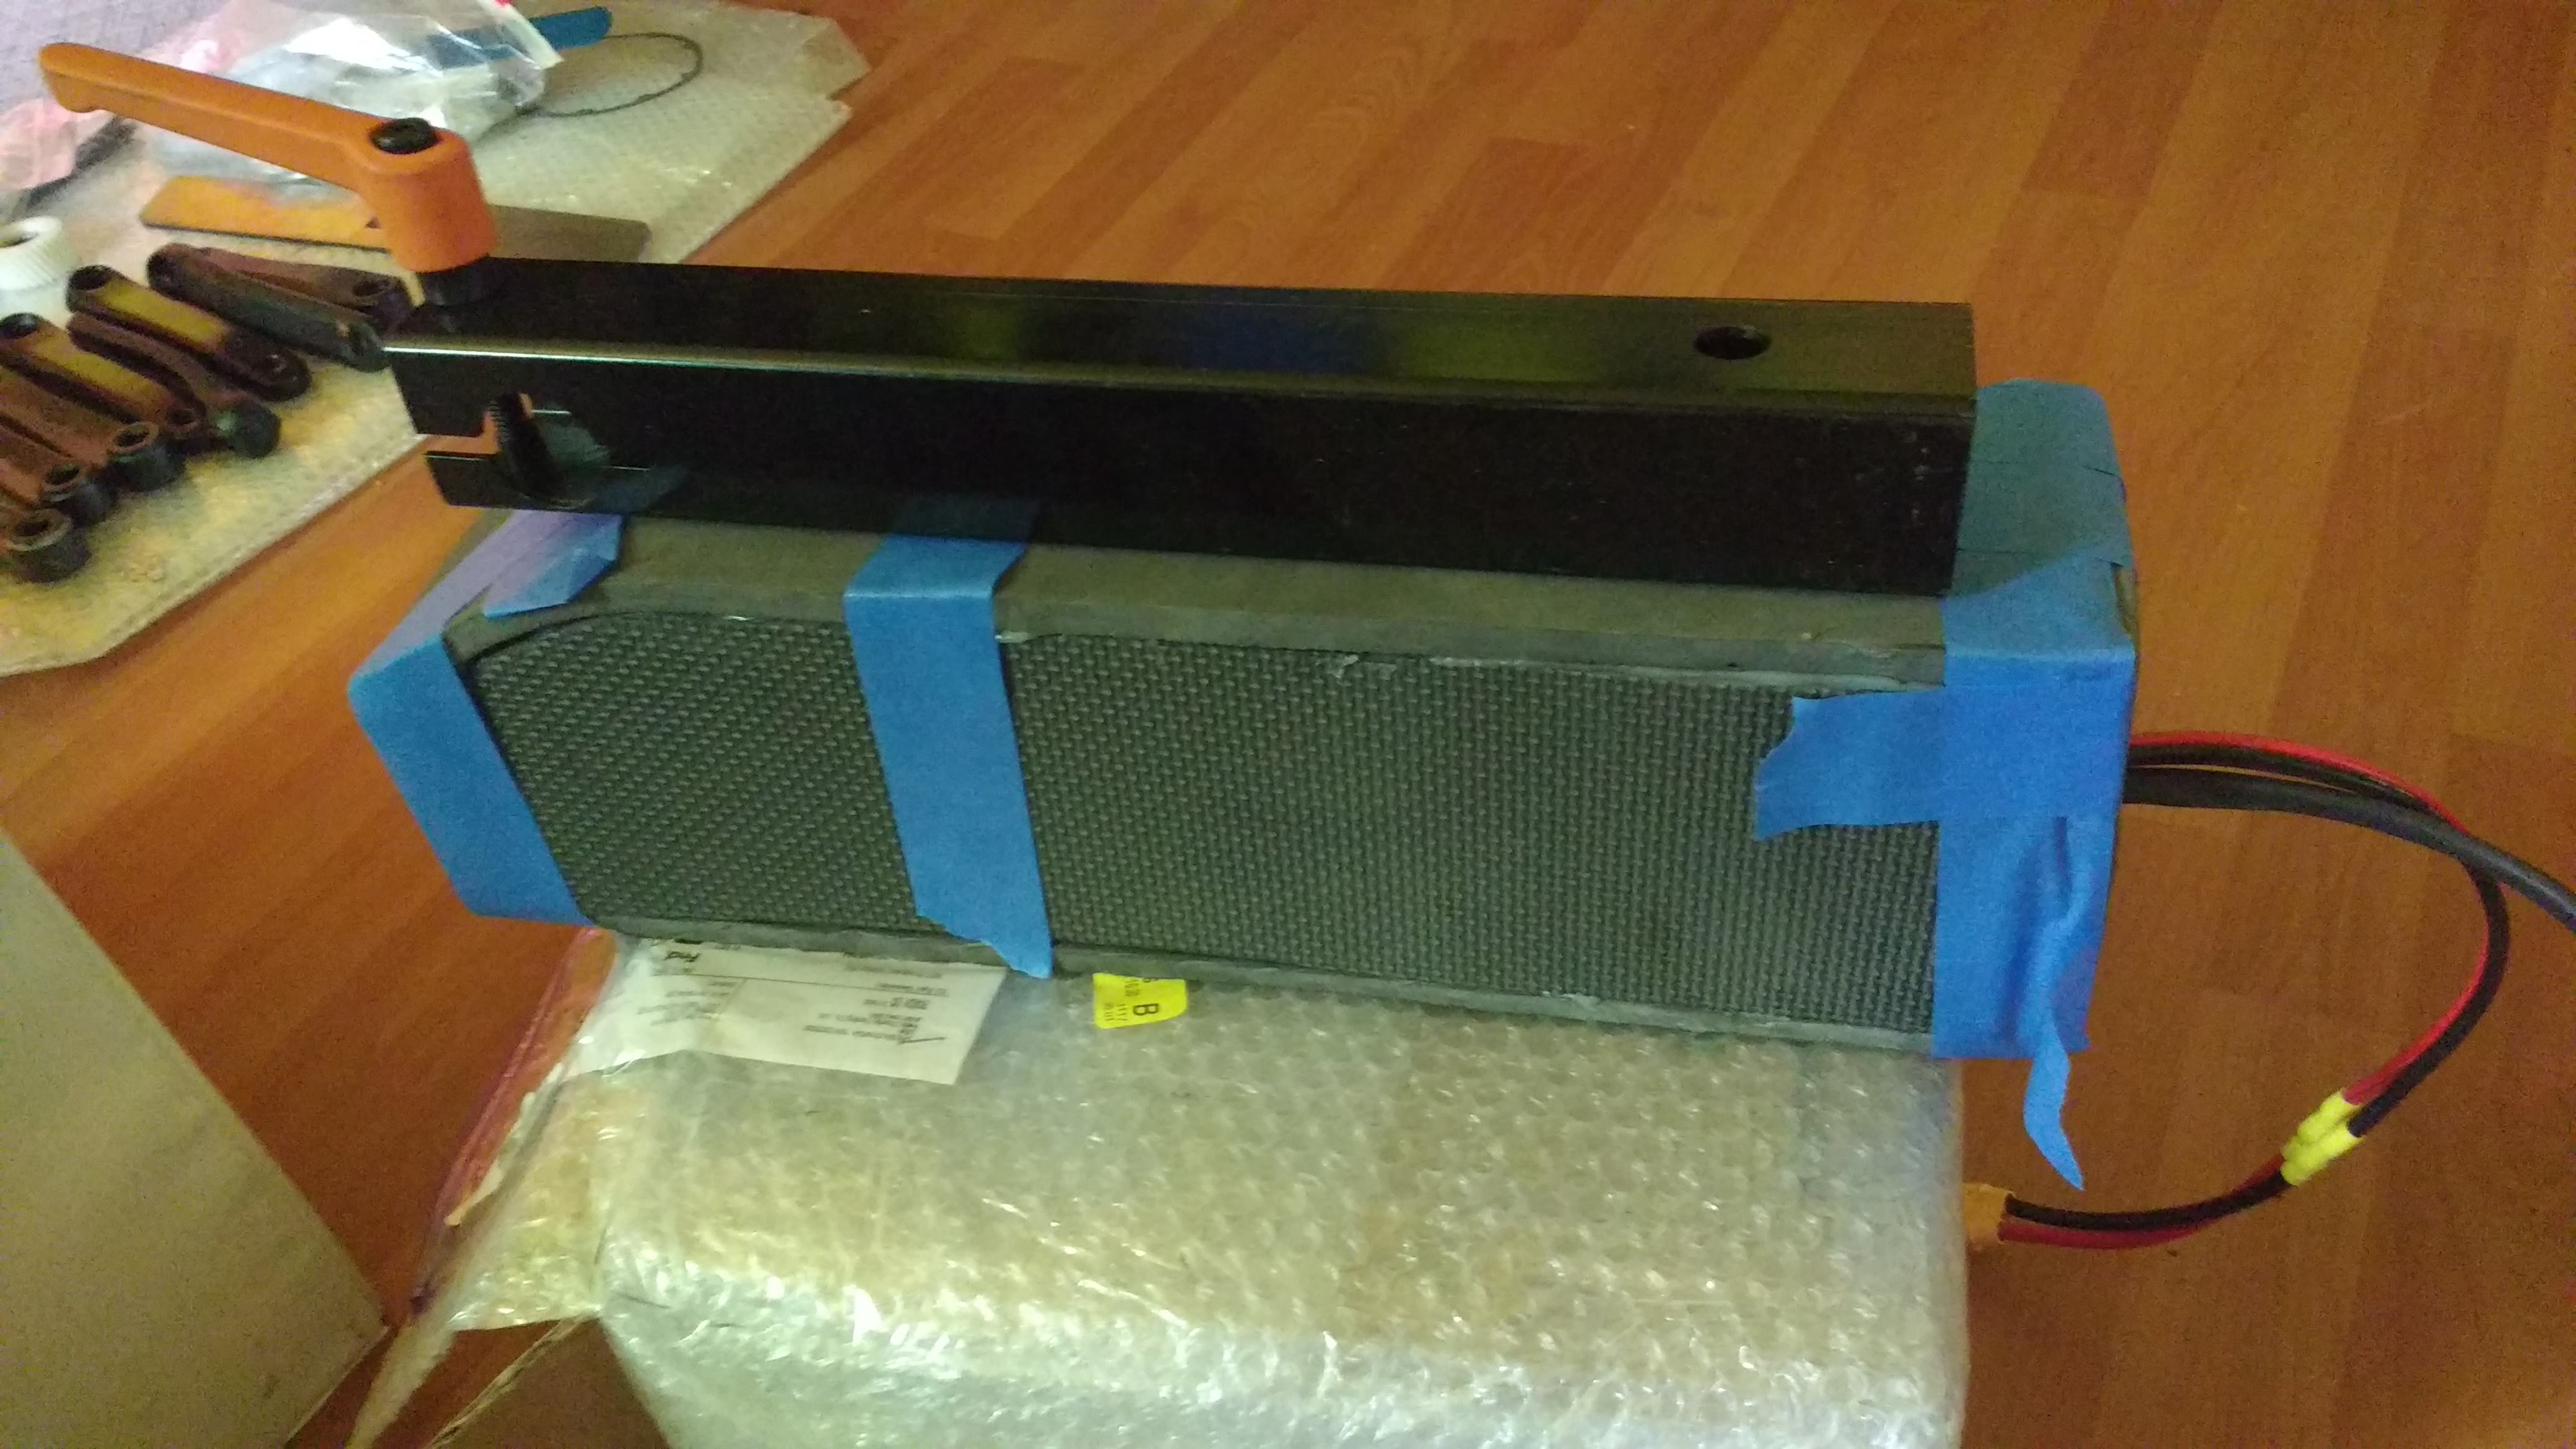
The battery heat-shrinked and wrapped in closed cell foam. The weight on the top keeps the pads down while the silicone dries.


Yeeeeeahhhh… I am happy for you that you finally got that homemade beauty finished =]
The Sunko spot welder is an okay entry level welder and does a good job as long as you don’t push too hard with really thick nickel strip.
Loved the “Bruno ‘more power’ Buccianti” hahahahaaa.. I am still laughing here….
*guess what.. I have a fatty surprise for you… I will make a video soon… you will love some hacking features hahaha =]
LikeLike
Oh you are my hero Mr power, waiting for that video!!!
LikeLike
Haha I hope you make your packs from now on. Each one will get better and better although your first isn’t pretty after a couple builds they become super refined and things of beauty. Don’t stop you’ll get better I promise :-))
LikeLike
nice work man 🙂
LikeLike
Pingback: Electric Fat Biking In The Woods Is So Much Fun, I Can’t Believe Everyone Isn’t Doing It | ElectricBike-Blog.com
Pingback: 15 Tips To Having More Fun Than Everyone Else Electric Fatbiking In Snow | ElectricBike-Blog.com
Sorry, I’m a pessimist, I will be waiting for the “other” youtube video. Do you have a quick release from the bike?
LikeLike
Pingback: There And Back Again : 100 Miles Of Destination Winter Ebiking On Skyline Drive | ElectricBike-Blog.com
Pingback: It’s Time To Howl, Baby : The Lunacycle 30Q Wolf Pack – 50 Amps Continuous at 52v 12Ah | ElectricBike-Blog.com
Pingback: It’s Time To Howl, Baby : The Lunacycle 30Q Wolf Pack – 50 Amps Continuous at 52v 12Ah | ElektricBikes
Pingback: To Boldly Go … The Christini All Wheel Drive BBSHD Electric Fatbike | ElectricBike-Blog.com
Pingback: Phatter Phukker : Snowshoe 2XL Steel Lurch DIY BBSHD 10 Sp Ebike 55lbs ~$1780 w/ out battery | ElectricBike-Blog.com
Pingback: Everything I Own Is Now Obsolete : Christini AWD Fat-E Ultra Max 2XL Snowshoe Ebike | ElectricBike-Blog.com
Pingback: Using eBikes as medication in the battle against depression | ELECTRICBIKE.COM
Pingback: I’ve got the power: Using the Cybertruck to power my off-grid Tiny House | ELECTRICBIKE.COM
Wow, good job.
But I think you should buy a battery case instead of packaging battery modules like this.
LikeLike
Pingback: 100 Kmh Of Destination Winter Ebiking – ebee
We provide laser welding machine for lithium ion battery.
LikeLike
Pingback: Everything I Own Is Now Obsolete : Christini AWD Fat-E 5 Ultra Max 2XL Snowshoe Ebike - Christini Bicycles
Pingback: To Boldly Go … The Christini All Wheel Drive BBSHD Electric Fatbike – Christini All Wheel Drive Bicycles