
Every cool project needs a decent and terrifying paint job, Happy Halloween kiddies
For the last several years my wife and I have gone from a single tiny patch of Asparagus to having Organic and Permaculture garden and orchard that is well over 2 acres of cultivated land. We have hand grafted hundreds of fruit trees and moved many tons of soil, leaf matter and woodchips mostly by hand. I’ve found a level of peace in my heart from hard work and sacrifice that I never thought I would ever have, and that has led me to the pursuit of having a farm without fossil-fueled machinery nor beasts of burden. I’ve wondered how much my wife and I can accomplish with just our bodies and whatever electric-powered tools we can obtain or build. The answer is that you can do a lot more work than you think you can, especially if you’re not burdened down with a full-time job. Last year we decided that we needed to build an electric lawn tractor both for mowing and for moving things around the property so we set a budget of $2000 to build something that would suit our needs that we could easily charge from our off-grid solar array. This article is about that journey and how we ended up with a 5000W Craftsman lawn tractor with a Motoenergy ME-1004 200 Amp motor and a custom-built 13S20P 60Ah 48v battery pack out of 18650 30Q cells.
Disclaimer: This story includes a lot of horrid details, horrendous mistakes, and 3 destroyed BMSs so it’s not for the faint of heart.

This was the fated pack I made before it got chopped apart and put back together again
When we started this project there were no electric riding mowers on the market that we could find. I looked on craigslist and found a nearly mint craftsman lawn tractor with a blown engine for $200 about an hour from where we lived. I went to look at it and I really liked how the craftsman tractor had very little electronics, almost everything on it was manual. There were a few safety switches but the mower engage was mechanical and so was the hydrostatic transmission. When I got the tractor home I was able to just gut the entire wiring harness and throw it all away. I didn’t want any safety cutoffs for the motor or blade if I got off the seat.

The Motenergy ME-1004 motor had a shim that needs to get removed with a crowbar
After looking around for an electric motor to put in the craftsman I ended up settling on the Motoenergy ME-1004 which is designed as a drop-in replacement for most lawn tractors. It has the right shaft to mount the pulley on and at 48v nominal it runs at about the same RPMs as a normal gas motor. You don’t need a motor controller with it, just a contactor (essentially a high amperage relay) and the motor just pulls whatever power it needs from the battery. This kind of setup works pretty well with Lead Acid batteries which are designed to easily put out over 700 Amps for short bursts (it’s called cold cranking amps). Using a contactor and not having a motor controller becomes much more of an issue when you’re trying to run the tractor with a 18650 pack with a BMS. I ended up smoking 3 BMS’s before I gave up on using a BMS with my 18650 pack and just wired it directly to the battery. All of these pack’s ends were glorious and also painful at the same time. Each time I smoked a $500-1000 pack I was left wondering what the hell I was doing.
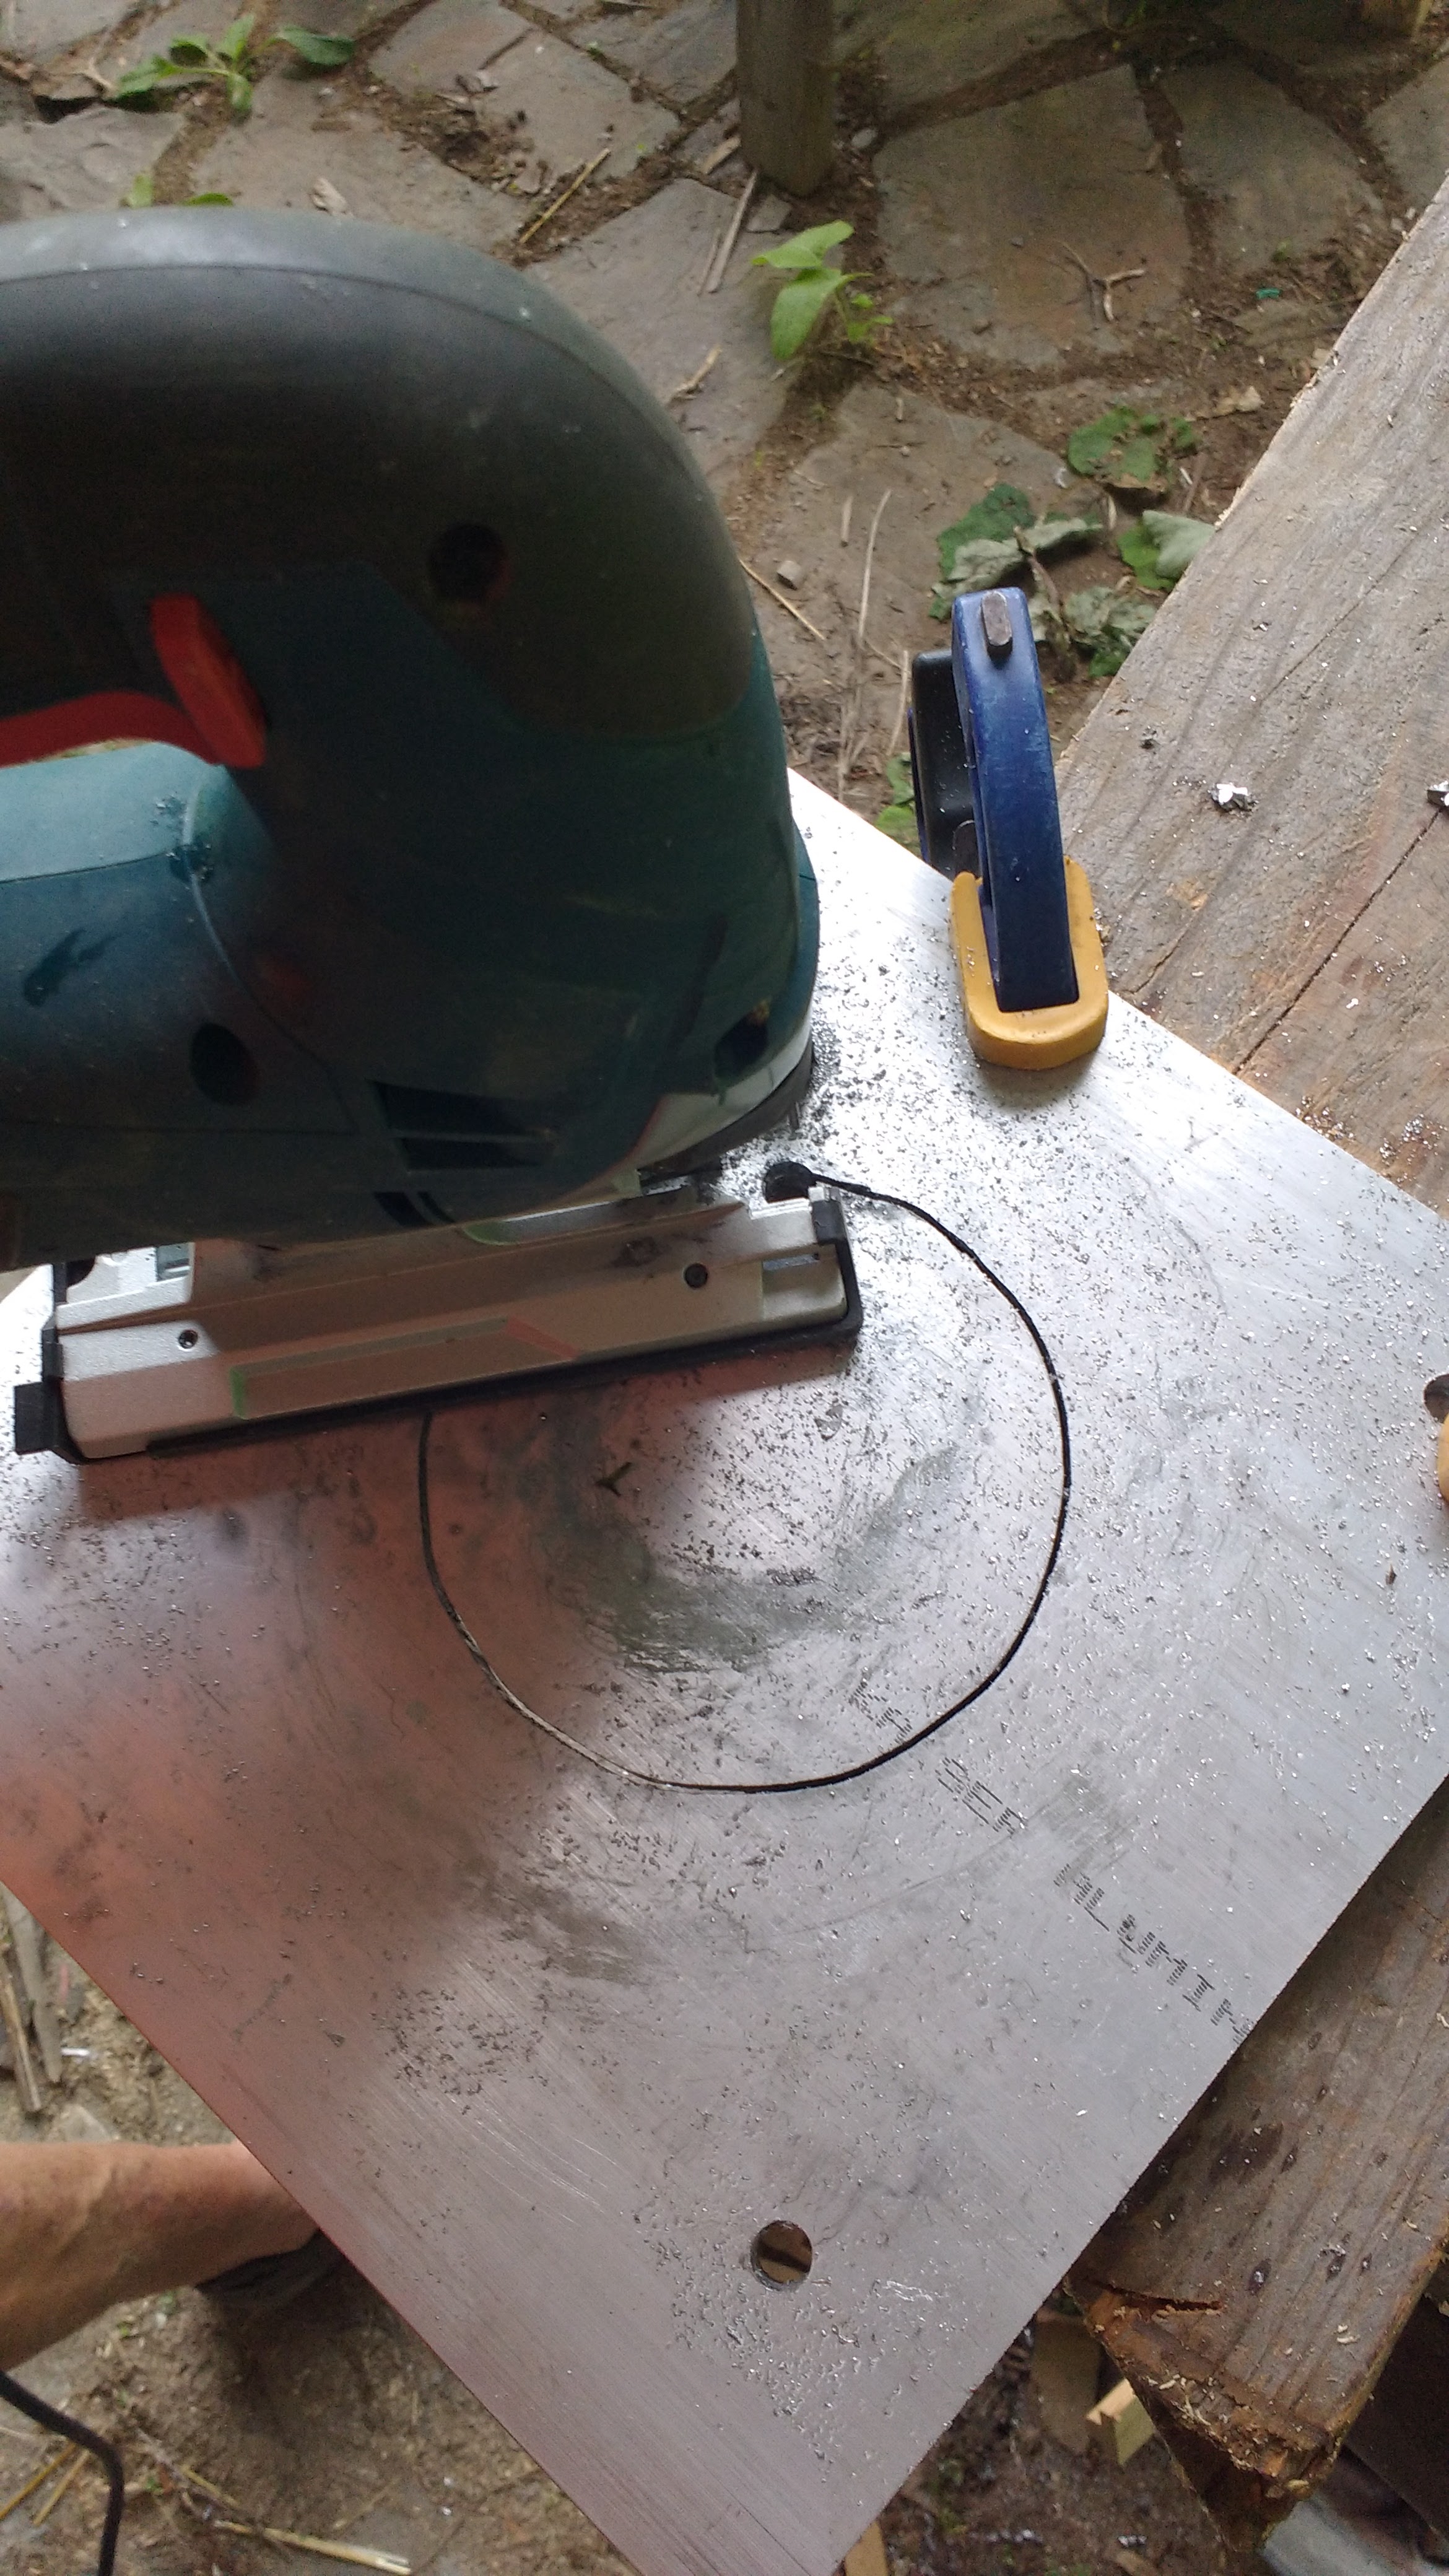
You can cut aluminum with a jigsaw, even really thick aluminum, cutting fluid helps
The day after I put the order in for the Motoenergy motor through evdrives.com I was at Home Depot and lo and behold they were showing off a brand new Ryobi electric powered 48v mower with 75Ah of sealed Lead Acid packs for $2699. After a year of being out this mower has 476 mostly positive reviews, so in retrospect, the smart thing to do would have been to return the Motenergy motor and just eat the $200 for the Craftsman tractor and forget about building an electric tractor from scratch. I really like to do everything the hard way so I kept going with the electric tractor build.

You can mark and drill out the holes with a standard power drill and some Tap Magic
Mounting the Motenergy motor on the craftsman was extremely easy and it took me less than a day to do. I bought a thick aluminum plate from ebay then drilled holes in it with a standard screw gun and Tap Magic (cutting fluid). I lined the electric motor right up with the center of the hole and then had to line up the pulley properly. I had to jam a washer down into the pulley housing to get the spacing to line up properly. It is important that on your electric tractor that the pulley is more or less in the exact same position as it was with the gas mower. I used the key switch on the tractor to power the contactor and then I hooked up a 300Amp fuse that I bought on ebay for $20 (it had 2 fuse holders and 5 fuses). I also bought a bunch of 2AWG welding wire from evdrives which was plenty thick enough and easy to work with.

The Motenergy motor mounted with a metal plate above it to hold the battery
When doing the wiring for the motor I found that the easiest way to make a good connector with the lugs was to fill the tin plated lugs with hot solder and then plunging the tinned ends of the 2AWG cable into the hot pool of solder. The whole procedure can be hard to do unless you have a very high power solder gun or a small propane torch similar to the ones you use for sweating pipes. I have never had a connector that was put together in this way fail, although I have had crimp connectors fail to work properly when you are using 200Amps or more. I tested the setup with the motor by tying 5 of my 52v nominal ebike packs together in parallel and proceeded to fry the BMS on a couple of the battery packs. When the tractor was running it was a terror to behold. The engine ran way too fast, the tractor drove too quickly and the mower ran so fast I thought the blades were going to fly off it. If you consider that the normal Motenergy ME-1004 was designed to run with 48v of lead-acid (which would sag down to below 40v under a 200 Amp load) and I was running it with a 52v Lithium pack which was up around 58v fully charged and only sagged down to about 54v under load you can see that the extra 14v of power was making the motor run way too fast.
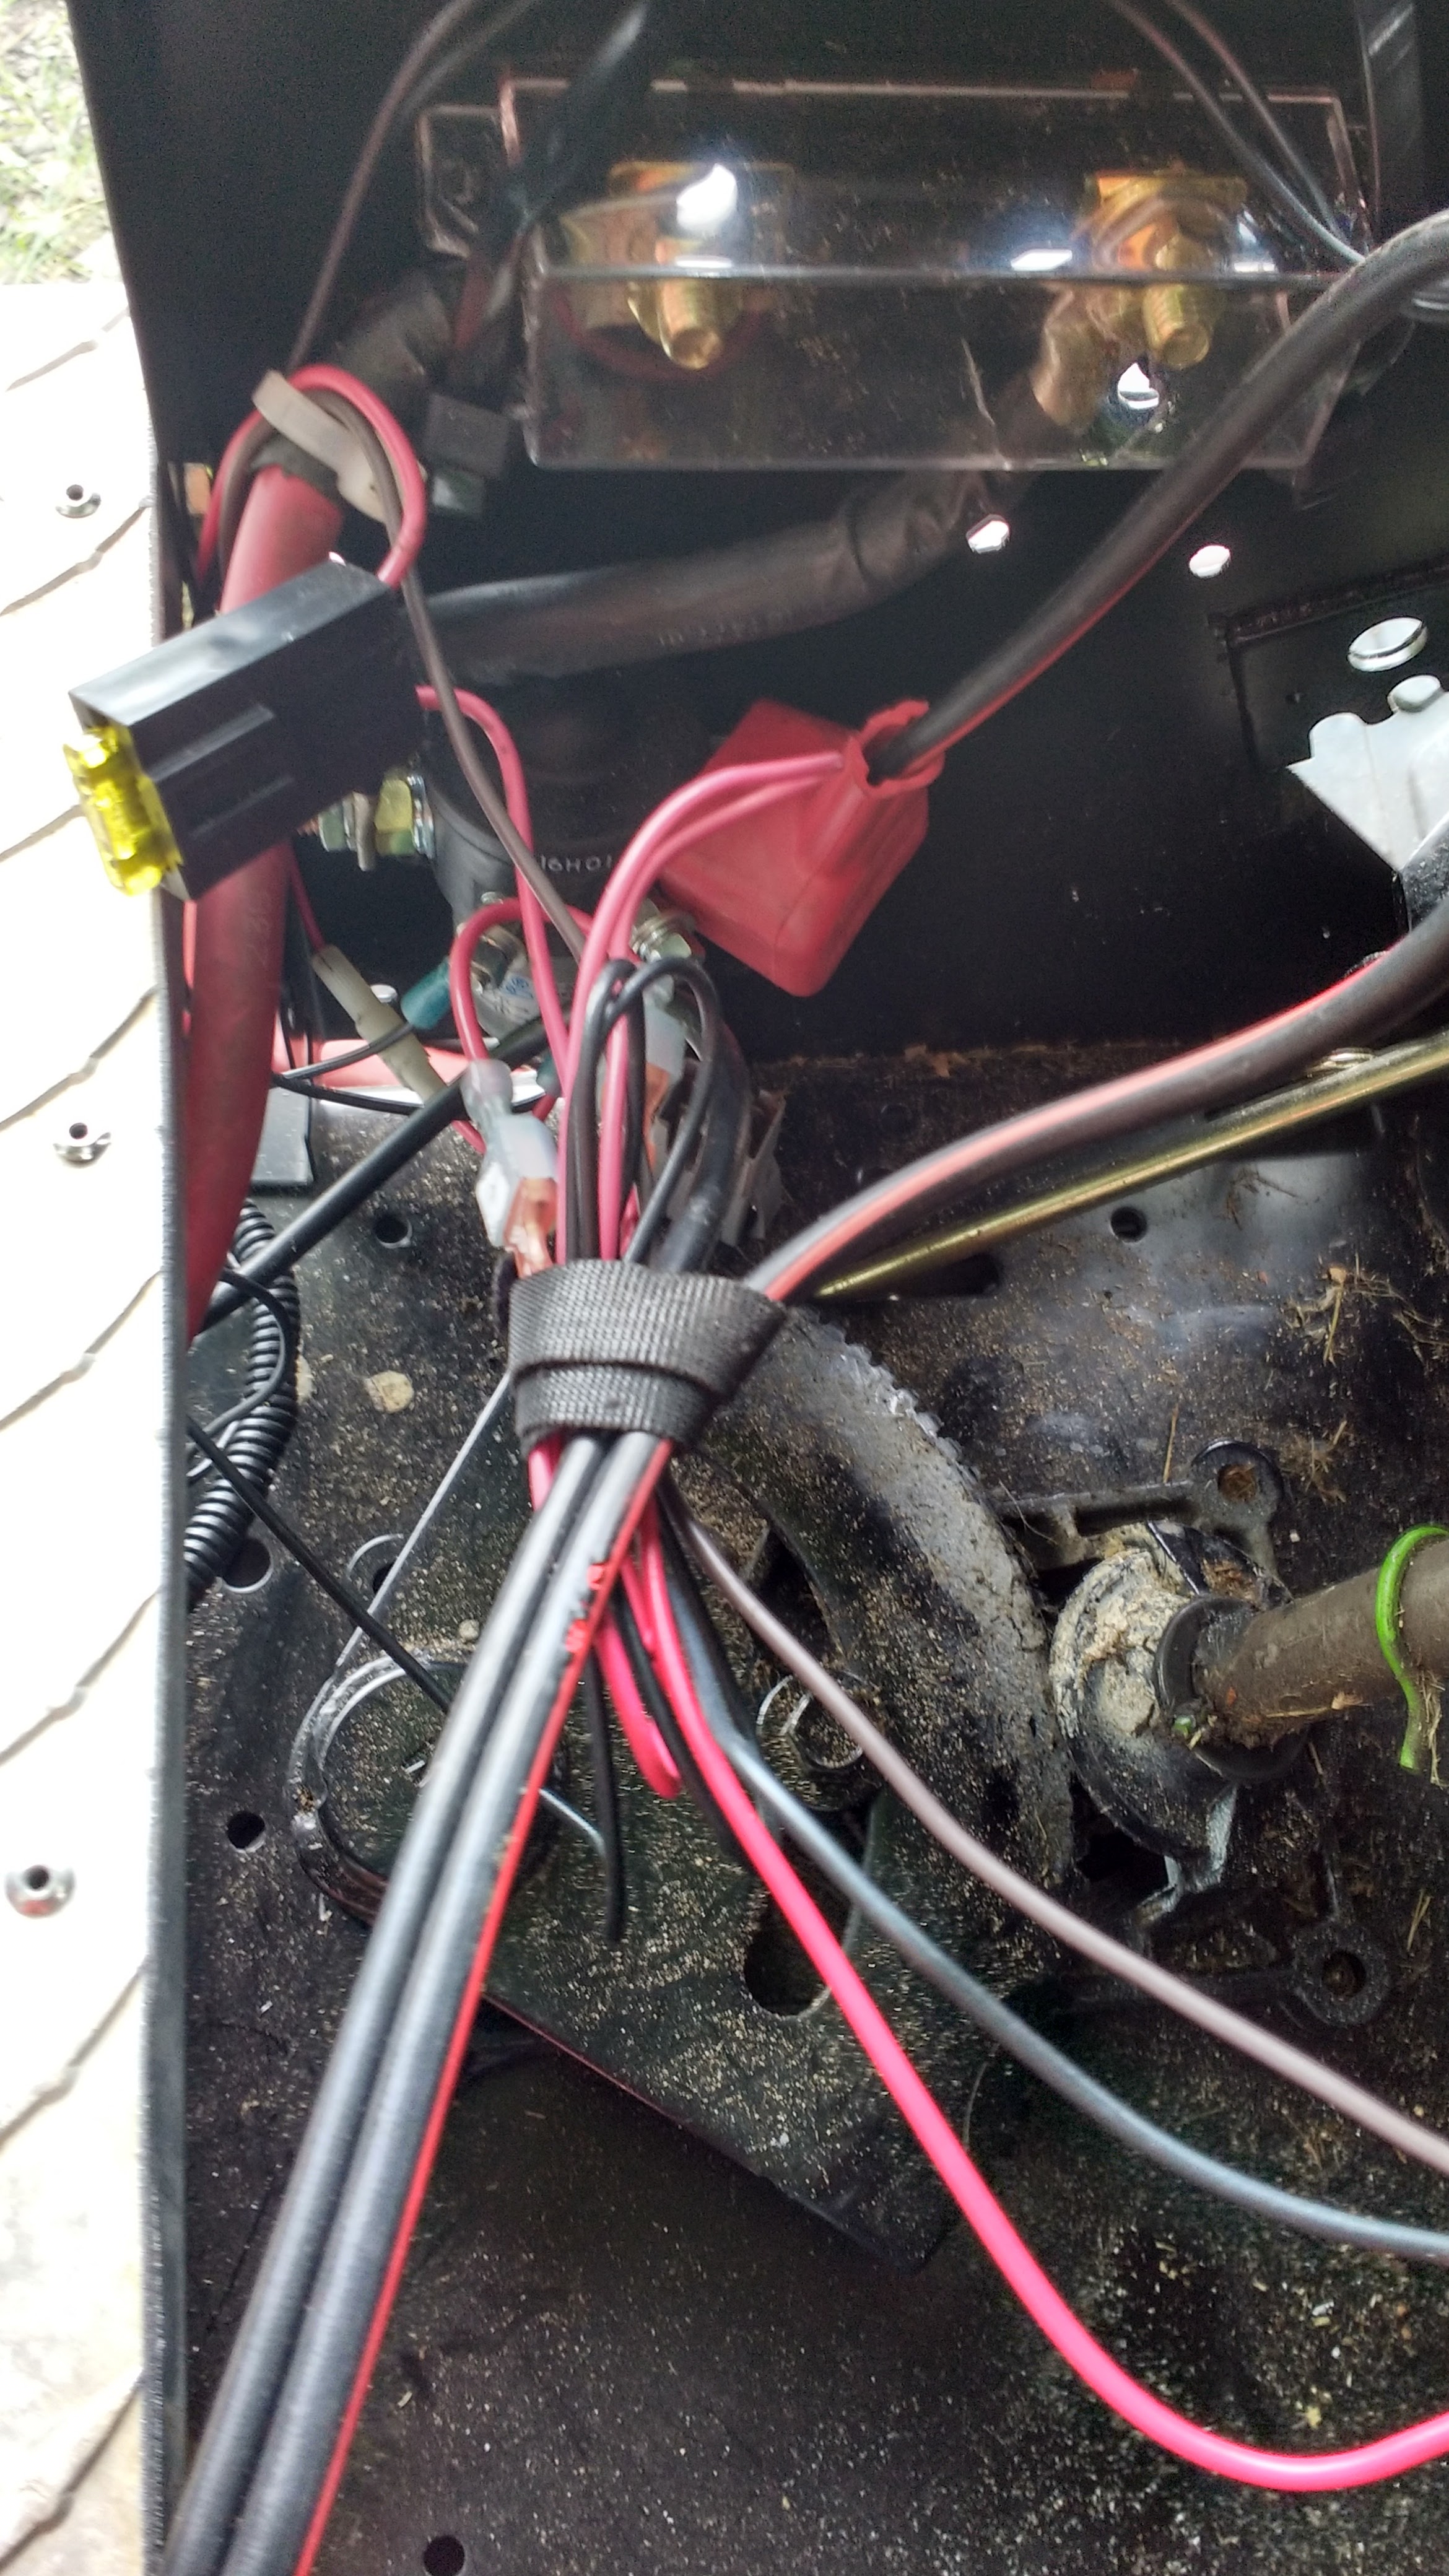
The wiring bundle should be kept away from any moving parts, 300 Amp fuse at the top
Building the battery was something of a nightmare. When I started the battery I laid the 260 30Q batteries out in the grid the wrong way so instead of building a 20P13S pack I laid them out in a 20S13P pack. I didn’t realize my mistake until I had spent many hours spot welding the pack and was actually trying to label the different groupings with a marker. This was probably the lowest point of my electric hobby career where I was left feeling like I really should take up another hobby (maybe knitting) that didn’t rely so much on me not being a complete brain-dead idiot. I flew into an inspired rage and started to cut up my $1500 battery pack with a metal mat knife. I ended up cutting into some of the PVC covering of the cells as well as shorting out one terminal briefly with the knife (it made a big spark) and then I had a giant mess on my hand. I took out the hot glue craft gun and just starting gluing the chunks of battery back together in the correct configuration. What started out as a beautiful pack ended up looking like some horribly ugly Franken-pack built by a madman. That’s what I get.
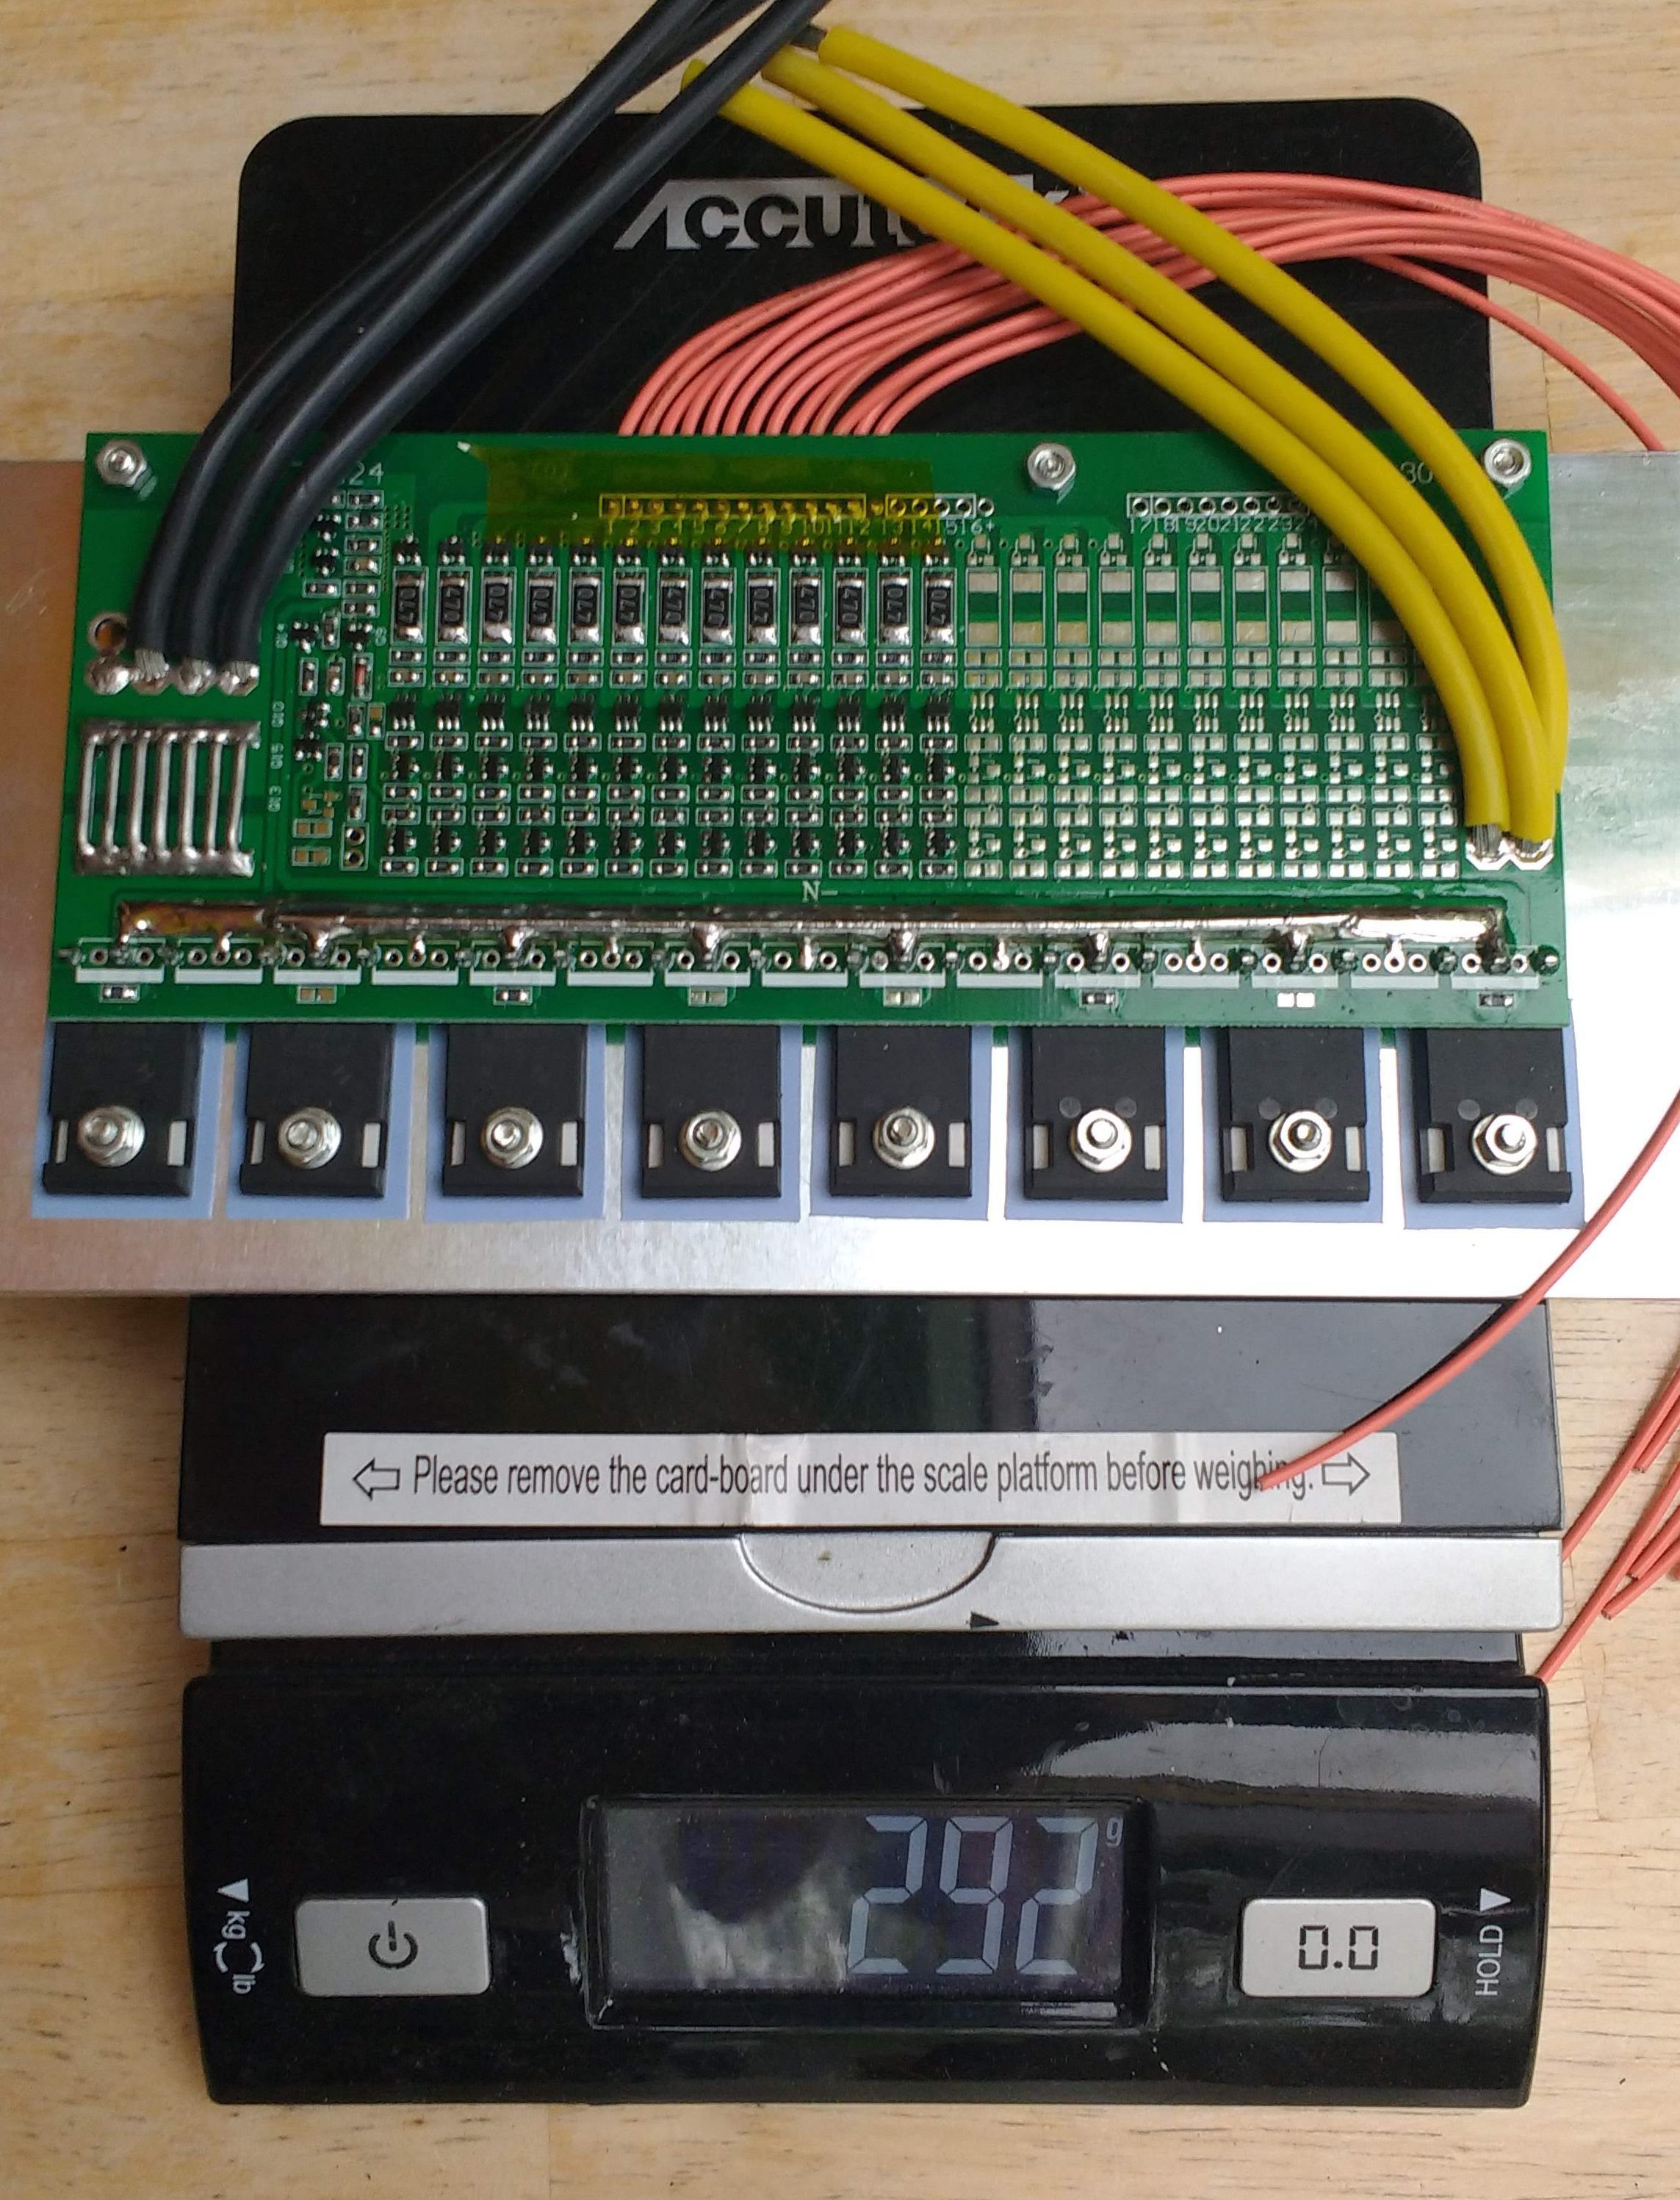
The claimed 150Amp $100 ebay BMS that got smoked like all the rest, just because you paid $100 for that BMS doesn’t mean it will do what they say its gonna do
Since your standard nickel strips can only carry about 5 amps per strip without getting too hot and I was running this pack at a whopping 200 Amps I needed to use a lot more than a single strip of nickel. The parallel strips I used only one strip because the only thing that strip was doing was balancing the individual cells out, but for the serial strips I ended up welding 3 strips on them. I had 20 connections with 3 strips each which could each carry 5 amps (5 x 3 x 20 = 300Amps). In the ends where I had to connect to the power cables I made 6 connections on 4 layers deep of nickel strips which then tied to 3 different XT90 connectors which should have been able to handle 90Amps per connector. Trying to build a high power pack that would put out 10,000W bursts and runs at 5000W continuous power is a real pain in the toushy.

The initial dry run that smoked the 150Amp BMS, batteries are exposed so I can check heat buildup
I bought a 150Amp BMS on ebay that claimed to support running at 150Amps continuous. I ended up smoking that BMS while it was pulling only 30 Amps at idle (no load). The problem is that in order to spin up the motor without a motor controller you end up pulling a huge amount of burst power. As I watched smoke pouring out of the mosfet on my $100 ebay BMS I again thought to myself “there has to be an easier way to do this”. At this point, I was again ready to give up, but instead, I remembered the wise words of Josh the Professor when I first started this project a year ago who told me to just bypass the BMS and use a volt meter and stop running the motor when the voltage started to drop quickly. I built a waterproof voltage meter into my build that I got on ebay and cut a hole in the dash to mount it.

If I had to do it all over again, I probably wouldn’t. I’d just buy this electric mower and replace the crappy sealed Lead Acid batteries with a home-built 18650 pack when they died (but what where’s the fun in that?)
In the end, would I have been better off with the $3000 Ryobi lawn mower? Probably I should have just gone with that mower, even though it was powered by Lead Acid packs. The batteries probably would have lasted at least 5 years if I kept them charged (it would have broken down to about $50/month if they had lasted that long). In 5 years I could have built a custom 18650 pack to replace the lead acid batteries in the mower which would have made it much lighter and perform much better. The biggest problem with the craftsman tractor was that it seems like everything on it leechs power. The Ryobi has 3 separate motors, one for each blade and then one to drive the mower. This is the smart way to do it because then you’re just having the friction of the tires and the grass itself slowing the motors down. On the craftsman tractor, you have to contend with not only the tires and the grass, but also the drag of the pulleys and the hydrostatic transmission, which is significant I assure you.
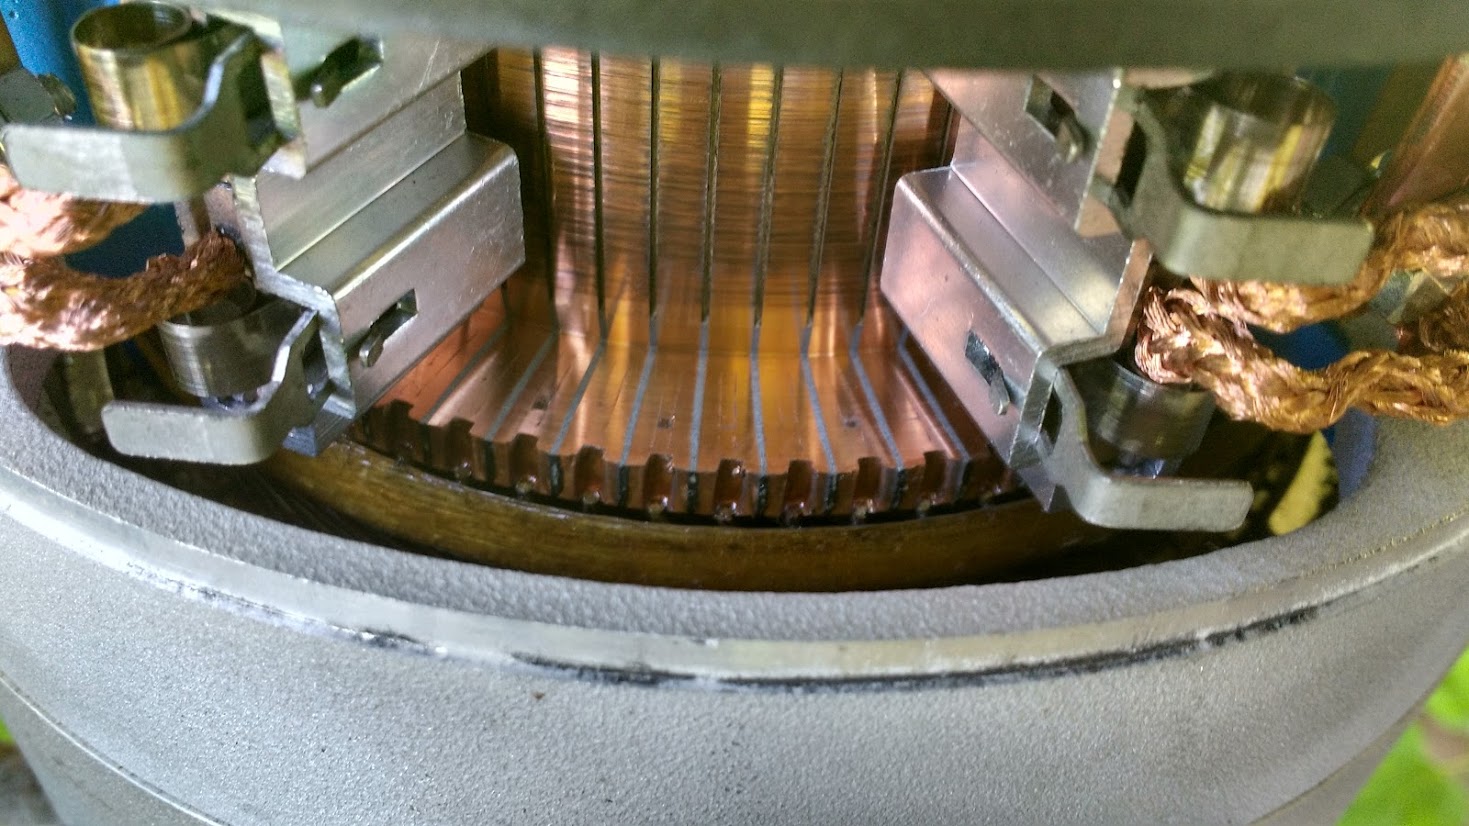
So that is what 300 Amp brushes look like, Motenergy designed the motor in the Zero electric motorcycles
The mower works about as well as you would expect a $1000 craftsman lawn mower to work. It has more torque than a gas mower, but it also has limitations on how long you can mow. With the mower running it pulls about 100Amps continuous so I can get about 40 minutes of mowing before I have to stop and charge. The biggest problem is that there is no BMS on the battery so I have to make sure not to run the battery down too low. One of the main problems with this mower is that it is just too light. With the loss of the motor, it is several hundred pounds lighter than the gas-powered stock mower. This means that it slips easily on wet grass and mud and you really need to add metal studs to the tires to get it to work the way it should.

To give your tractor the evil eyes just put down some masking tape, then cut to shape and spraypaint away
Would I do this project again now that I’ve completed it? It feels pretty good to ride around on a lawn tractor that was built with your own blood sweat and tears. The 30Q cells still get warm (but not hot) while it’s running so I’m really glad I didn’t go with the GA cells for the pack. In the end, I got a pretty cool 20lb ebike pack that will go insanely far if I ever want to put it on an ebike and it can also reliably put out 5000W continuously. If I had to do it again I probably would just buy the Ryobi, run it till the batteries die then build a fresh pack for that out of whatever fancy cells exist 5-7 years from now. When it comes to the world of battery-powered stuff it seems like the longer you can wait the cheaper and better the batteries get.
In the end, I learned a lot and didn’t blow myself up or burn my house down so I guess we can count that in the win column.
I’ll have to try harder next time.
Ride On.

Our Off-The-Grid-Not-So-Amish-Battery-Powered-Paradise (that’s a lot of hyphens)


I would love this. 40 minutes is about right to mow my lawn, probably less. MY old gas rider is so freaking loud I’m embarrassed to run it.
LikeLike
it needs a 200 watt solar panel as a roof to recharge it and provide shade while mowing. 🙂
LikeLike
blockquote, div.yahoo_quoted { margin-left: 0 !important; border-left:1px #715FFA solid !important; padding-left:1ex !important; background-color:white !important; } I love your slate area and the view of the mountains over the pond. Do you have fish or crustaceans in the pond?
Sent from Yahoo Mail for iPhone
LikeLike
Quality of the comment sounds about right for yahoo.
LikeLike
I have an Ariens Amp 48 volt electric riding mower. It originally was powered by 5 packs made up of 4 12V SLA batteries, such as you might expect to find powering a Razor scooter. I recently replaced them with 4 large deep cycle batteries. The main drive motor looks very similar to your Motenergy.
LikeLike
AWESOME paint job!
LikeLike
Pingback: My Dirt Cheap UTV : One Year On A Sur-Ron Light Bee Electric Motocross Bike | ElectricBike-Blog.com
Nice read! Seems like you’re one of the very few people that has done this to me. I think in the end maybe somewhere around 20-24s with like a second hand forklift motor would have been a little easier to work with. But this really seems like a nice setup you have made!
LikeLike
Nice build I am starting mine soon. As for your traction problems you can put water in your tires as they do with large tractors or get wheel weights they are made to bolt on the rims and provide more weight than the water method
LikeLike
I have been converting gas tractors for 20yrs and I would not recommend just replacing the gas eng with an electric motor, this might seem like the easy way but you will be disappointed with the results, I recommend replace the eng and gearbox with an electric transaxle about 1hp and use separate small electric motors directly driving the cutter blades, this is much more efficient and you will have longer battery runtimes, there is a lot more to it than just this, more info and videos can be found @ electriclawntractor.com
LikeLike
Yes good advice, you seem to lose a lot of power with the hydrostatic transmission and the belt on the blades.
LikeLike
Sorry for the late post – I just found this thread whilst researching my own conversion. I’m drawn to having individual motors for the blades and drive – has anyone thought through the effect on the motor when a blade jams? Is it necessary to put some circuitry in between the battery and motor to switch off the current if the motor can’t spin? If so, is there any proprietary control system on the market? Richard.
LikeLike
You definitely need to design some protection for the cutter electric motors, I believe you can use any design as long as you are only using it for yourself, http://www.ElectricLawnTractor.com
LikeLike
Pingback: Electric vs Gas vs Diesel: When is a horsepower not really a horsepower? | ELECTRICBIKE.COM
Pingback: Elétrico vs. Gasolina vs. Diesel: Quando é que uma potência não é realmente uma potência? – La Revolucion de la Bicis Electricas
In 1990 at a garage-sale, I stumbled across a used dysfunctional CRAFTSMEN ELECTRIC RIDING MOWER. Although it resembled a conventual riding mower, it was essentially on a golf-cart chassis & drive-train, with 2-electric motors on what appeared as a conventical mower-deck, with 4-batteries under the hood. After rebuilding the deck-motors, cleaning both centrifugal motor-clutches & outfitting with 4-fresh deep-cell batteries, it functioned perfectly on our nearly 1-acre N.Texas yard, before requiring re-charge with a typical 48V golf-cart battery charger. Passer-byers would stop on the roadside to witness me silently mega-rpm mowing, while listening to the Eagles on the factory-dash-mounted 8-Track player. After several months of eventless use, someone broke into my garage and stole, “curiously” just my treasured mower. (likely one of the numerous curious inquirers) Been searching for a replacement ever since & will probably be a player for the Ryobi, if I can find the $. Thanks for this article.
LikeLike
Ego will have a riding mower next year that will be Lithium, there is a Craftsman for $4000 that is Lithium. The Ryobi is sealed lead acid.
LikeLike
Edmond Electric Company Ltd sell a conversion kit for an electric riding mower, electriclawntractor.com
LikeLike
Cool.
LikeLike
Well done! I recently converted two garden tractors to electric. The small Toro “Lawn” tractor’s transmission couldn’t handle the torque of the electric motor so I moved everything over to a much bigger John Deere “Garden” tractor. More bettah! Search YouTube for Roy Bertalotto and see how it runs….or http://www.rvbprecision.com for articles about it.
LikeLike
This conversion can be done easily, I have been doing this since 1999 and have solved most of the mistakes you have, here is some info on my design that works great and can cut 2-3 acres on a charge
DIY electric garden tractor plans, and it could be charged by solar, zero pollution
2hrs cutting approx 2 acres or 8-10 hrs pulling trailer on a charge
Converting to battery power is a great idea for a garden tractor I converted one 20yrs ago, I used the 3 separate motor design and it is still cutting grass on a daily basis, it is amazing how it never breaks down and needs almost no maintenance, I renew the batteries every 7 yrs I am just on my 3rd set now, my design will cut up to 2 acres on a 50cent charge there are no belts or pulleys and no oil on the entire tractor, it can pull a trailer for about 8hrs on a charge, because battery run time is the most important aspect of most conversions I paid particular attention to the most efficient design, I used 3 separate small motors one for the drive with electronic speed control and two smaller with a cutter blade mounted on the shaft of each cutter motor ,total amperage when cutting grass is approx 40amps, (2000watts) this design only uses the battery power req to do the job, very little wasted battery power, it uses magnetic breaking of both tractor and cutter blades and automatically applies parking brake when you stop or get off the seat, an amazing tractor.
Now available a riding mower conversion kit:- electriclawntractor.com
Video #5 Ploughing Snow https://youtu.be/o4nSYsbPfvg
Video #4 Ploughing Veggie Garden https://youtu.be/7OF6lXgXth8
Video #3 The Little Electric Tractor That Can! cutting grass https://www.youtube.com/watch?v=9LWjfUjQ8a0&t=42s
Video#1 on youtube https://www.youtube.com/watch?v=9GN5fTEWYPs&t=0s
and https://youtu.be/9LWjfUjQ8a0
video #2 Making an electric 3 point hitch https://youtu.be/nqhB3D47y_s
LikeLike
I’m planning my conversion of a TroyBilt 17hp mower now. I have the motor(s), just ordered the batteries, and most importantly, already have the Curtis brush motor controller. The controller has an adjustable ramp rate on motor start up that you can use to ease the motor up to speed. I have two 6.5 HP 48v brush motors but will start with just one to see if that is enough. The batteries are LFP 20Ah pouch cells and planning a 24s2p pack at 72v. I will set the controller to the max motor speed of 3600 rpm which is about 45v. My bms will be 250A at 72v and should hold up to the max power of the motor when I ramp it up slowly. The only concern is my dc motor may be overtaxed as it has a limit of 120 amps at 48v. I do have a second motor that I could couple up if this becomes an issue. Since my motor has a larger shaft, I need to buy pulleys as the original won’t fit.
LikeLike
You should keep the BMS, just wire its output to a contactor from a golf cart so the power isn’t going through the Mosfets. You should have safety interlocks and a contactor anyway in case of a runaway condition due to a short/weld or stall.
I would use some EV or hybrid batteries. Leaf/Bolt/Volt/ Kia etc. I’ve got some nice Bosch 5s 50Ah from a Fiat 500E. Whatever is cheap.
As mentioned a Golf cart drive might work much better, at least more efficiently. Possibly power wheelchair motors if you were making a zero-turn.
With ‘farming’ equipment you usually get traction with iron weights on frame or wheels or water filled tires.
LikeLike
On second read you probably would have been fine with a motor controller. Alltrax are very nice and you can set the speed or Amps with a computer program. Once it is set a simple 5000 Ohm knob in the dash for throttle would work great.
Your BMS died from surge starting the motor. You could even probably get by with a soft start made from a resistor coil like old golf carts had and a second contactor. To get it spinning press the contactor connected through the resistor, once the motor is spinning good use the second contactor for full voltage.
With no controller I would have gone with 10-12S to keep the current down the old fashioned way, less voltage.
LikeLike