The most common reason for DIY ebike battery failure is damage due to improper mounting. Frame packs connect directly to the frame of your bike and generally do not require extensive shock or waterproofing. If the battery is in a triangle bag, in a rack bag, in a backpack or bouncing around anywhere else loose on your bike then it should be water & shock proofed.
A typical lithium ebike battery cluster (other than frame packs) often comes shipped in a bundle surrounded by oversized heat shrink wrap. The ends of the battery pack are often covered with small squares of plastic, or it has been heat-shrinked twice, once width-wise and once length-wise. This setup works well as a way to transport your batteries and BMS around, but it is still quite easy for water to work its way into the end of the packs. There is also little to no shock proofing so if you throw a loose triangle pack into a triangle bag without padding often around the perimeter where the batteries contact the frame it will create serious problems over time. This article goes over some of the ways I’ve found to protect your valuable investment using only Ziplock freezer bags, packing tape, Thermarest sleeping pads and duct tape.
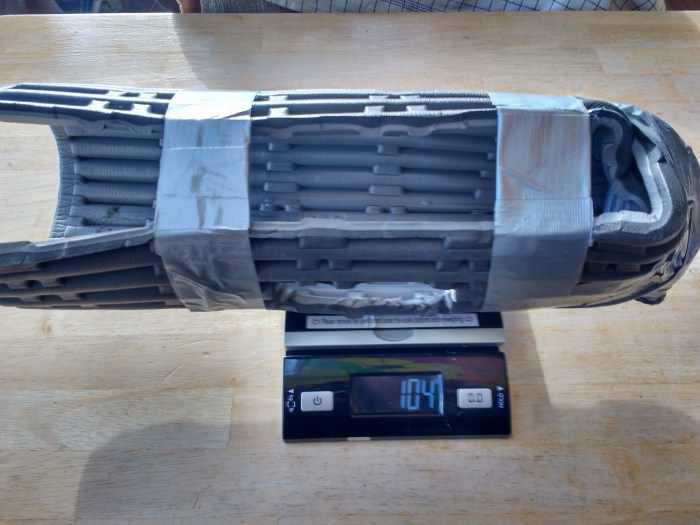
For about $5 worth of materials, you can build a shockproof case that weighs a scant 104g
When I first started packing batteries in my backpack I was concerned about damaging them if I wiped out on my ebike. For normal people, this would not be an issue, but I seemed to take a pretty bad spill almost weekly on my mountain bike and had gotten into the habit of flipping around and landing on my backpack which usually had just a spare tube and some water in it. I didn’t want to flip over the handlebars and land on top of my $500 battery, and if I did do it, I wanted to make sure my battery would survive a 200lb weight (that’s me) dropped on top of it from a height of about 5 feet.
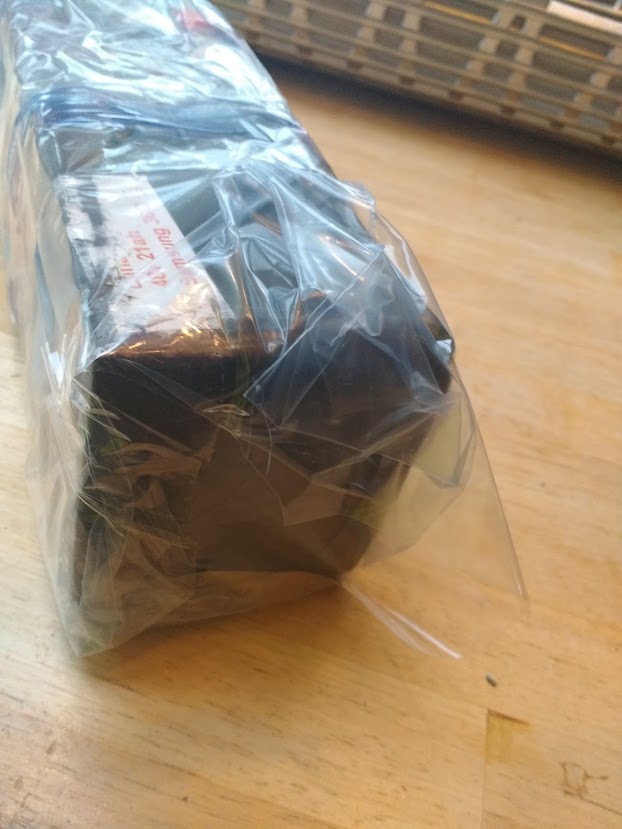
With my battery in the backpack, another problem I have is that I leave the top of the pack open and snow will fall down onto the top of the battery and melt. Shrink wrapped batteries are water resistant but are not water proof. Because I have to leave the backpack open at the top for cooling, I decided to start waterproofing the batteries as wells as shock proofing them. At first, I tried materials like saran wrap and plastic sheeting but what I ended up using which works better than either one is heavy duty brand name ziplock freezer bags.
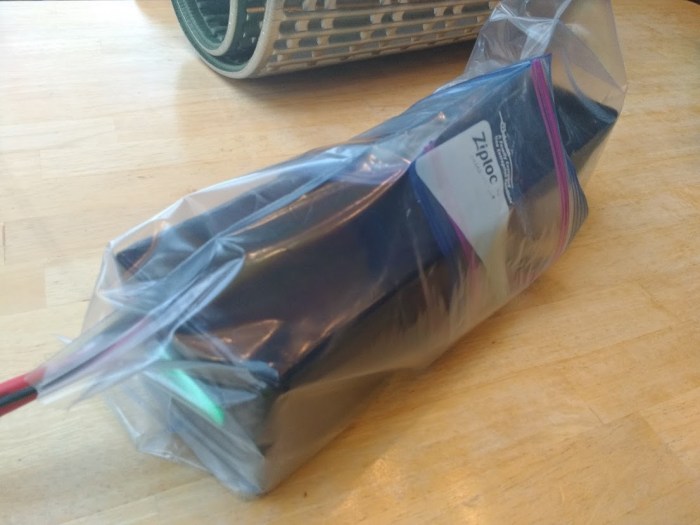
Take your battery and put one bag over the end without the wires then put a small cut in the corner of the 2nd ziplock bag big enough to pass the connectors through. Put the second bag on the other side overlapping the first ziplock bag with the wires passed through the tiny cut in the bottom of the bag. Get packing tape and tape the two ziplock bags together. Fold the ends of the bags like you’re wrapping a present and put packing tape around the ends of the battery. It’s important that all the edges of your battery have a strip of packing tape, as it is pretty tough and will help to keep the battery from wearing holes in the freezer bag. Where the cables go into the bag wrap a piece of packing tape tightly around the cords to keep water out. If you want to make it super waterproof then add a little silicone before your wrap the tape around the wires.
Wrap it up just like a Christmas present. For yourself.
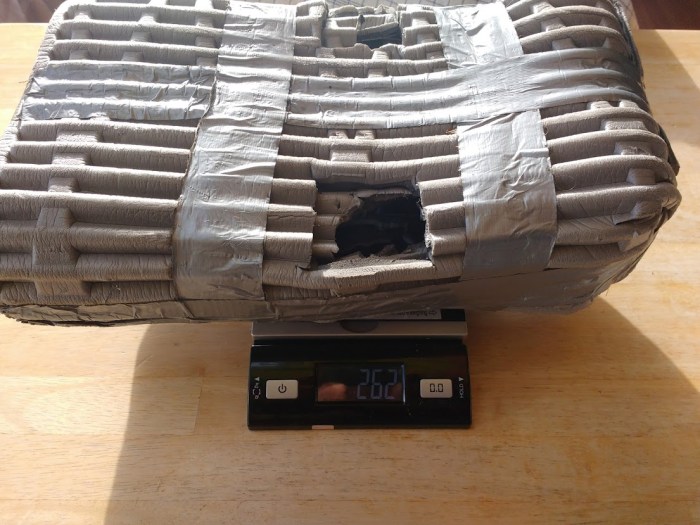
Once you are done wrapping the battery in ziplock bags and packing tape it’s time to work on the shock proofing. I’ve tried a lot of materials, but the stuff I’ve found that works better than anything else is cheapo Thermarest pads. They are a heavy duty closed cell foam that you can get on ebay or Amazon for about $15 and one pad will do about 3 batteries. For a small shark pack you’re looking at about 100g, the heaviest shock proof case I’ve ever made was double ply sleeping pad for a very large 20lb battery and weighed about 260g. If you use thermarest pads make sure that the thermal coated (silver) side is on the outside of the pack. It will reflect too much heat back to the battery if it’s on the inside.
This pack has almost 2 years of daily use on it and it still works perfectly. I no longer use double ply as it is a total overkill.
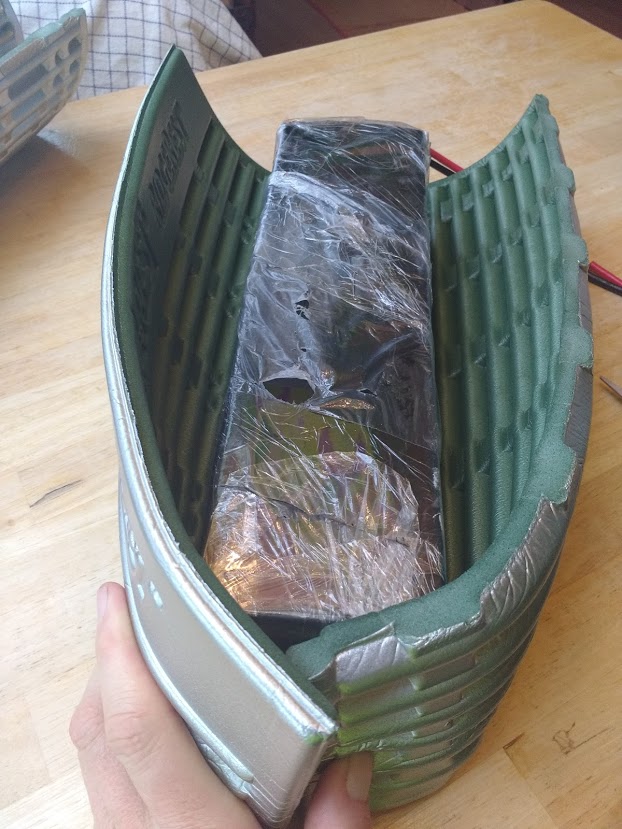
The first step is to cut the foam pad to size. You want the ridges to run the length of the battery and wrap the battery around the pad so that it is about 80% the entire way around. Having a large slit in the case will save you a little padding and make it much easier to the battery to release built up heat.
This was an early experiment with Saran Wrap which did not wear well. Notice that the Thermarest pad does not wrap all the way around the battery.
Once the pad is wrapped around the battery cut two slits on the bottom so you can fold one flap up and two flaps in, one from either side. You will want this extra triple layer of padding on the bottom, as this is where most of the impact will come from when you are setting your backpack down. If you are building a protective frame for a triangle battery then you will not need this much padding in one place.
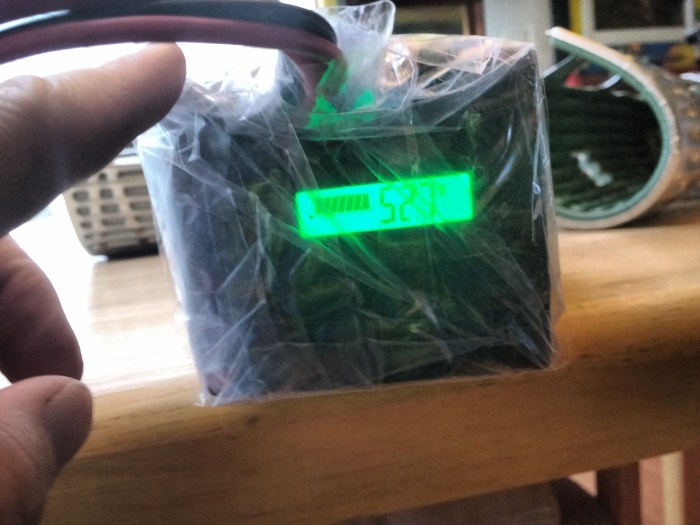
Using clear plastic will allow you to see the voltage display as well as any moisture that manages to sneak inside the plastic
Then I start wrapping duct tape around the bottom to tie it together. Once that is done I will wrap duct tape around the center and near the top of the battery, making sure the foam is loose enough that you can easily remove the battery from the case, but not so loose that it will slip out on its own. Where the duct tape bridges the gap there will be sticky tape towards the battery. Take some small pieces of duct tape and wrap them around the tape so that it can’t stick on anything. I usually cut a few air holes in the side of the padding to help the battery cool as well.
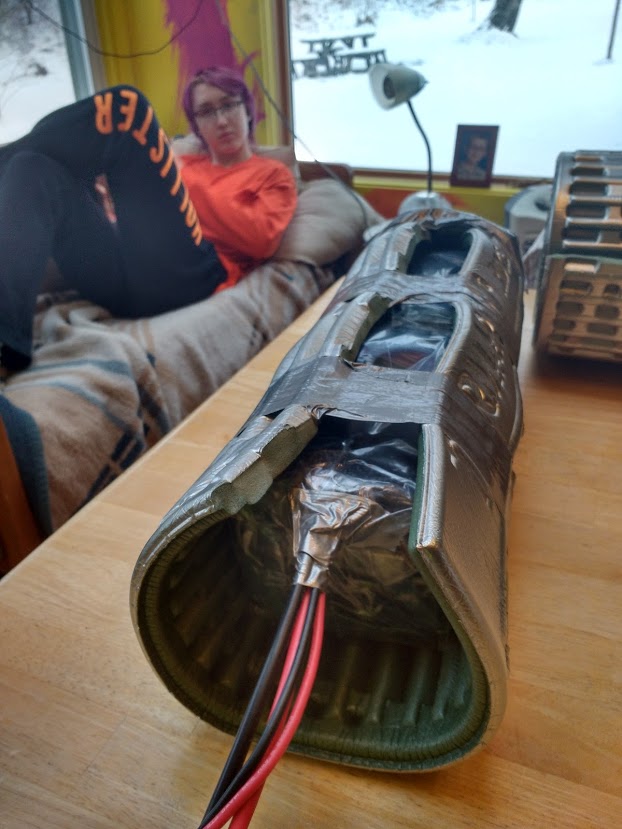
The final product shown here with my wonderful teenager in the background. His hair matches the Dr Suess paint job in my kitchen, how sweet.
For Triangle packs stuck in triangle bags you do not need to wrap the Thermarest all the way around the entire battery. A thin strip wrapped around the outside edge of the battery that is about 2.5 inches and taped in place should be enough. Since that is the only place the triangle pack will come into contact with anything hard, that is really the best way to do it. If you put padding on the sides of the triangle there is a good chance that it will end up being too big to fit in your bag.
Whether your battery is in your backpack or in a triangle bag or a rear rack pack, waterproofing & shockproofing it costs almost nothing and may add years of life to your pack. Think of it like buying dirt cheap health insurance for your ridiculously expensive lithium packs.
Ride On.


A trick I learned as a radio man waterproofing my radio.
Put duct tape on the plastic.
You can now cut the plastic though the duct tape.
You make a zipper by folding one end over.
Duct tape will always pull off other duct tape.
LikeLike
Very nice article! I employ pretty much the same techniques, but living here in Milwaukee I have access to this place for my foam: https://buyfoam.com/Default.aspx Get it in bulk for so many applications…
LikeLike
awesome….great article. So simple but so fundamental. Great Article once again Karl!!!
LikeLike
Pingback: 30 Days On A Samsung 48v 21Ah 30Q Lunacycle Pack : These Packs Just Get Better & Better | Electric-FatBike.com
Used yoga mat from goodwill for $2 works for me. If too thin, you can double wrap. I cover all the battery edges well but cut out big vent holes in the flat middle sections.
LikeLike
I wish I had read your advice before wracking my brain for the last several weeks as to what I would use, and this morning, before reading this, lo and behold, the yoga mat came to mind and this is an excellent idea. I have a question about venting. Is it necessary to vent and what would happen, if it weren’t vented for a period of about 3 hours?
LikeLike
Pingback: Hot Glue vs Plastic Framed 18650 Packs : Which One Should You Buy / Build? | ElectricBike-Blog.com
Pingback: I Got The Skills : Building A 18650 25Ah GA 50Amp Soft Pack From Scratch | ElectricBike-Blog.com
Pingback: Destroy Everything You Touch : Managing The Repairs On Your Ebike Fleet | ElectricBike-Blog.com
Great read, just out of curiosity do you ever worry about the heat from the battery melting the ziplock bags? looking to do something similar myself and am not sure if I should be worried about stuff like that.
I’m in AU by the way, so occasionally 40+ C days.
LikeLike
It never gets that hot here. If you’re worried about it you can put the plastic bags outside the foam insulation. I’d be more concerned with the batteries overheating.
LikeLike
Thought maybe its just a.rookie.thing.to add extra safety & security measures around the battery
Glad 2 know all my time & effort have been a worthy investment.. Its taken ages for me to be happy with the balances of. apperance, practicality & safety’ heres my version
Sydney – Mostly Hot,.dry humid. No snow or Ice & rarely rains my way & also my way,.roads & paths are bumpy, uneven, cracked, not level, rocks stones & gravel are common
I cut a plastic A4 magaize holder right along the rectangular line at the.lower end of the cage as its a perfect battery fit. the battery can slide in or out of this cage which can easily be connected around the frame in several positions to secure the load & manage to riding conditions. Several thin rubber mats & cable ties can distribute the weight burden evenly & prevent dislodging. between the battery & cage is a Silicone mat I made up using chalking gun. glued to bottom battery is a strip of rubber matting. The rubber against silicone mimimises significantly any movement, its now anti slip but to be sure.on.safety I bought $ 5 flat rubber strap with 2 S hooks that straps around battery & frame & no movement, no jumping.sliding or.dislodging..
no.over heating coz of the vents in the original magazine frame..
easy to put in or take out..
also if it rains or wet ive got a warerproof cover that goes straight over the frame & then pull tight the cord & lock the tension of.elastic.once.done.. It works & looks great for me…
LikeLike