Everyone has been asking me “Karl, where have you been, we miss you”. My wife and I have untaken some huge projects which has involved moving massive amounts of dirt, woodchips, and seaweed on a nearly daily basis to fertilize our 500 fruit trees. We are also building a 700 sq foot greenhouse that will be unheated but well insulated with over 2000 gallons of barreled water as thermal mass so we can grow food all year round without heating it. My belief is that some point in the next 20 years there will come a reckoning for our irresponsible contributions to climate change where all of your real estate holdings, mutual funds, and cash will become all but useless and the only thing with real value will be food and seeds. Perhaps you think I’m being hysterical. The average meal travels 1500 miles to get to your plate. A few well placed terrorist attacks on refineries or a pandemic that causes truckers to just stay home are two things that could cause food to run out in most areas in 3-4 days. It’s shocking to me how few people actually have any kind of garden at all. What are you going to eat when there is no food? Each other? Your pets? Bugs? Ewww.

In just a few hours you can build an electric wheelbarrow that will save your back
For our family, food security is king. Yesterday my wife and I shoveled 8000lbs of seaweed twice, once onto the truck & trailer and once off it onto the orchard. Today I’m shoveling about 15,000lbs of 3-year-old composted willow mulch because my wife’s back is just too tired from yesterdays shoveling. One of the biggest problems we’ve run into is how to get dirt, mulch, compost & seaweed where we need it to go without breaking our backs. I built a custom electric wheelbarrow from scratch using a $350 3000W cyclone kit (available here), a used Ego $15 charger from ebay and an $80 Home Depot wheelbarrow. It only took a few hours and it has worked far better than I ever hoped it would in my wildest dreams (and believe me, my playa dreams get pretty wild).

This is a typical load of composted mulch which weighs over 7000 lbs, happy shoveling … sucka
The first decision I had to make with the creation of an electric wheelbarrow was whether to go with a hub drive or a geared down mid-drive. There are hub motors designed for wheelbarrows being sold on Alibaba like this one here that is 24v and claimed to be 500W for $130. I’ve destroyed every hub motor I’ve ever touched (except one 12T Mac motor which is on my ‘to destroy’ list). I ended up settling on the Cyclone kit (review here) which is cheap, powerful and has an insane amount of torque. Since the fastest I will ever be going with this wheelbarrow is around 5 mph I decided to gear it way down. The Cyclone works out well because it comes with a large steel gear you can bolt to the wheel of your wheelbarrow and the Cyclone motor also has a bulletproof 5:1 reduction inside the motor unit. The Cyclone motor works well in this application and provides more power than you’re probably ever going to need, even when wheeling 500lbs+ up a very steep incline. With a 52T steel chainring off an old roadbike the wheelbarrow at full throttle still goes faster than I can run.

Having a clean chain line is the most important thing about this build
Initially we were thinking of going with a dual wheeled 8 cu foot wheelbarrow for this build, but in the end I’m glad we stuck with the 6 cu foot single wheeled wheelbarrow. It’s much easier to navigate the narrow aisles that my wife leaves in between her trees and bushes. Since most of our trees and bushes are on <2 acres there is hardly any room between plantings. This limits our options with trucks and tractors and makes is so that we need to use a wheelbarrow to access many areas. The other problem with our orchard is that it is on a pretty steep incline and I have to say that trying to get 500lbs of dirt up a 10+ degree incline without a motor is the very definition of unfun.

You have to protect the unused ebike connectors from moisture somehow
The Cyclone kit I started with was one designed for a 100mm bottom bracket. I took the mounting bolts apart and set them up with the standard 68mm mounting thickness which allows the unit to be slightly wider than the steel handles on the Home Depot True Temper wheelbarrow we used for this build. Whatever wheelbarrow you use for your conversion I recommend one with a flat free tire and steel handles. We have several of the cheap $40 wheelbarrows kicking around but they don’t usually last more than a few years of continuous use. When lining up the cyclone kit to drill holes in the handles I used wooden wedges and clamps to line it up properly with the front wheel. After the build is complete and you’ve tested it you will want to take the bolts out and replace your wooden wedges with steel washers. You will need to use the wooded wedges on opposite sides of the steel handles to get the drive unit to line up with the front wheel when you first mount the motor.

The Ego battery I mounted on the non-drive side to counter the weight from the motor on the left side
Once the motor is mounted you have to make a rough measurement of how far out the wheel is lined up so you can figure out how long to make the standoff bolts for the chainring. Since the wheel can be easily moved left and right almost 2 cm by loosening 4 bolts and moving the wheel back and forth, this makes it very easy to align the front chainring with the motor even if the motor alignment is slightly off. You should measure the offset of the front chainring with the front wheel in the middle of the adjustment so you can move it a cm in either direction if you have to.
The throttle should be mounted so it is easy for your thumb to wiggle it down
The metal front wheel is made of cheap stamped steel so you will need to drill through both sides of it. Put the BCD 130 chainring over the wheelbarrow wheel and line it up perfectly before you mark the holes to drill. Before you start drilling use a punch so the drill does not wander. I started with a small drill bit and then went bigger and bigger. The holes on the non-drive side will want to be the exact size of the bolts you are using. The holes on the drive side will need to be much bigger so the pipe you use as a standoff will fit through. The standoffs can be cut from any steel pipe that should be only slightly larger than the bolt diameters. I used a conduit pipe cutter which worked well for cutting 5 lengths of pipe to the exact same length. It’s critical that the standoff pipes go all the way through if they just rest on the top piece of sheet steel on the drive side of the wheel then when you tighten them down the two pieces of steel on either side of the hub will crush together and the wheel will not line up properly. If the standoff goes through one side of the steel wheel and rests on the non-drive side of the hub then there is nothing to crush and you can tighten down the bolts with impunity. I used bolts that were about the same size as the BCD 130 holes in my steel chainring.

The Cyclone produces unbelievable power when it is geared this low, notice the standoffs go into the rim
Once the chainring is mounted you need to align it as best you can. If it is warped then you can correct it using washers between the chainring and the wheel. It doesn’t have to be perfect, since the Cyclone kit has a chain aligned wheel that sticks out of their motor, even if the chain drifts a bit side to side it will still stay on. The problems will come when you wheel the wheelbarrow backward. If you can’t get the motor to line up correctly the other option is to find a narrow-wide chainring which should stop the chain derailments when pulling the wheelbarrow backward.

Here you can see the steel washers under the aluminum mounting bracket used to get the motor to line up properly, there are more on the opposite side toward the back
The Ego power packs are so convenient for us to use for everything so I decided to use one of them instead of hooking the wheelbarrow up to a standard ebike battery. You can get used Ego chargers on ebay for around $15. All you have to do is take them apart and solder connections to the positive and negative terminals for the charging unit. The only trick to doing this is that you need a security torx bit to get the case apart. We have all three sizes of Ego battery packs, the 2 Ah, 5 Ah and 7.5 Ah but since the wheelbarrow hardly takes any power at all we only use the 2 Ah battery with it. Essentially you are using the charger as a handy cheap mounting bracket for the battery, although there is nothing keeping you from also using it as a battery charger as well. I’m quite certain that between this article and my how to use Ego batteries for your ebike that Ego has me and all my friends listed in a special category of ‘laugh at him and then hang up if he calls in for any warranty support’. You have been warned.
I mounted the controller out-of-the-way using some self-tapping screws on the underside of the wheelbarrow. I took all the ebike connectors and wrapped them up in a cut open ziplock bag and then taped the bag shut with aluminum foil tape. This makes a decent waterproof protection that keeps the connectors from shorting out when they get wet.
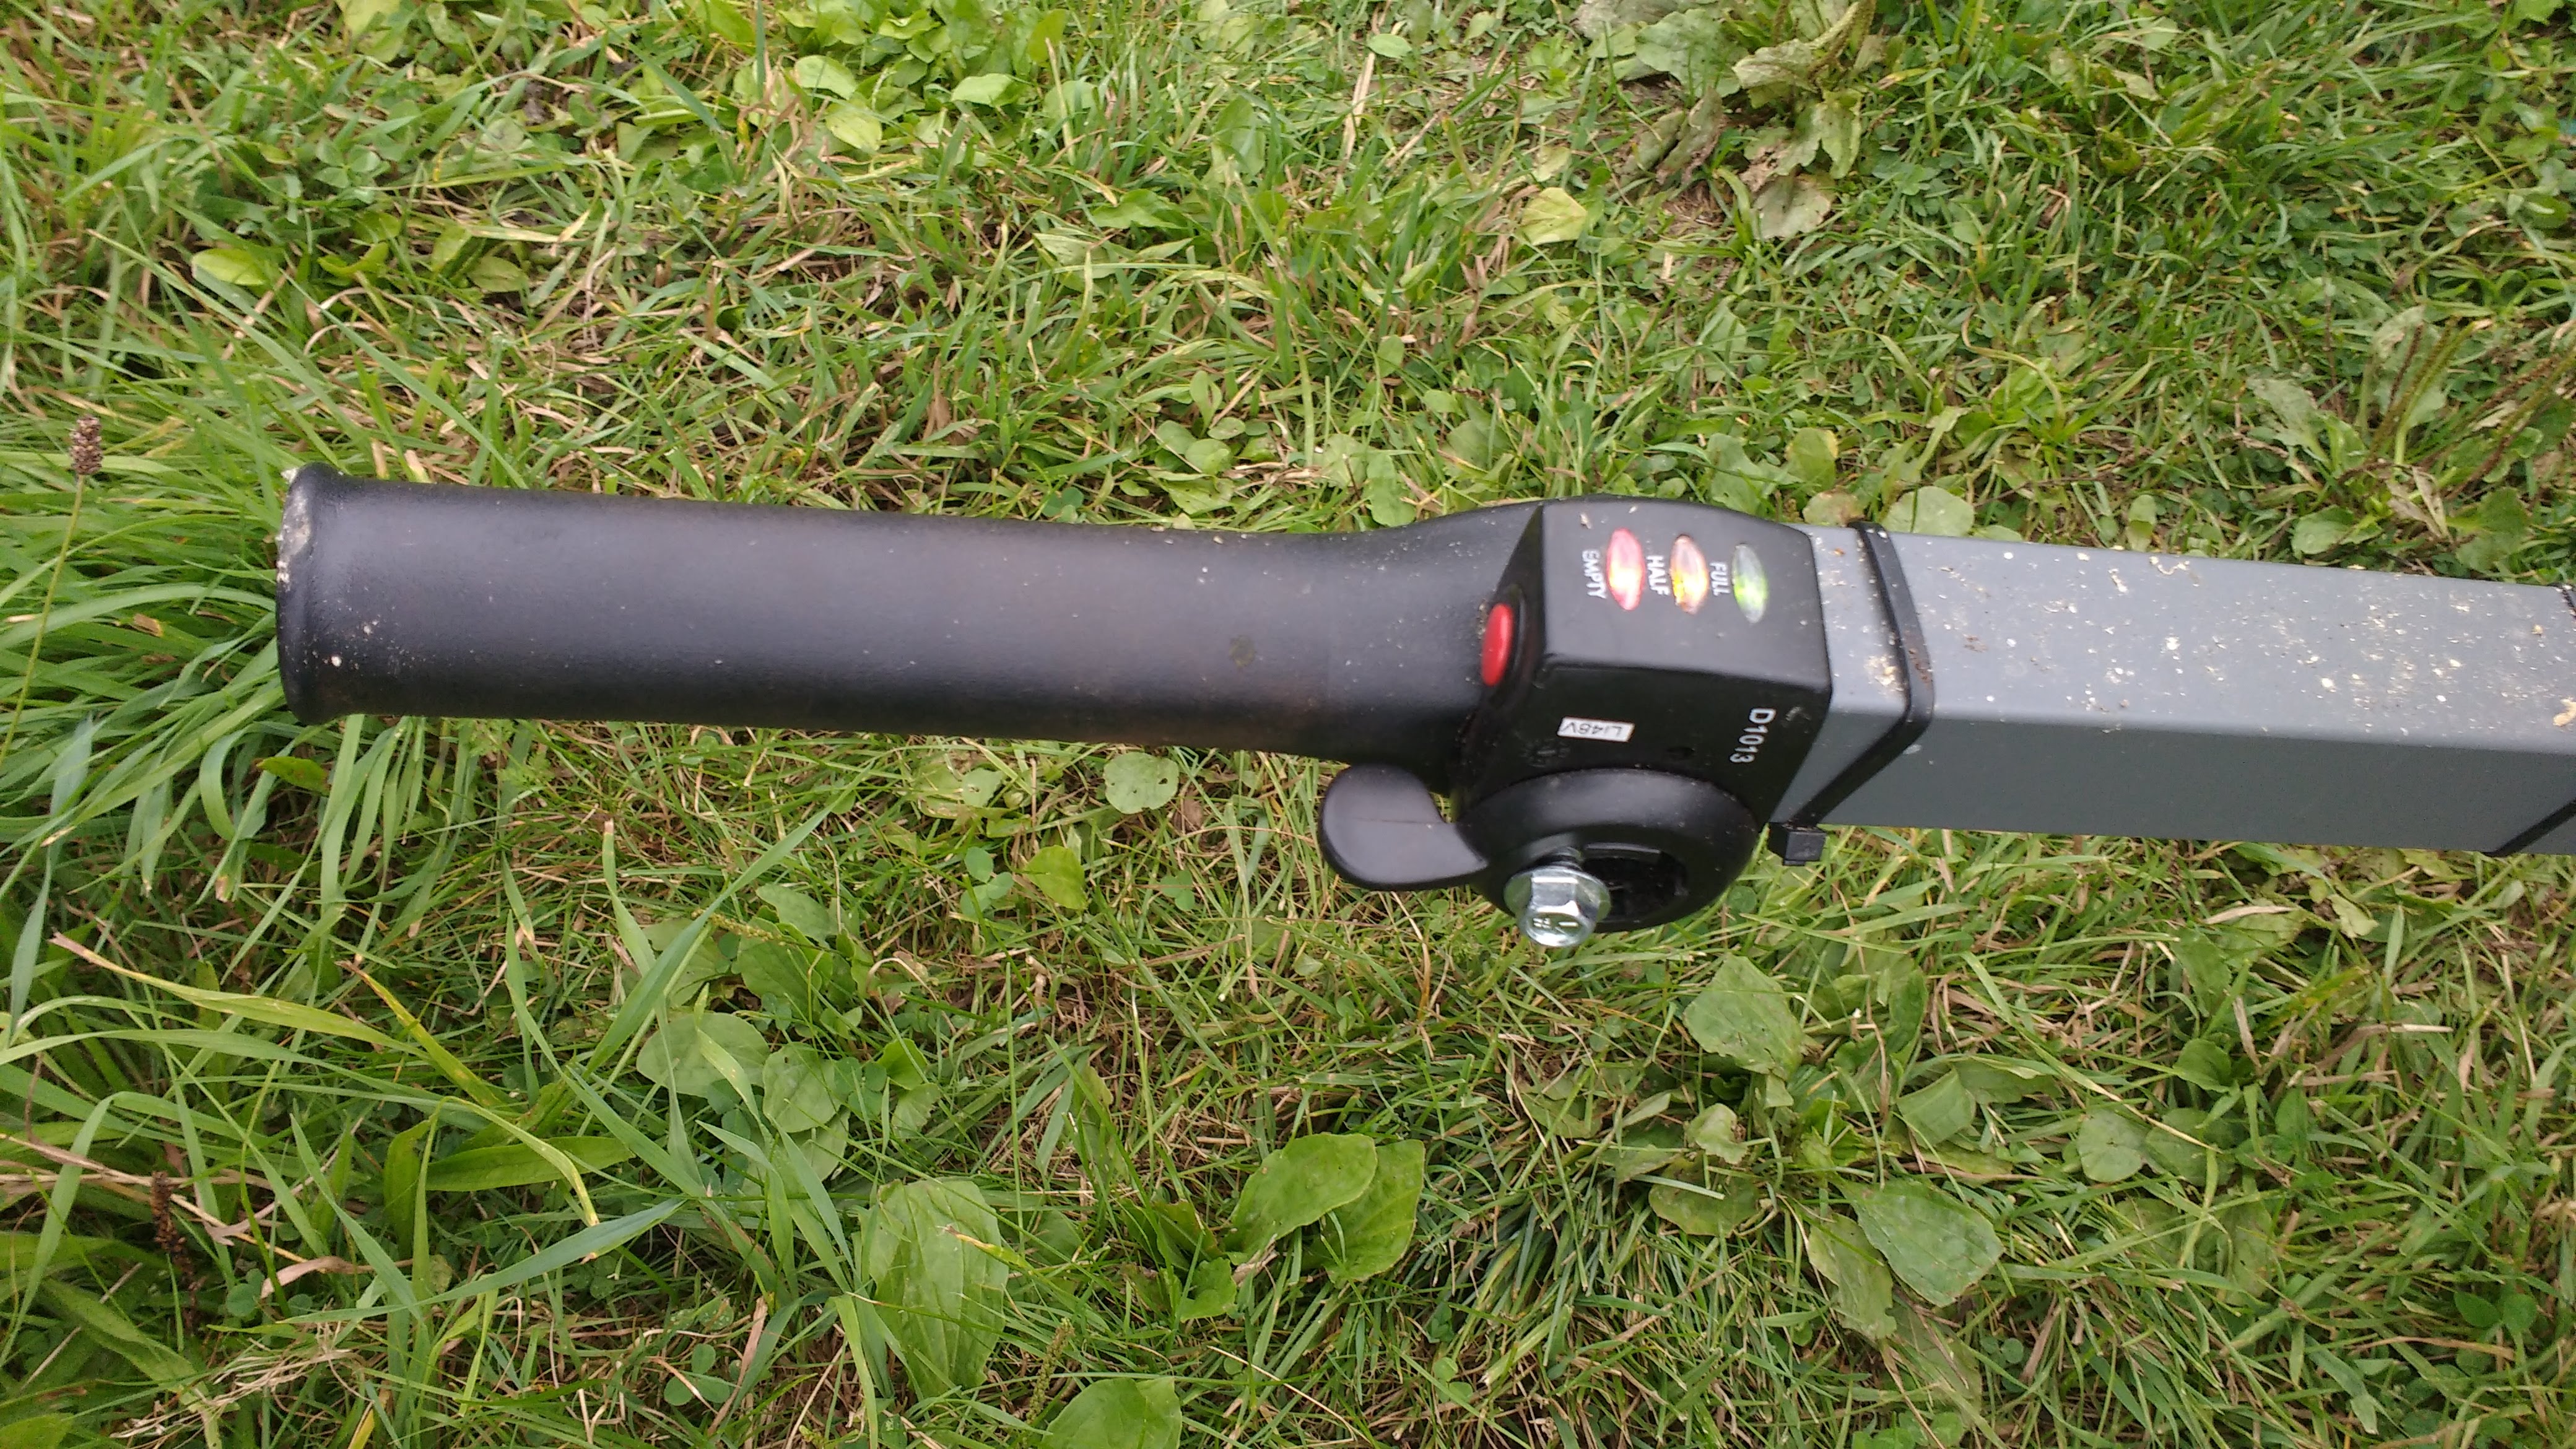
For the throttle, I lined it up with the handle in a way that felt comfortable and then used a large bolt which I screwed into the handle. The Cyclone is a nice kit to use because it can take any voltage up to 72v nominal so the 52v nominal Ego batteries worked just fine (they claim 56v but they are really 52v nominal). There is also an on-off button and some LEDs to show how full the pack is.

Love makes you do crazy things, like mounting 3000W electric motors on wheelbarrows
Most of the motorized wheelbarrows for sale in the US cost thousands of dollars and weigh well over 250 lbs. Using a Cyclone 3000W kit on a standard wheelbarrow only adds about 15 lbs to the weight of the wheelbarrow (for a total of <60lbs) and only costs about $450 without the battery. If you’re reading this blog you probably have ebike batteries kicking around you can use to save on the costs of buying a new battery pack. My wife loved her birthday present electric wheelbarrow (but not as much as the $9000 minivan she got on her last birthday). For those of you that are married, you know the old saying.
Happy wife, happy life.
My wife is now asking me for an electric shovel which might be a little trickier to pull off.
Ride On.

Our hilly paradise, just add lots of topsoil


I’ve thought that whole scenario through a few times – and I come up short when it comes to defending my home from teeming masses who know I will have food; or how many minutes the food will last just attempting to help them by giving it freely. Your location needs to be secret, right? ;)) (Are we talking a full-on, all bets off, apocalypse or just a great depression? – in any case, it pays to have productive hobbies. Have fun!)
LikeLiked by 1 person
Agreed, defending it will be the true challenge in that scenario. Likely impossible.
LikeLiked by 1 person
Unless, of course, more people ‘get it’ and soon. In post-Brexit UK, we may have to turn our gardens over to allotments (a la WW2) anyway 😉 Will let you know how that turns out.
LikeLiked by 1 person
Cool post!
LikeLike
I hate you now. Every time I take my running start to get my wheelbarrow full of firewood up the short ramp onto my back porch and pieces clatter off the top, some going in front of the the wheel to upend it and spill the entire load I’m going to think of your insanely awesome E-Barrow. This must be how those poor villagers feel as they schlep ten gallons of water two miles from the nearest well/river and think about people like me with our indoor plumbing. On the topic of stability, do you think it would be easy to mount a pair of small wheels to the back legs? You could still lift it onto the front wheel when needed but have the extra stability without increasing width during normal operation.
LikeLike
You don’t need 3 wheels.
LikeLike
I like that thought especially if your lugging something high density. I would like to have a motorized cart personally.
LikeLike
Thanks for posting Karl – an interesting read. Welcome back!
I can’t help thinking though, is this how cults start..?
The cult of Karl and his electric wheel barrow?
LikeLiked by 1 person
Hey, I just bought that exact wheelbarrow. Time for a project if I needed it. My wife only hauls mulch in ours.
LikeLike
AWESOME. This is the real heart of life, making rad shit.
LikeLike
Here’s a tip for unloading a flatbed truck or a flat trailer. Before loading, lay a tarp over the whole thing, with one edge of the tarp tied to the rear bumper of the trailer, and then lay the excess tarp over the front edge of the trailer. Load your stuff on top of the tarp, fold the excess tarp (located at the front edge) over the load for travel. When you get to the spot where you want to unload, take a rope and tie it to the top of the tarp, and anchor the other end of the rope to something (maybe a tree of a stake you pound into the ground?). Then slowly drive away.
LikeLike
We have a load roller for the pickup, but it doesn’t really work when there is over 2000lbs of material on it. The trailer holds 6000lbs+ so I doubt any tarp is going to survive that. Great tip though. The load unroller is a godsend when we want it all in a single pile.
LikeLike
You got to lube it up!!! How much vaseline would it take to coat your truck bed? (good work w/project Karl.)
LikeLike
Electric shovel: for tight work I use a bosch bulldog chipping hammer w a spade bit for the close hardpan soil breaking. Bigger holes, bigger jack hammer. Operating them is a balance thing, relative to the fact that those tools are hard to break. I’ve seen them take serious abuse.
LikeLike
Pingback: Electric Wheelbarrow Makes Hauling Big Loads Easier | Hackaday
Pingback: Electric Wheelbarrow Makes Hauling Big Loads Easier – Sloppy Laughs
Pingback: Electric Wheelbarrow Makes Hauling Big Loads Easier – Encryptedelite
Pingback: Electric Wheelbarrow Makes Hauling Big Loads Easier - itmix.cz | Informační Náskok
Pingback: Electric Wheelbarrow Makes Hauling Big Loads Easier – Hack A Day
Pingback: Electric Wheelbarrow Makes Hauling Big Loads Easier – LorePop
Pingback: Electric Wheelbarrow Makes Hauling Big Loads Easier
Electric shovel: isn’t that another word for “backhoe”? 🙂
LikeLike
I guess you’ll have to buy the wifey a pneumatic shovel. Remember seeing one years ago in the Whole Earth catalog. http://www.airtechtools.com/digging-tools.html
LikeLike
Dang that’s cool.
LikeLike
Pingback: My Dirt Cheap UTV : One Year On A Sur-Ron Light Bee Electric Motocross Bike | ElectricBike-Blog.com
Pingback: My Dirty Cheap UTV : One Year On A Sur-Ron Light Bee Electric Motocross Bike | ElectricBike-Blog.com
That is AWESOME! I have that same wheelbarrow. Wish I knew about this before moving 36T of material in a week for a drainage project that I did last fall.
Any problem with clearance with the motor positioned where it is? Would it be possible to mount the motor on the topside of the handle/frame rather than below?
LikeLike
Pingback: The Little Hub That Could : Build A Wheelbarrow Out Of An Ebike Geared Hub Motor For <$300 | ElectricBike-Blog.com
HI Karl
I am considering building a very similar project based on your design.
I have only one concern, which is does any part overheat ie motor,battery or controller.
The reason I ask is that I will be carrying loads uphill of between 300 and 400 lbs for at least a mile and a quarter on non paved track
with some longish inclines of 30 degree and some some smaller inclines of 45 degrees.(total change in elevation 600 ft)
I live in the UK so the ambient air temperature is usually never more than 77 degrees F.
Thanks John.
LikeLike
It won’t overheat. The Cyclone is a monster.
LikeLike
Wow, excellent, Karl! I just wanted to know if wheelbarrow was one word or two, and Google tossed up your amazing project! Seems key that the wheel has that two-sided design with space inside, so the drive side steel also acts to keep the sprocket spacers upright against the torque from the chain- a kind of built-in stabilizer. LOL- my wife asked what I was reading, and when I told her, she said, “I want one!” Thanks again, great article!
LikeLike
Man thanks for the enthusiasm Larry. Just this morning I was lamenting all the cool crap I’m doing and no one seems to give a rats ass.
Good timing.
LikeLike
This is brilliant! Love it!
LikeLike
truly brilliant. nice idea to add similiar style to push mytein stroller. lo e the stroll hate the push.
LikeLike
Pingback: What Not To Do When Planting Out 500 Hybrid Chestnut Trees From Seed | Tiny Chestnut Paradise
Do you suppose this would work on a DR Power Wagon? I’ve wanted to convert mine to electric for years…this just might do it. Can I ask you what the diameter of the shaft is? I’m athinking, all I’d have to do is to mount the motor vertically and line up the shafts. Haha, it’s probably much more complicated that that, but worth a try. Thanks for posting.
LikeLike
Pingback: El pequeño cubo que podría: construir una carretilla eléctrica a partir de un motor de cubo de engranajes de bicicleta eléctrica para - MOTOS RECARGABLES