Heat is the enemy.

A $2 thermometer can save your $80 controller and a lot of headaches.
Electric motors can often take far more power put through them than their nominal rating, but over time the heat will build up and cause all sorts of problems. Mosfets can blow, phase wire insulation can melt, windings can fuse together. When the motor starts being under high torque load and the RPM speed is slow the electricity flowing through the windings mostly turns into waste heat. The best way to keep your BBS02 from blowing is to mount a much smaller 32-36T chainring on it. The 2nd best way to keep your controller from frying is to install a temperature sensor. It costs about $2 and takes about 7 minutes to do if the drive unit is not mounted yet and 15 minutes if the BBS02 is already mounted. Aquarium thermometers are available by hundreds of vendors on ebay right here.
The BBS02 comes with a temperature sensor that is supposed to shut down the drive unit before the mosfets are damaged. However the unit ships with a monstrous 48T chain-wheel which is way too big for trail-riding (even the smaller 44T is too big). Combine a chain-wheel that is far too large with mosfets which are way too cheap, then throw in a temp sensor which doesn’t cut in at a low enough temp and you have a recipe for disaster. If you neuter the power on the unit to 20 amps instead of 25 and lower the power to the throttle from 9 to 5 you can solve most of the problems your BBS02 would suffer in the hands of an inexperienced ebiker. However if it is your bike and you don’t want to loan it out the last thing you want to do is lower your power settings.

An aquarium thermometer from ebay, works for a long, long time even when you forget to turn it off after your ride. It even comes with a spare battery!
How To Do It
1) If unit is mounted to a bike already remove the drive side crank arm and chainwheel or chainwheel adapter. If your drive unit is not installed yet just skip this step.
2) Carefully remove the plastic reduction gear cover being careful to not lose the gasket or to get grease everywhere. This can be 5 or 7 screws depending on the unit

I usually wipe up the grease with a rag to keep it from getting everywhere. If you do this make sure to re-grease the gears before reassembly.
3) Remove the 3 bolts that hold the controller on. They tighten these bolts ridiculously tight and it’s not uncommon for me to strip them out. Use the right size wrench and then I suggest making sure the wrench is fully seated before you start to turn it. You can use a set of pliers to increase the torque but be careful because too much torque and it will strip. If you strip it remove it with an EZout adapter and a power drill.
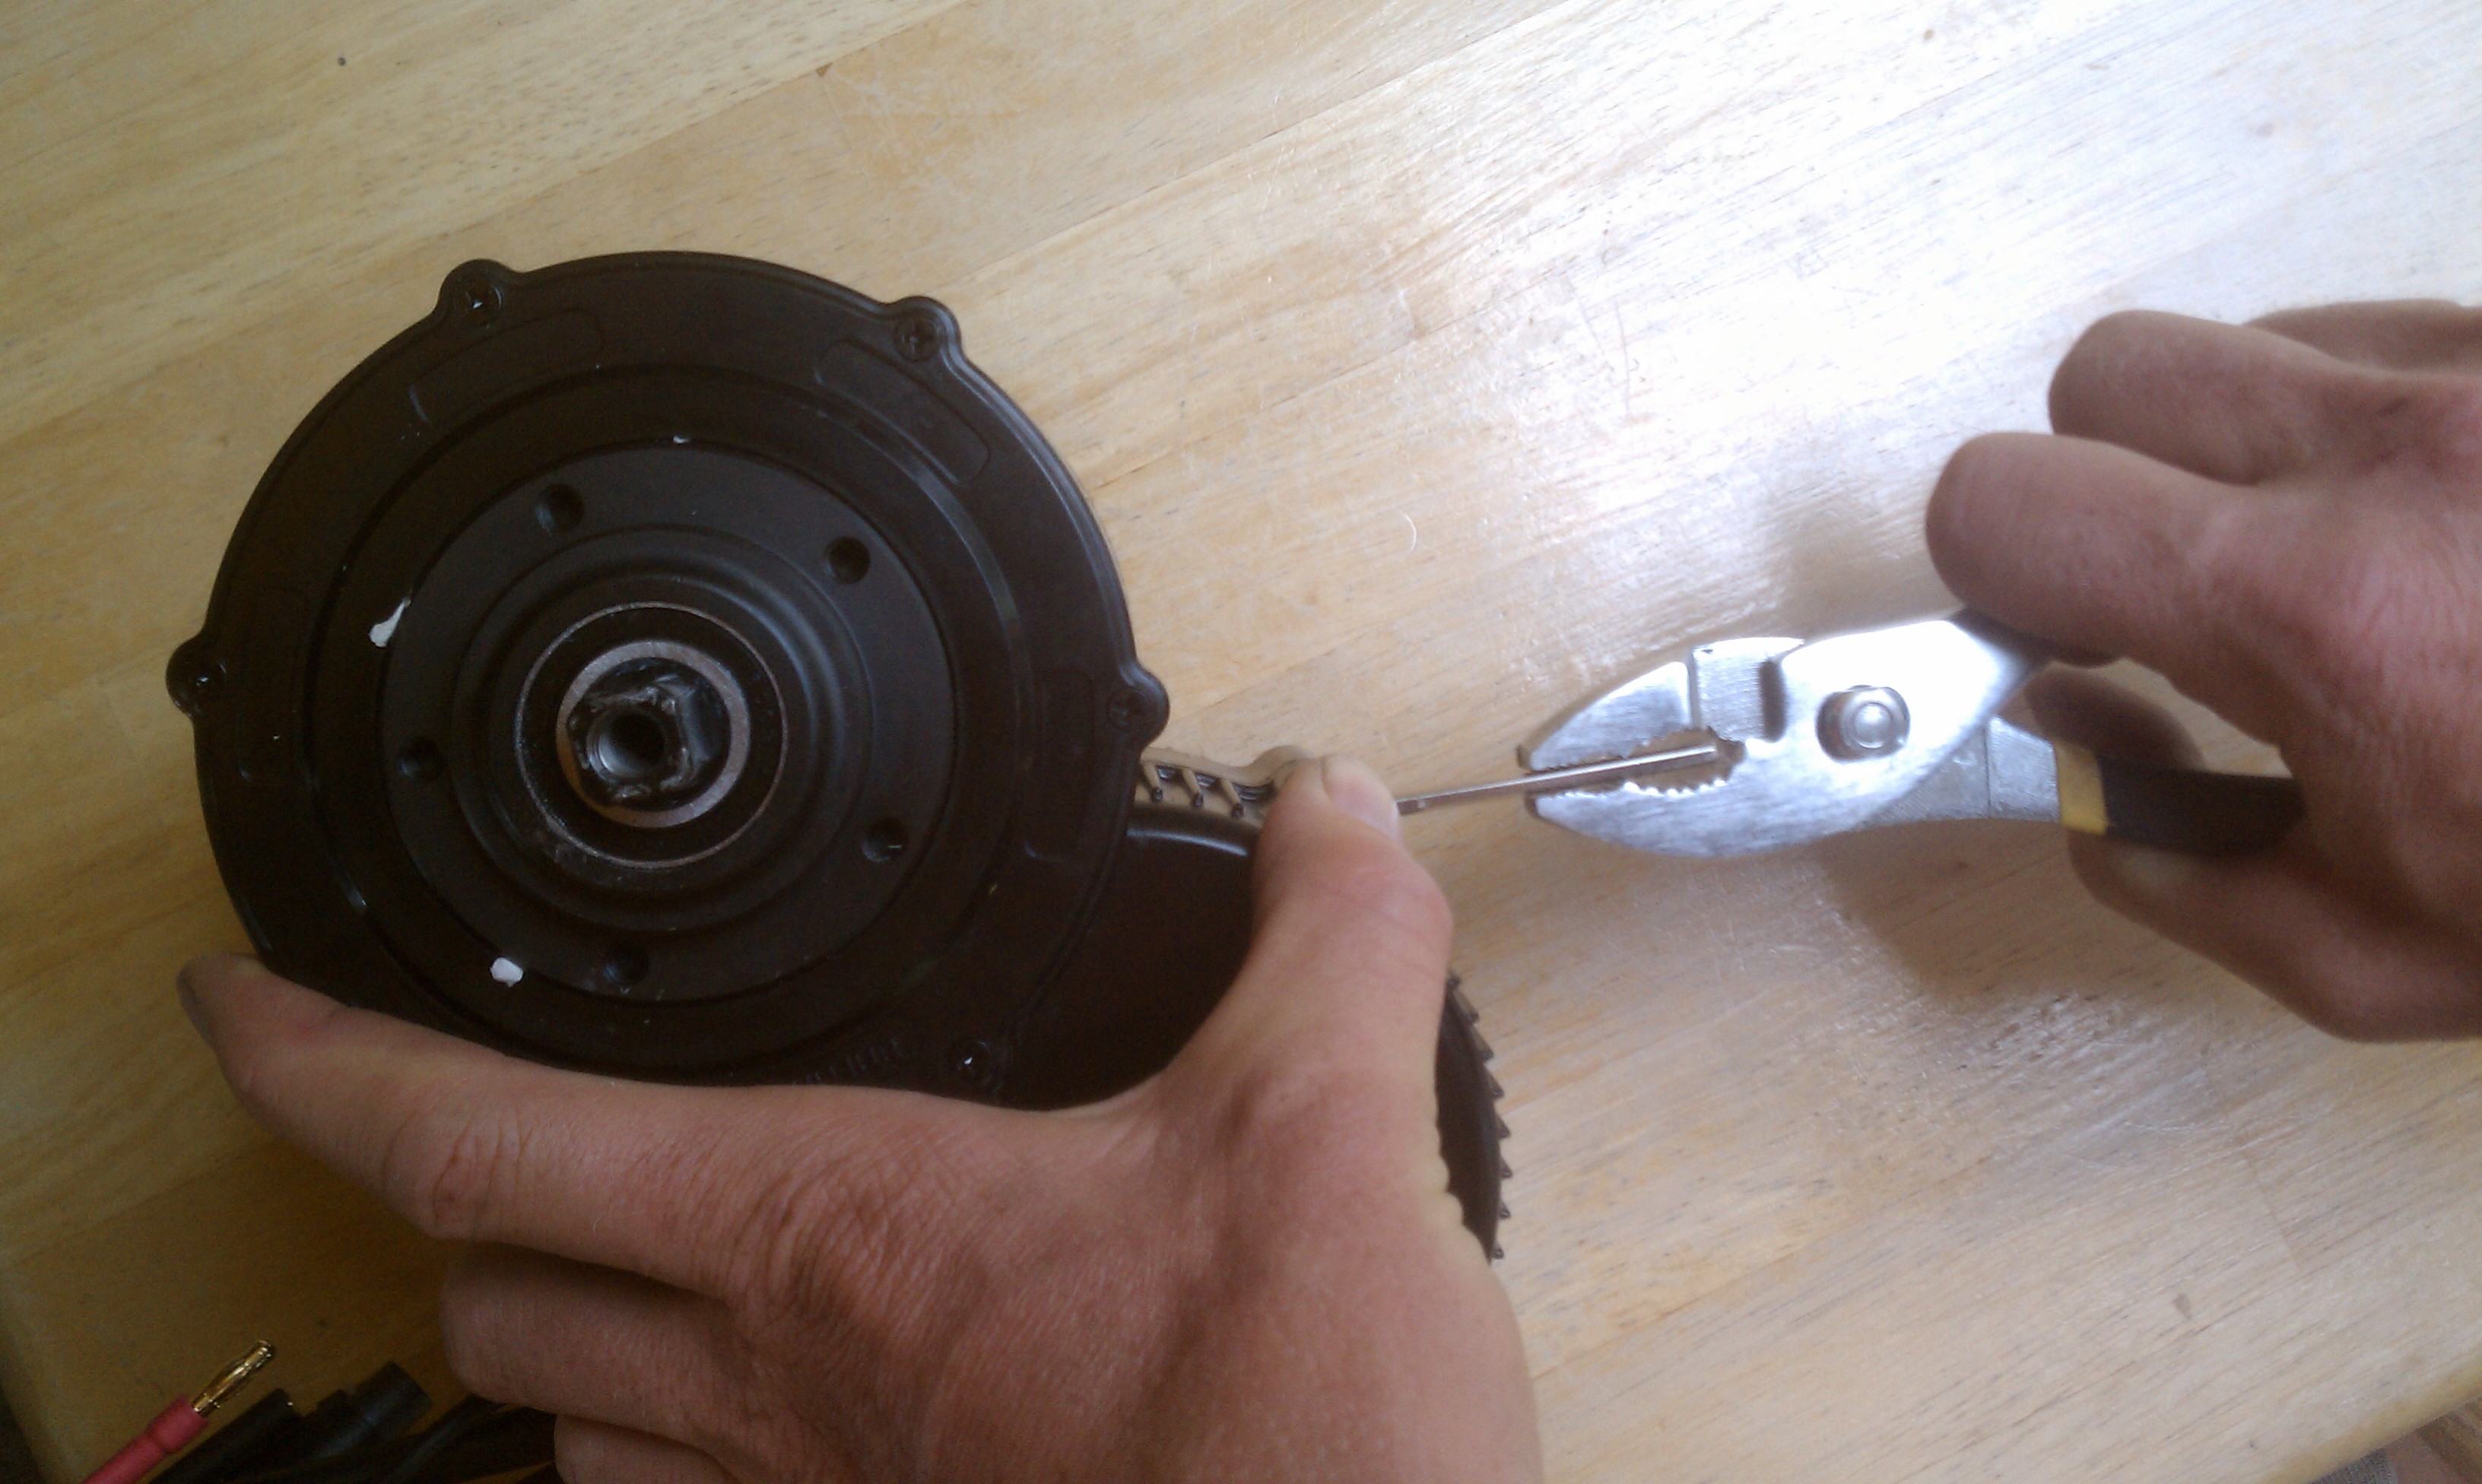
Be extremely careful on this step to not strip out the hex bolts.
4) Remove the controller by carefully rocking it back and forth and pulling it away from the unit. The cables are often siliconed to the base and they often pop free when pulling the controller away.

You can see the PAS disabled by removing the grey wire from the pin block in the center and on the bottom left the temp probe laid down against the potting material ready to be siliconed in.
5) This is the perfect opportunity to disable the PAS system if you want to. Pull the small 4 pin connector apart and remove the grey wire from the female side of the plug and cover it in electrical tape and put the connector back together. This will completely disable the Pedal Assist system but will also give your throttle several levels of power settings (depending on how your controller is programmed).

6) Clip off suction cups.
Carefully push the probe through the rubber gasket.
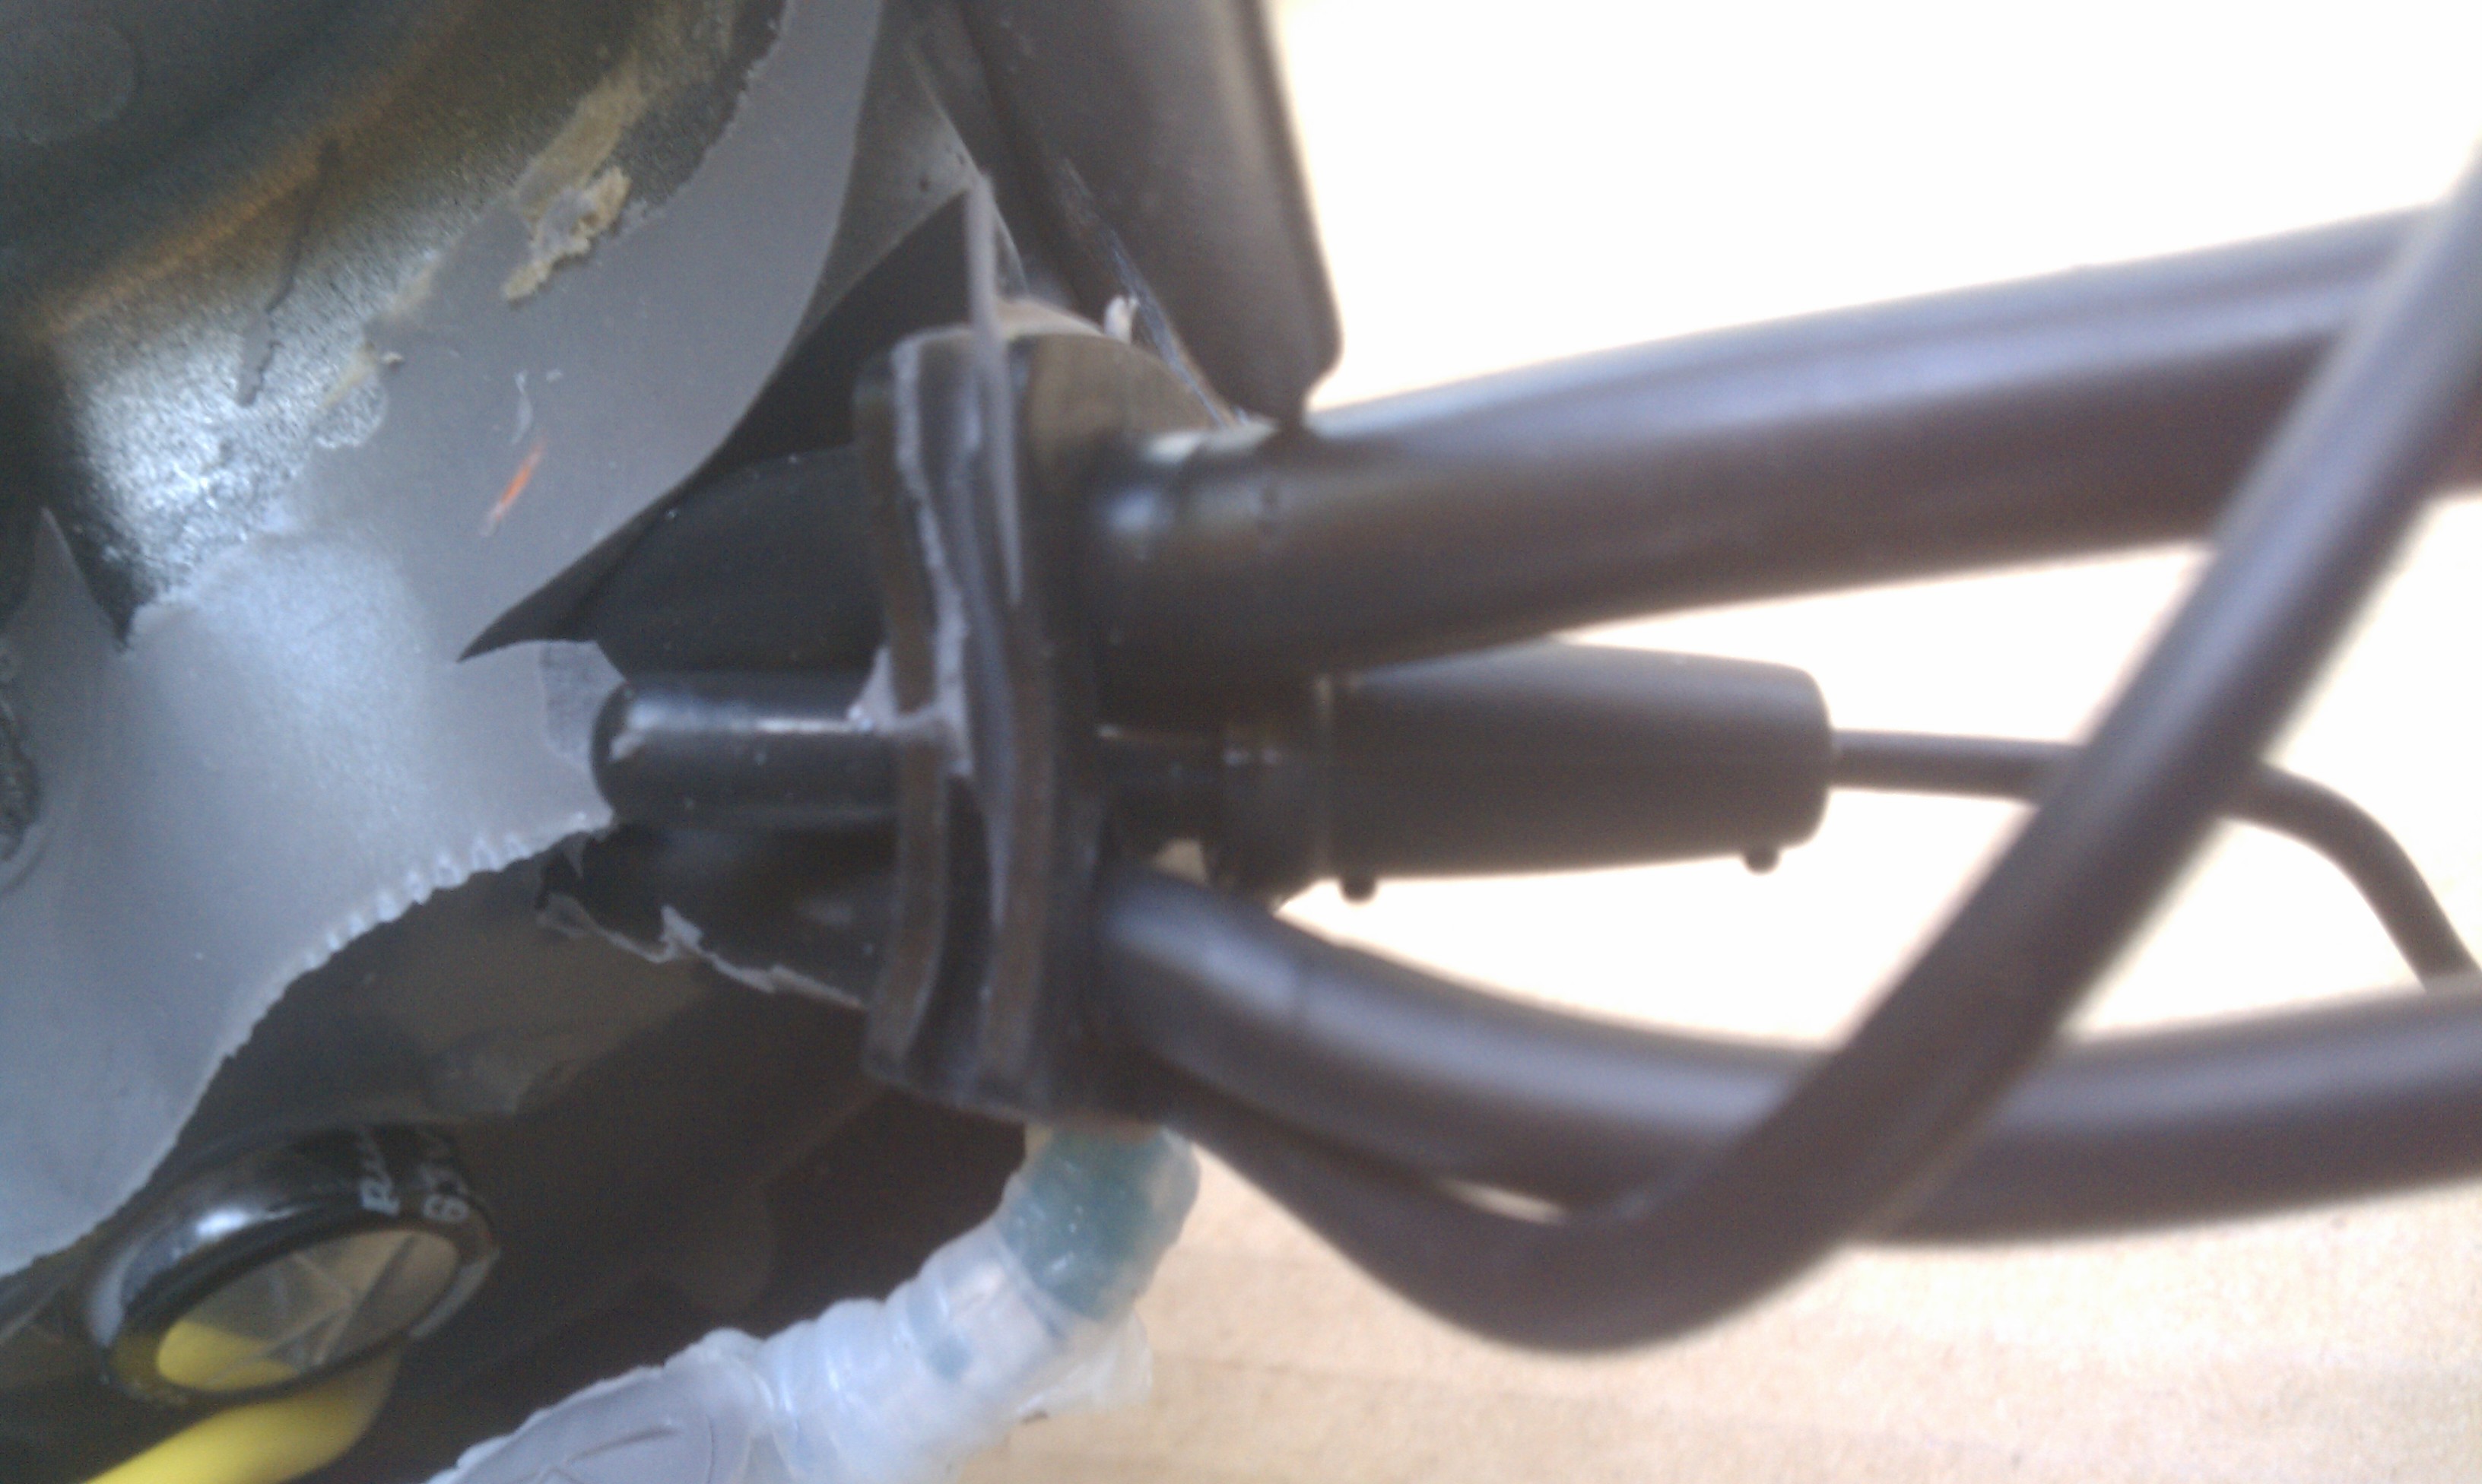
7) Pull the rubber square with the wires running though it and carefully push the probe through between the larger wires.

Find a good spot for the probe where the controller can still close properly.
8) Position the probe with the tip closer to the outside of the case (this is where the mosfets are). Put the controller back on and make sure it can close properly before using the silicone.

9) Silicone the probe in place using silicone which will work as a heat-transfer medium. Cover the probe completely in silicone then carefully put the controller back in place while the silicone is still wet. Replace the three screws on the controller then the plastic cover with the 5 or 7 screws. Make sure to not over-tighten the black cover as it breaks VERY easily.
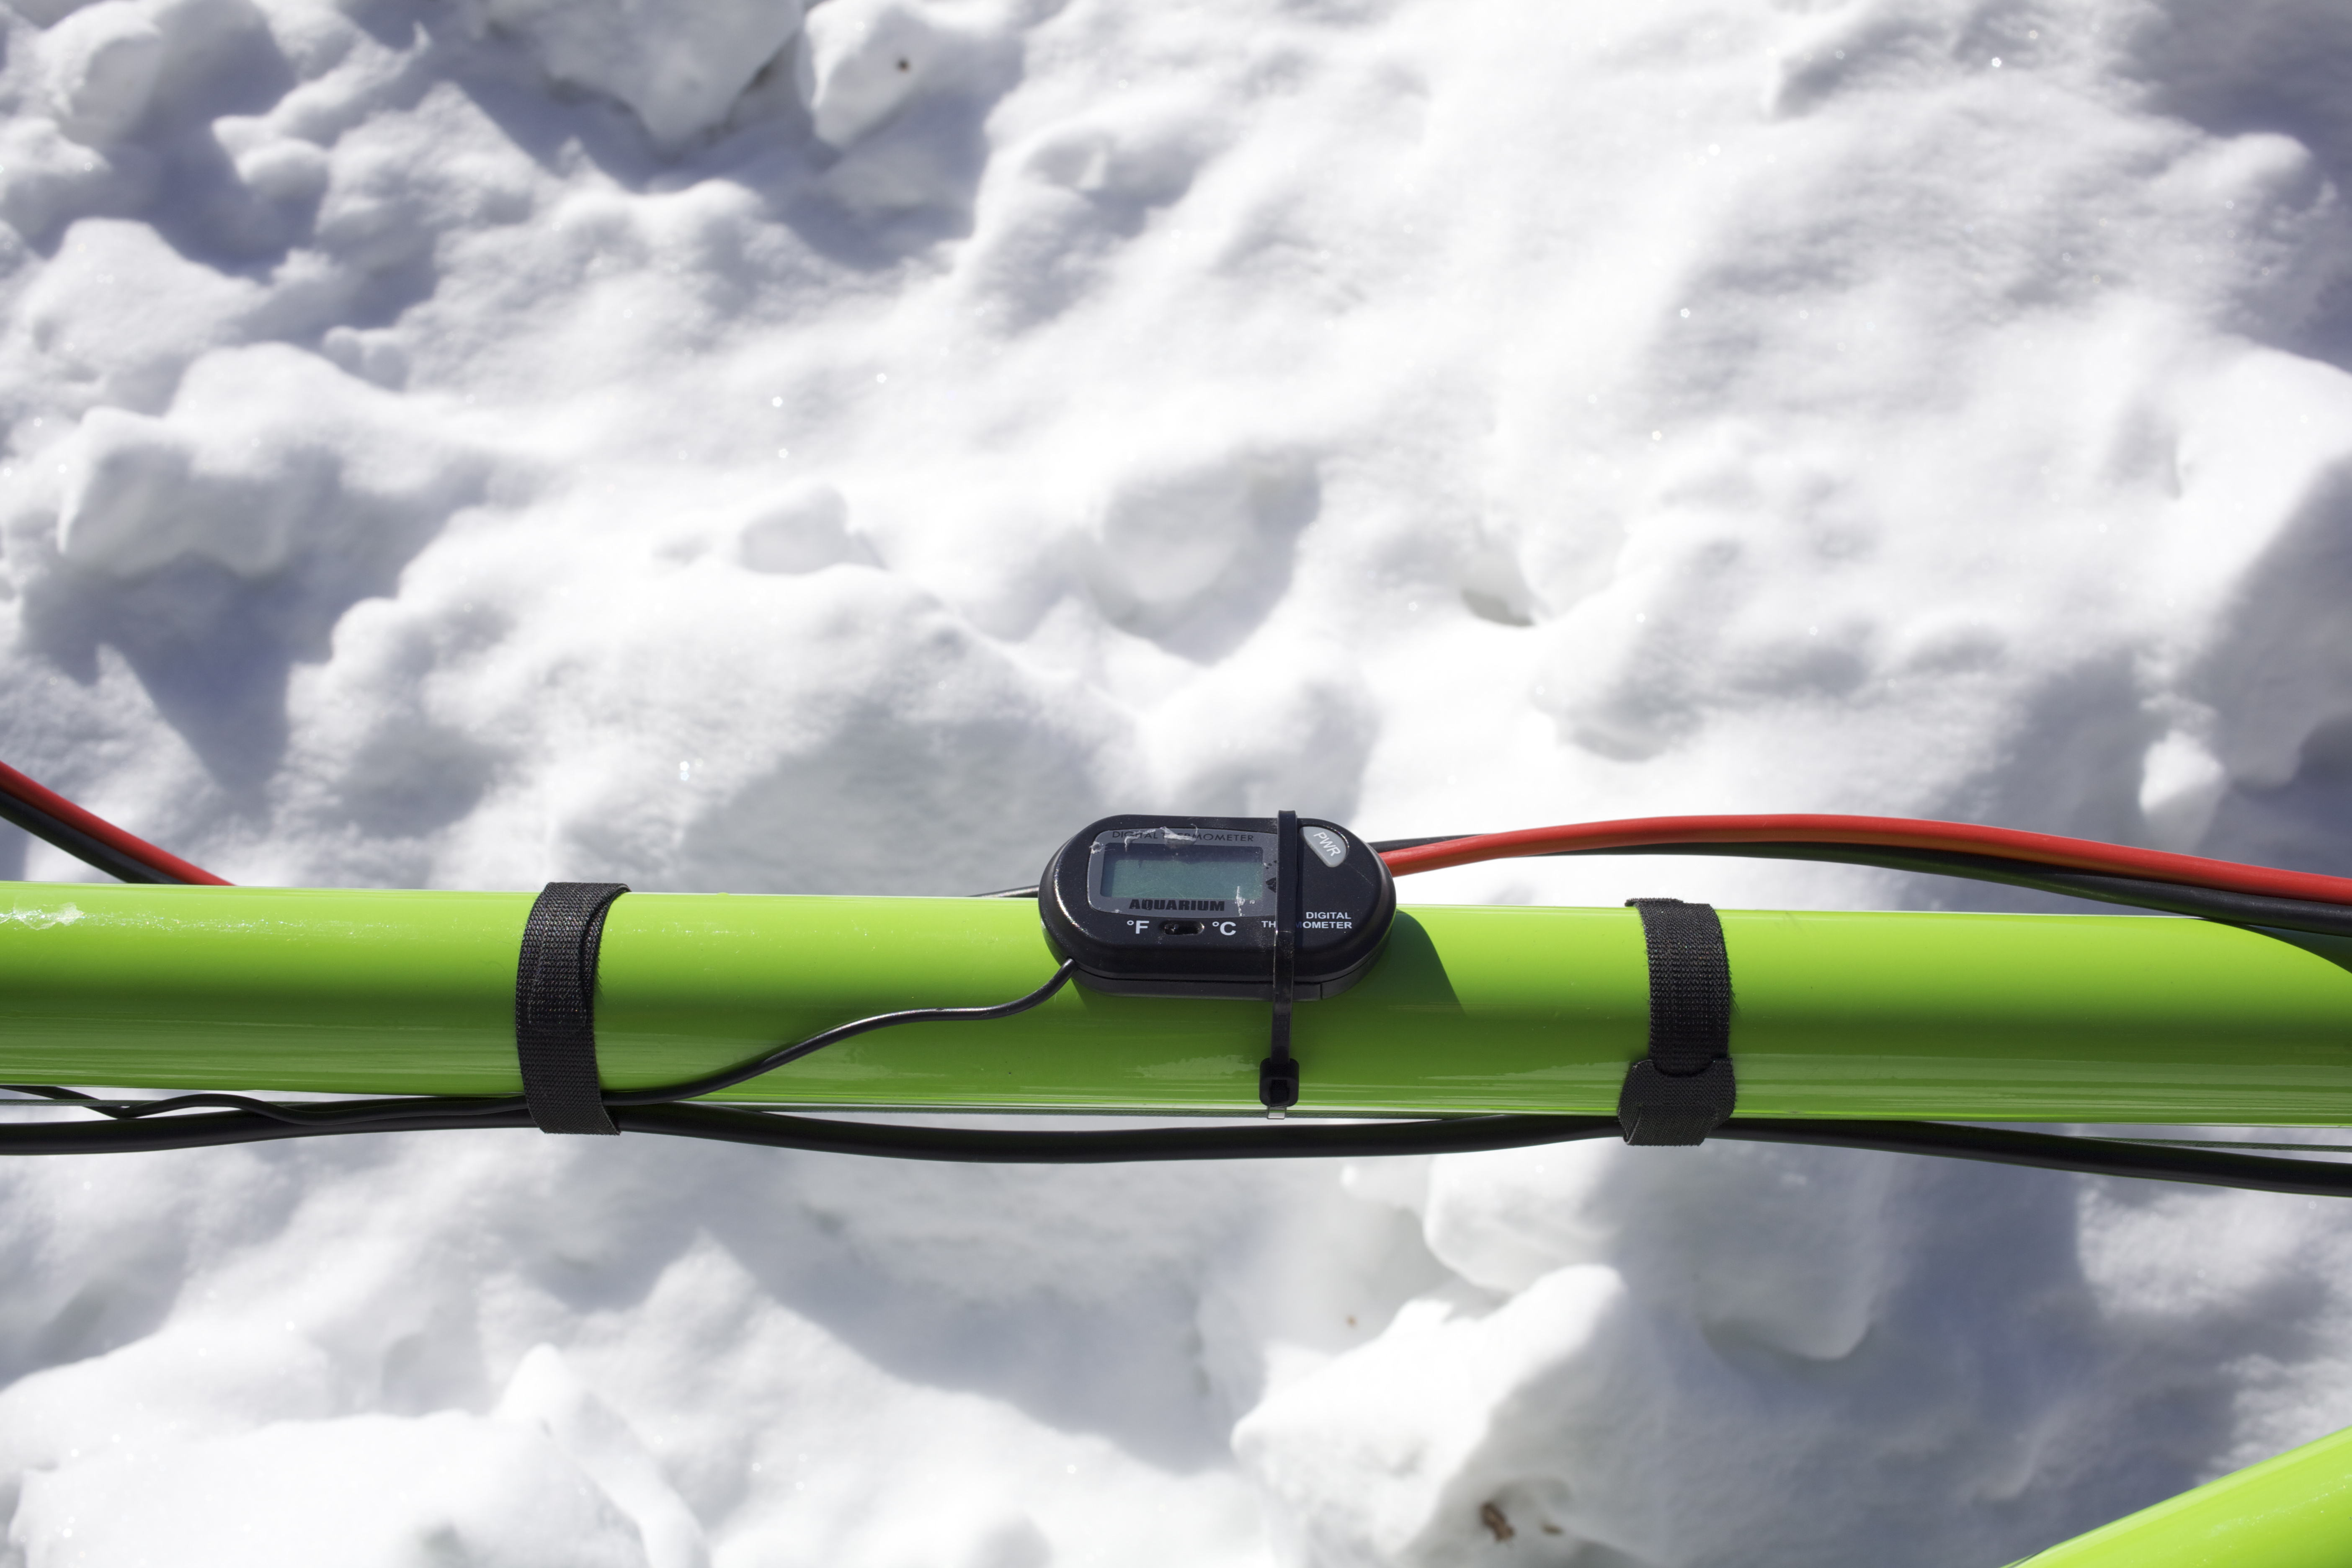
10) Mount the sensor on the top tube near the front of the bike. Be sure to route the cables so that when you bash the drive unit on logs it will not eat through the wire.
The temp probe will give different temps on different bikes depending on where it ended up getting placed but a good rule of thumb I use is –
- 140F + Stop riding and let it cool
- 130F + Don’t use full throttle, only half throttle
- 120F + Take it easy
- 110F or less go whole hog
The temps you are reading are controller temps and not motor temps. It takes time for the motor heat to make it’s way into the controller housing, so keep that in mind when riding. The cheap mosfets create plenty of heat on their own, especially when they are overloaded and the motor is not spinning fast. Just installing a temp sensor is not enough. You also need to use a smaller chain-wheel for trail-riding. I recommend a 32-36T ring with 34T being my personal favorite.
Ride On.


Thanks AGAIN Karl. Excellent write up. I’m going to place my CA3 probe soon. Kinda over done but hoping someday to be able to use more CA3 features on these fabulous motors.
LikeLike
newbie. Bafang in velomobile: i want motor to start easy. It comes on pretty hard at the rohloff. I dont need more power just less surge stress
LikeLike
Read the programming guide it should give you tips on how to do that.
LikeLike
ok thanks karl
LikeLike
3000 miles on my Rohloff and I have to replace the back gear and the chain. I wouldn’t have thought the motor was being that hard on it. I bike-camp with full panniers and pull a trailer so there is a lot of weight.
LikeLike
Great post I use a Speedict mercury intended to put the temp sensor in, your info here big help will get it installed would hate to fry my controller.
LikeLike
Pingback: A Hackers Guide To Programming The BBS02 | Electric-FatBike.com
Pingback: Duh Banana Bike – Deadeye DIY BBS02 41lb Single Track e-Bike $765 (w/o batteries) | Electric-FatBike.com
Great article. Maybe you could put in the C values in there as well for easy reading?
140F-60C
130F-54C
120F-49C
110F-43C
What worries me is these low values. It basically means that you can only ride about 15mph with these motors. I have two BBS02’s limited to 18A/20A respectively. BOth running 44T front cog.
When commuting I ride at 44Tx15T, 20mph, maybe half throttle. After 5km of flat terrain, the motor casing is between 50C-60C.
LikeLike
The motor temp gets much hotter than the controller does. When the probe reads 140, the motor is probably over 180. It also has a lag for updating as it takes time for the motor heat to make it into the controller. The cheap mosfets also generate their own heat.
With a 20A BBS02 and a smaller chainring it is unlikely that you will burn out the controller from overheating. I ride 25mph for extended distances with these motors with no problem. My gps recorded max was 39 mph going down a hill at full power, but I wouldn’t recommend it.
LikeLike
In my motors the controller side gets warm/hot to the touch. The motor side of the casing is barely warmer than air temperature.
LikeLiked by 1 person
I live in toledo ohio i bought a 1000 watt midrive kit and burnt it then they fixed it and it burnt again . I am not an electrician i have been a power plant mwch for 40 years and finf the tech part confusing I bought a new motor but havent installed it yet . is there any one in the midwest that works on these . I never throttle and always ran on lower power. . tell me the truth are they junk or are there local mechanics that can help me.
LikeLike
I’m going to do some experimenting with some cooling fins on my bbs02.
I’ve not fitted them yet. I’ve only put the probe into the controller as described above. I’m going to see how quickly the motor hats up with and then without them.
Here’s where I got mine from…
http://eclipsebikes.com/motor-cooling-fins-p-982.html
LikeLike
Hi Jeff,
Any luck with your cooling fin experiment?
Thanks,
Karel
LikeLike
Hi Karel,
The cooling fins made a bit of difference. I did it before the controller Mosfet upgrade became widely available.
If heat is a problem then I would probably recommend upgrading your controller from a reputable source. For me this made the biggest difference. With the new controller the bbs02 runs a lot cooler.
Hth,
Jeff.
LikeLike
Pingback: fang BBSO2, 750W mid-drive electric bike motor Kit REVIEW | ELECTRICBIKE.COM
Pingback: Replacing A Peanut Buttered Nylon Primary Reduction Gear On The BBS02 | Electric-FatBike.com
Heyy Karl that was a good write up. Heard that the new bbS02 have come with upgraded controllers(IRFB3077).
So these values are for the new controller?
One more question is that I live in plains, so do i need to go for smaller 34T chain ring?
I have heard that motor is capable for 1300 watts (peak). Do we still need to use it at 20A rather than rated 25A? I felt you were being way to generous on the motor.
LikeLike
Yes the new controllers have the upgraded mosfets which should fix many of the blown controller issues. If you do singletrack with 20+ degree hills then I use a 34T, if you only have 15% grades then a 36T is fine and you can even sneak by with a 42T Lekkie Bling ring if you have a 36T Cog in the rear.
It all depends on what you what your top speed to be, higher top speed then bigger ring, more torque smaller ring.
I only use mine at 25Amps and I would never even consider neutering it back to 20 amps, although there are many who do.
LikeLike
Pingback: How Much Power Really Is Enough For Your Build? | Electric-FatBike.com
Pingback: Wish List For Future Bafang Mid Drive BBSxx Kits | Electric-FatBike.com
Pingback: Troubleshooting Problems On Your BBS02 Unit | Electric-FatBike.com
Pingback: Here's some pics and info on the Interbike 2015 convention | ELECTRICBIKE.COM
Pingback: Bafang BBS02 Nuts and Bolts Breakdown | ELECTRICBIKE.COM
is it possible to MOVE the existing temp probe from the controller into the motor?
LikeLike
No, the temp probe that Bafang has does not have any readout or display and only shuts off when the mosfets overheat.
The problem is the old pre 3077 mosfets would blow before the temp cutout would trigger.
LikeLike
I live in Phoenix and am concerned about heat. Would you recommend a different type of motor or will the mid-drive be fine? Thanks, Joe.
LikeLike
All I recommend is mid drives. If you install a temp sensor and watch the heat you will not have problems. Try the new BBSHD which sheds heat much better than the BBS02
LikeLike
Thank you!
LikeLike
Pingback: My Little Bronie – Sette Ace Single Track Full Susp DIY BBS02 750W 9 speed ebike $1500 w/out battery | Electric-FatBike.com
Pingback: Phat Phuk : FB 5 2.0 Snowshoe 2XL DIY BBSHD 1000W 10 Speed ebike 51lbs ~$1850 w/ out battery | Electric-FatBike.com
Pingback: BBSHD & SnowShoe 2XL Rule The Beach – Even In Soft Sand | Electric-FatBike.com
Hi Karl,
I am very lazy so would it be OK if I glue the sensor probe on the outside casing instead?
Please say “YES”
LikeLike
You will get very accurate readings of the ambient air temperatures.
LikeLike
Hi Karl, I was thinking the same thing, but taped it to the left side of the BBS02 motor; seems to get the hottest first. While ambient temp was 80 degrees, the sensor went to 100 on a steep climb. So I shut it down, the temp continued to 104 then started to drop. Just bought this motor in April, the new one with the gear sensor plug out of the motor. Do you think it can handle more heat or will the built in temp sensor shut it down before any damage?
LikeLike
That is normal, there is a lag in the temperature readings because you are reading the controller temp not the motor, where most of the heat is coming from.
I don’t stop pedalling till it hits about 130ish.
Karl
LikeLike
Great way to monitor the controller’s temp! Looks like the aquarium thermometer was first used in October 2014: https://endless-sphere.com/forums/viewtopic.php?f=28&t=62646&start=25
LikeLike
What do you think would happen if you commute on one of these in 40 to 45 deg C ambient temp? Not particularly hilly and not looking to thrash it. Summer in Egypt..lol.
LikeLike
I think you would be fine as long as you were using the PAS and kept it mostly under 800W. If you give it full throttle it will overheat after a few minutes.
LikeLike
Pingback: Bafang BBS02 and E-rad Hodrodding and Upgrade Parts | ELECTRICBIKE.COM
Hi,
I followed these instructions and opened my BBS02 (purchased Aug 2016).
I didn’t put the temperature probe as described because I’d like to clear
some doubts before:
-> if I put the probe between these two outside cables I’ll run into a grey
substance (silicone?) inside the controller. In my case there is also
a small metal plate (with screw) inside, just next to the place where these
two cables are connected.
Shoud I unscrew it and tear the silicone surface so that the probe could
be pulled to the inside part of controller?
-> it seems that my controller has much less space inside – the level
of gray silicone seems to be higher, leaving less space for placing the
probe. Is it only my impression of it could be some model difference?
Many thanks for your help.
Kris.
LikeLike
There might not be enough room in the version B BBS02 to fit a temp probe, I don’t know. The controller is smaller on that unit.
Karl
LikeLike
I’m afraid you are right, there is no enough room. Thanks for replay.
LikeLike
I stuck probe in OK but was tight and its OK.
Will fit, maybe the probe was a bit bigger
LikeLike
So there is no way to put the remote sensor probe in the newer models?
LikeLike
There is not much room inside the controller of the BBSv2, you might be able to fit it inside, I honestly haven’t tried. I stopped using thermal sensors now that I’ve spent enough time watching the first 8 I installed I have a good idea how hot the motor is without them.
LikeLike
Hi Karl,
Im thinking on buying a BBS02B, but I want to know how reliable it is. I have read alot of how to take care of it, letting it work at high rpms, using smaller chainrings, dont ler it overheat (my conmute is just 15km one way). If I follownthese guidelines , which is approximately (as your experience) the life expectancy of the bbs02?
LikeLike
I have 8. All still work. One is flakey.
LikeLike
Yes, there is grey potting inside, but I have managed to fit a temperature probe without much difficulty inside both BBS01B and BBS02B. In fact the hardest bit is getting it through the grommet without breaking the seal.
LikeLike
Hi,
Thank you for your posts they are very interessant!
About the temperature sensor, i have a question, my temperature measur is must important on the motor, but not on the controller.

When y have 53°C in motor, i have 45°C in controller
The temperature controller it is must important ?
Thank you very much
David from France
LikeLike
Pingback: Bafang Speed Pedalecs – iBikes.ro
Nice Information thanks for sharing with us
LikeLike
Hi, great post! thanks a lot!
I am using an external controller, and a Cycle Analyst that is connected to the internal BBSHD temp sensor. My problem is that i don’t know what is the safe temperature range for the motor itself… As you wrote in prev posts – the values of 110-140F are much too low for the internal motor temp. Can someone provide some insight?
Thanks!!
LikeLike
I think the default rollback starts at 90c and shuts down at 130 for the bbshd/CAV3.
Are you getting accurate temp readings? I set up the same system at 10k thermistor but temp reads too low … 7c when it should be ~22c at room temp
LikeLike
I’ve stopped putting thermal sensors in the drives. I now have a pretty good idea when I’m going to overheat them.
Karl
LikeLike
Karl….do you think the temperature ranges you provided are still valid with todays BBS02 / BBSHD? I push my 02 quite hard off road in climbs so I decided to install the fish tank thermometer to monitor controller temp. If I haven’t burnt mine yet, I sure I never will, but it would sure be interesting to know the temp. I LOVE data.
LikeLike
Hi there,
great article, thanks! I accidentally ripped the square rubber gasket when pushing through the probe – is it okay if I just seal the outside of the gasket with some silicone, or should I get a new gasket on there somehow?
thanks!
Charlie
LikeLike